With the arrival of Webhooks on Kryll, users can now launch and stop their strategies via an external platform signal. In this article, we will show you how this can be done with a TradingView alert.
Let's break down how you can do this.
First step: Kryll.io
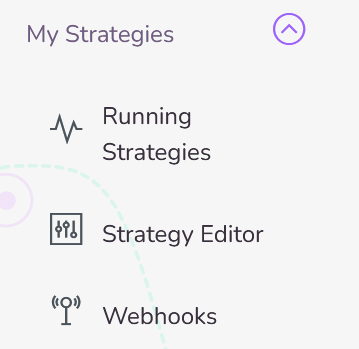
In this example, we will adopt the Odayakawa open source strategy. First, go to the Kryll marketplace page and import the strategy. Then go to the new "Webhooks" area.
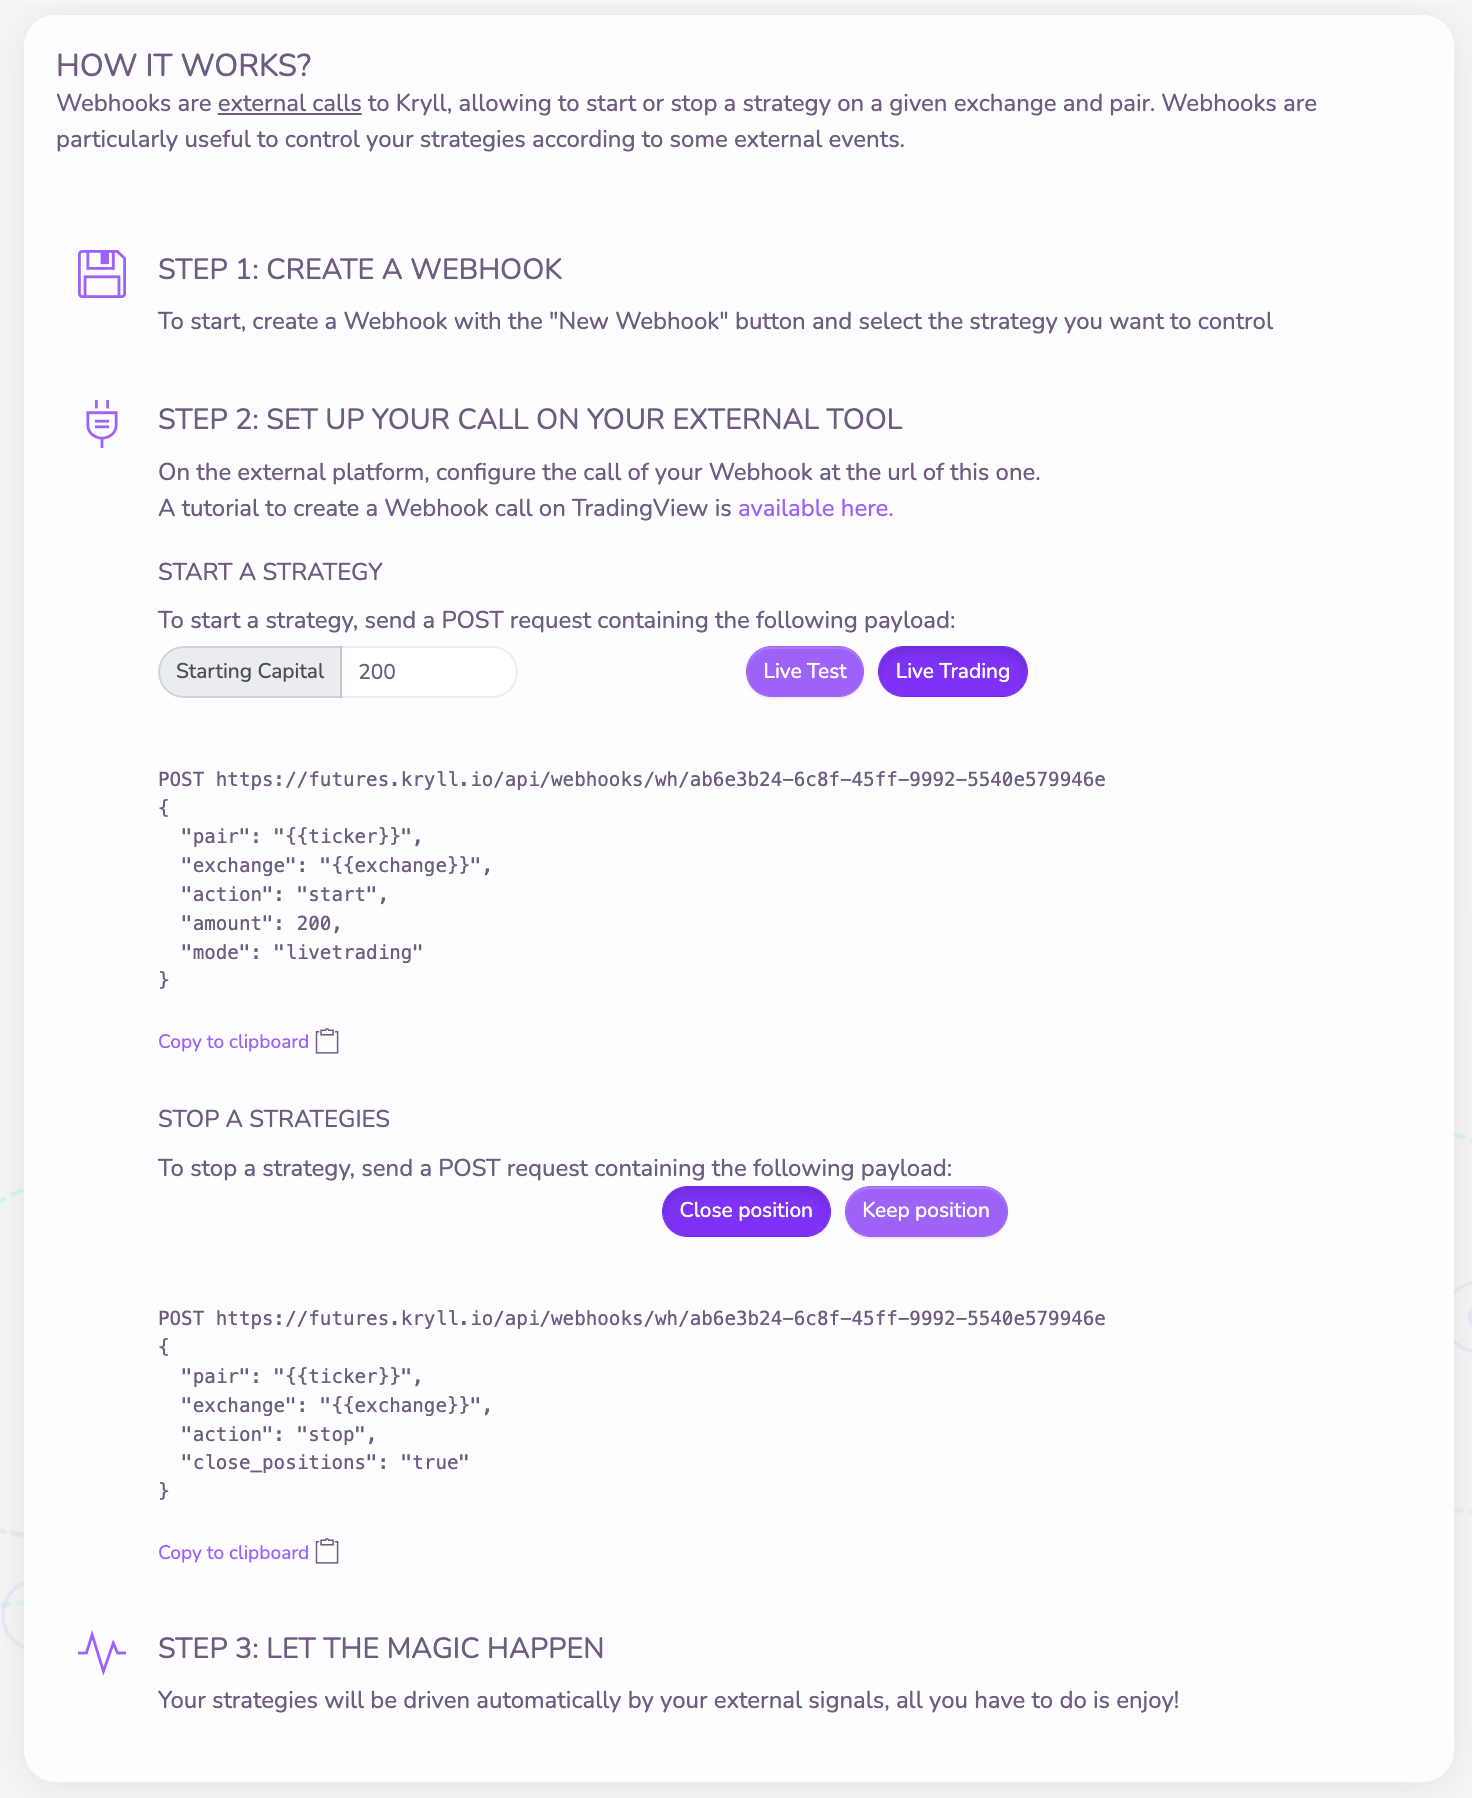
Create a new association between a Kryll strategy and a webhook by clicking on "New Webhook" and selecting the strategy you wish to pilot.
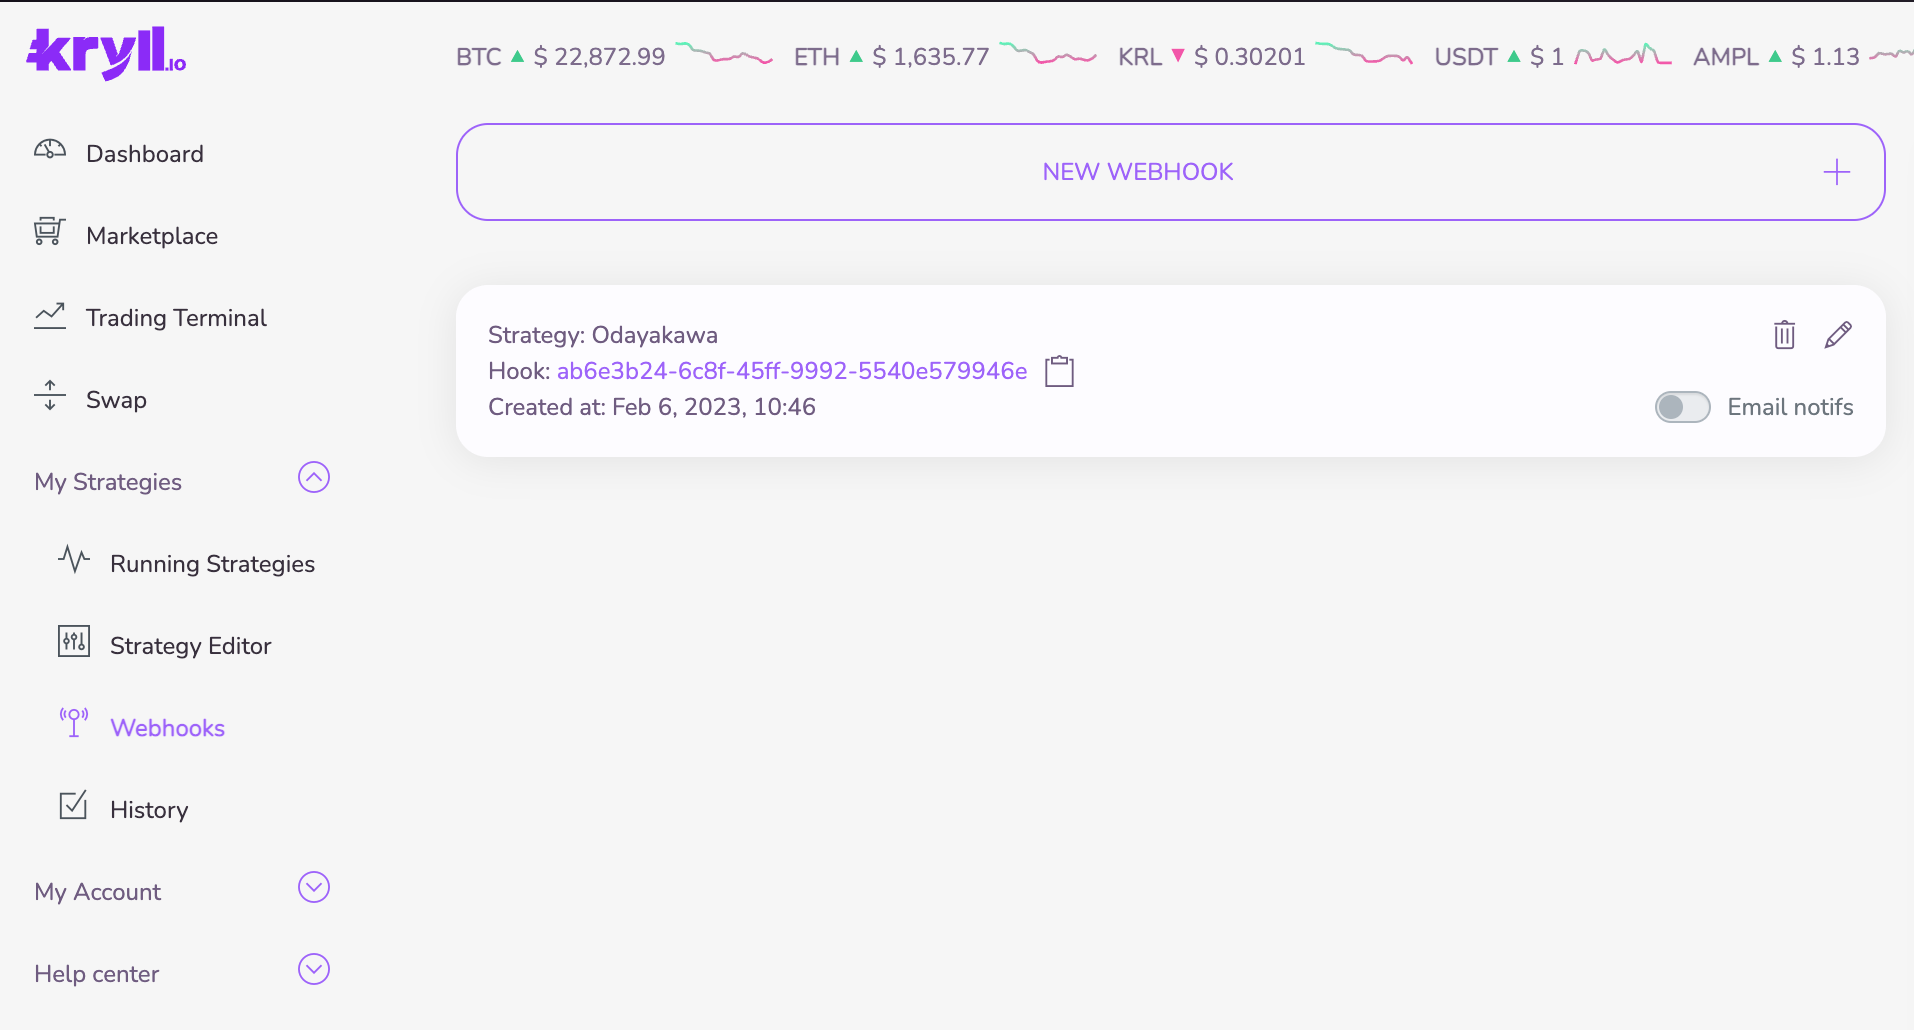
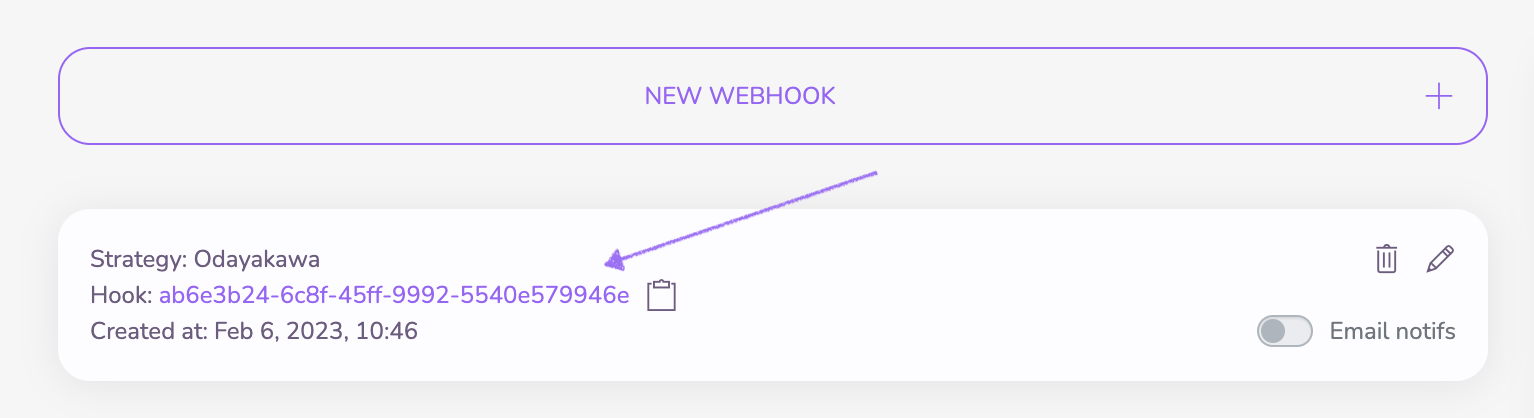
Click on the purple Hook ID to select it and update the "documentation" section for this Webhook.
The "documentation" area contains all the technical information needed by an external application (TradingView in our case) to drive this strategy (livetest in this example).
We have everything we need. Let's move on to TradingView.
Step 2: TradingView
In TradingView, it is possible to create alerts that will notify you (send an audio signal, popup, email etc...) when an event occurs on the price of an asset or an indicator level is reached. When setting up the alert, you can also specify information about a webhook, so TradingView will send the message to your webhook address when the alert conditions are met. This will be done automatically for you without you needing to do anything else.
Setting up a TradingView alert
You will need a TradingView Pro account in order to use the webhooks. Once you are logged in to your account, you can go to the price you want and create alerts, for this example we will use BTCUSDT.
Once on the course page, open the alert configuration window.
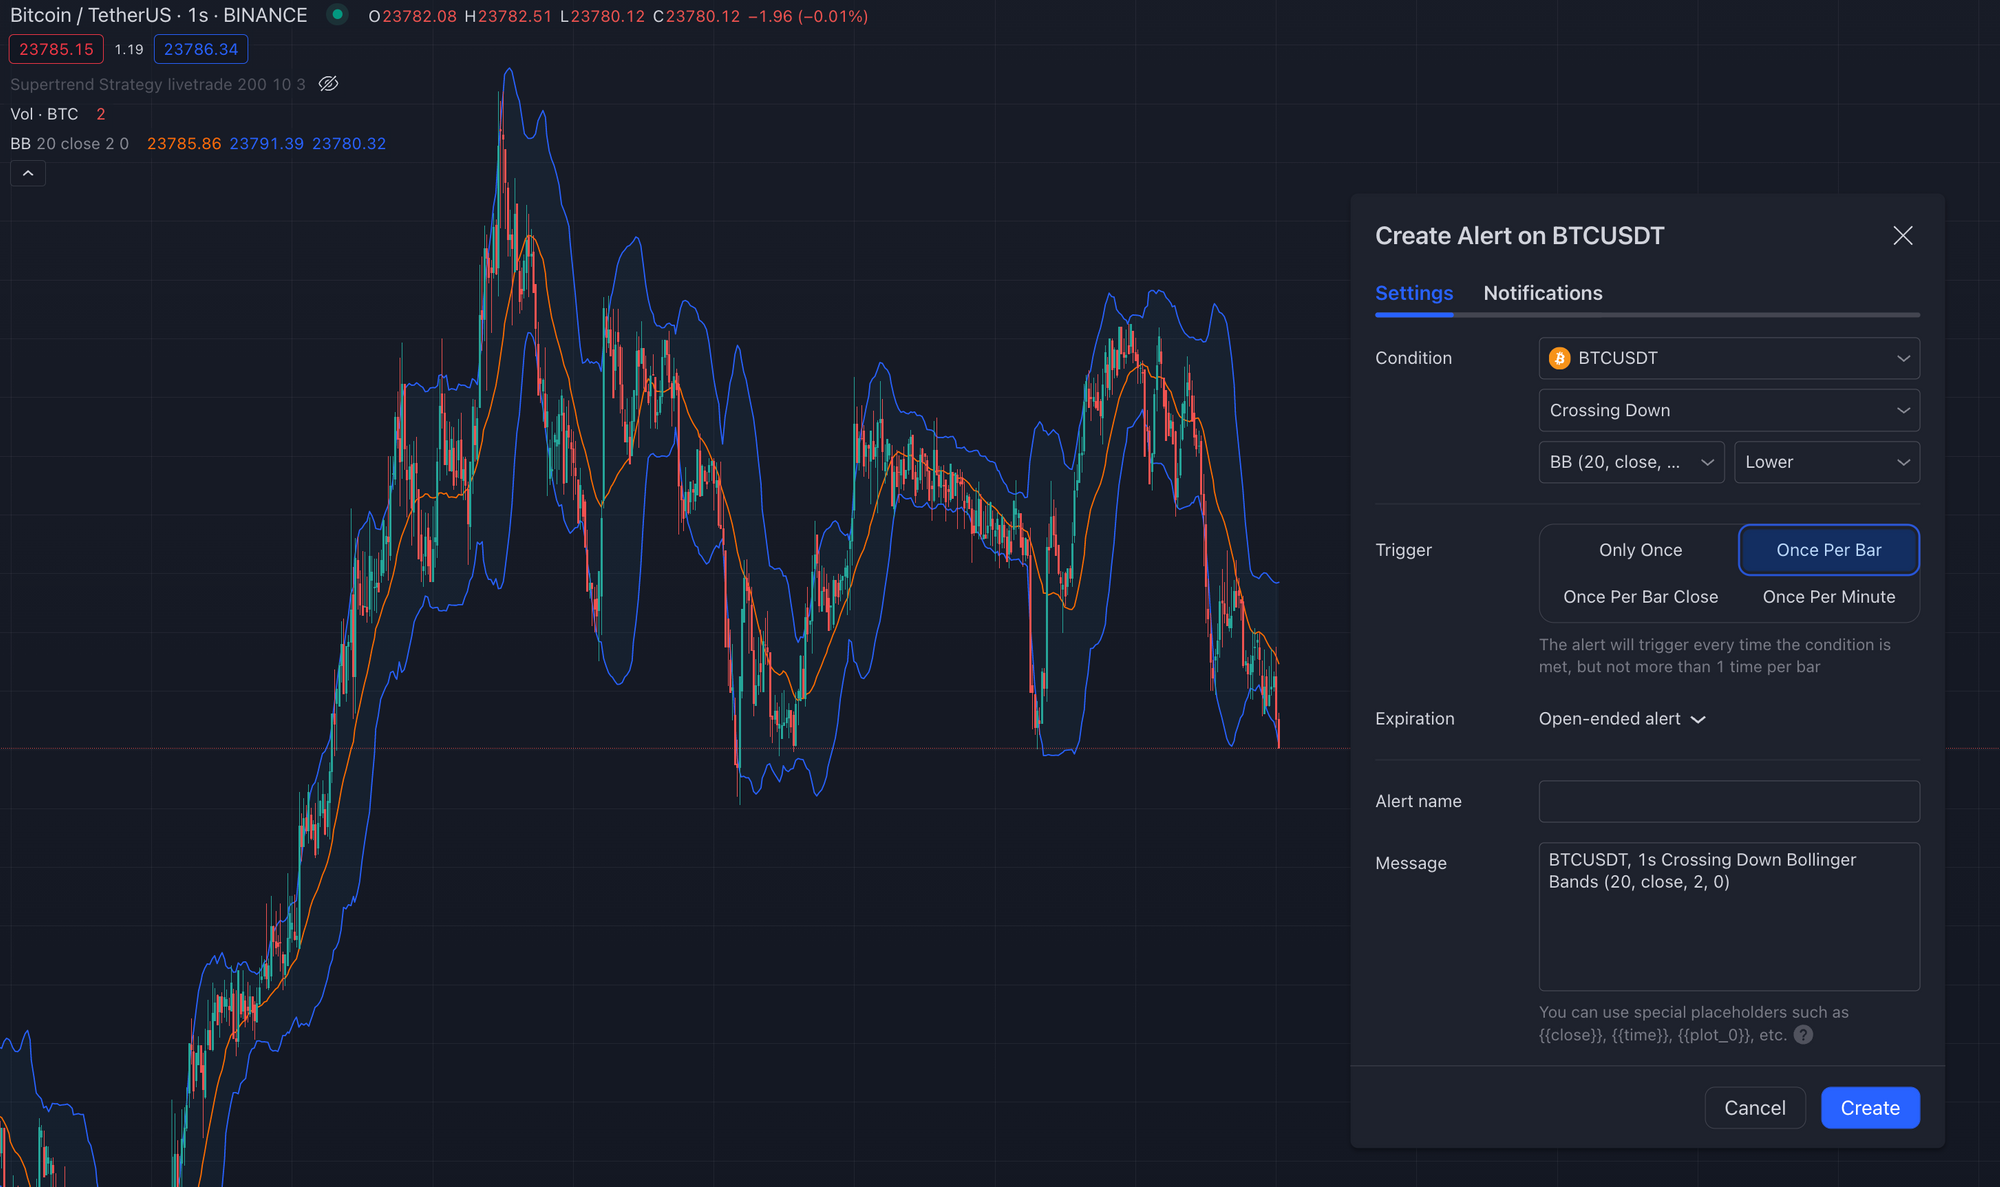
In the example below, we choose to be alerted when the Bitcoin price crosses down the lower band of the Bollinger Bands. Note that the alert will be created for the time unit you are viewing. In our example we'll use a 12 hour time frame.
So set up a new alert by selecting the conditions you want to use in the "Settings" tab.

In the Trigger option, you can set the parameters for the repetition of the alert. In our example, we have chosen a maximum of one alert per time period.
Linking with Kryll.io
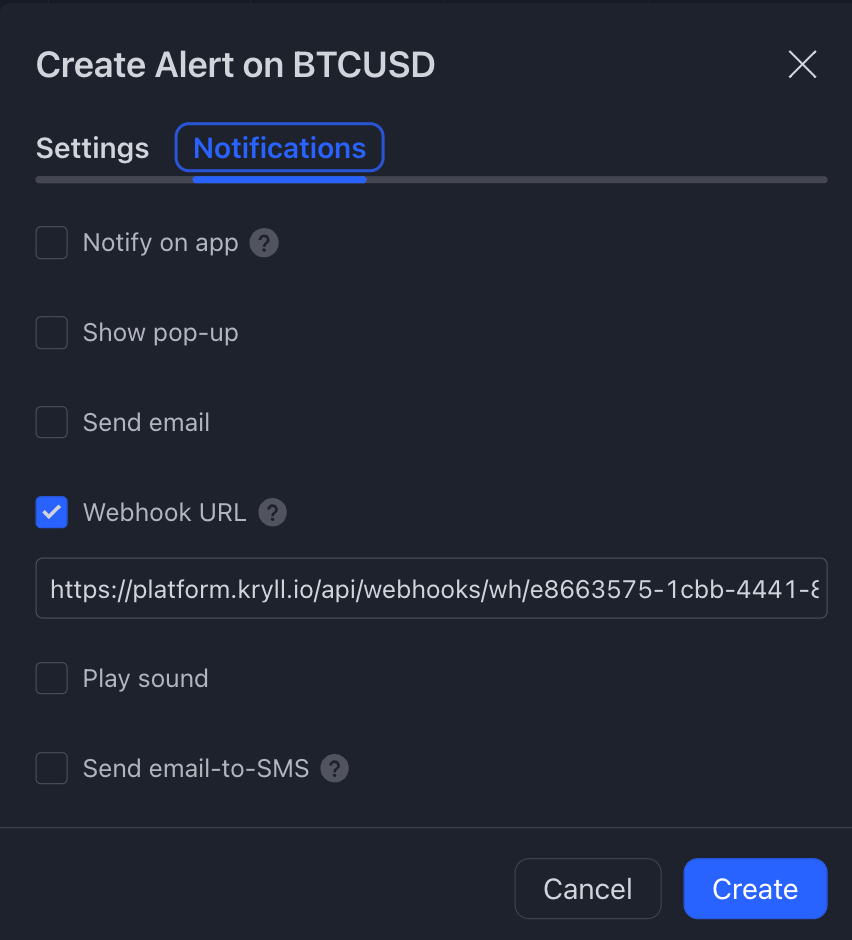
Once these parameters are defined, go to the "Notifications" section and check the Webhook URL option. Paste the URL of your webhook created on Kryll.io.
Finally, go back to the "Settings" tab to configure the "Message" part to be sent by TradingView to Kryll. You will find this message on Kryll.
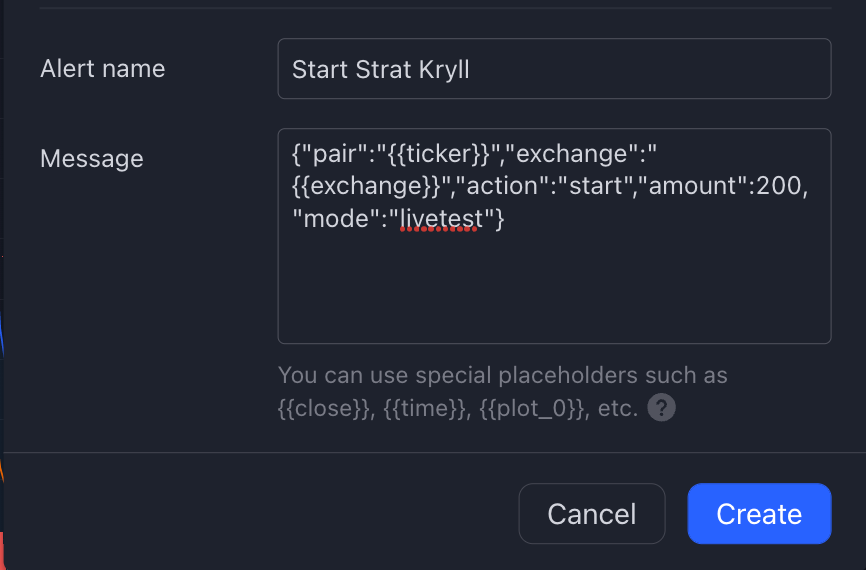
You just have to press the "Create" button and your alert will be created and ready to automatically send the signal to Kryll.io to start your strategy.
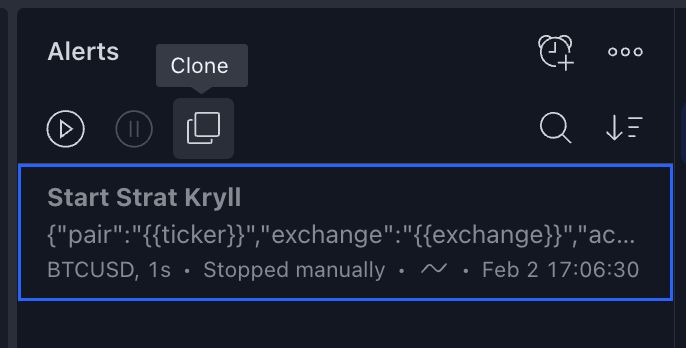
Stop the strategy
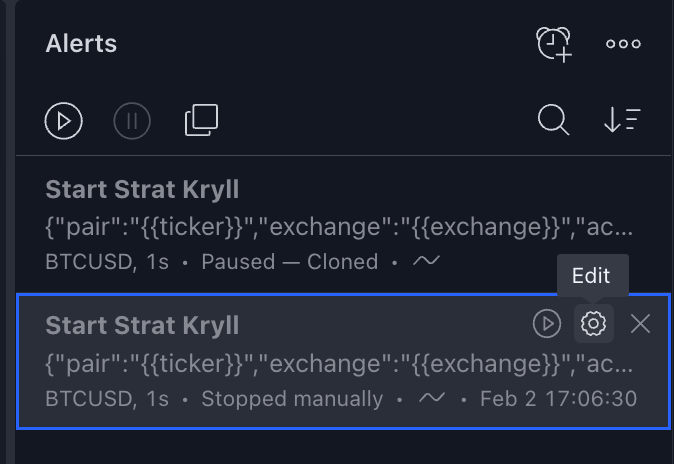
The example above allows you to launch the policy, but you can also create an alert to stop the policy from running. To do this easily, select the launch alert and clone it.
Edit the new alert thus created, change the conditions and the message to be sent and that's it.
To go further
Drive from a TradingView strategy
The interfacing of TradingView and Kryll opens up an infinite number of possibilities for Kryll users. You can now create your own technical indicators, mix them together, clone indicators or strategies from the TradingView community and use all of this to drive your own trading algorithms!
Here is a TradingView strategy template to control the launch or stop of a Kryll strategy. To learn more about TradingView Strategies, we recommend you read this article or get informed.
//@version=5
// KRYLL Webhook - Autopilot Exemple
strategy("KRYLL Autopilot", overlay=true)

// Kryll strategy config
kmode = input.string(title="Kryll strategy mode", defval="livetrading", options=["livetest", "livetrading"])
kamount = input.float(200.0,"Kryll strategy start amount")
mode = str.tostring(kmode)
amount = str.tostring(kamount)

// Kryll payloads
start_payload="{\"action\" : \"start\",\"mode\" : \""+mode+"\",\"pair\":\""+syminfo.ticker+"\",\"exchange\":\""+syminfo.prefix+"\",
\"amount\":\""+amount+"\"}"
stop_payload="{\"action\" : \"stop\",\"pair\":\""+syminfo.ticker+"\",\"exchange\":\""+syminfo.prefix+"\",\"close_positions\" : \"true\"}"
var kryll_action="none"

// ----------------------- YOUR CODE HERE ---------------
// [...]
// In your code, set kryll_action to 'start' or 'stop' mode depending on the desired behavior.
//
// exemple
// kryll_action := 'sell'
// ----------------------- KRYLL FINAL CODE ---------------
if (kryll_action == "start")
    strategy.entry("trade", strategy.long,alert_message=start_payload, comment="Start")
if (kryll_action == "stop")
    strategy.close(id="trade",alert_message=stop_payload, comment="Stop")
Learn more
Various tutorials are available if you want to learn more. The Kryll team has written several other articles on this subject:
- Webhooks, the game-changer for Kryll trading algorithms
- The Webhook Block Guide
- Connect your TradingView strategy with Kryll
Thank you for following this tutorial! To your Webhooks!

Happy Trading,
Website : https://kryll.io
Twitter : @Kryll.io
Telegram EN : https://t.me/kryll_io
Telegram FR: https://t.me/kryll_fr
Telegram ES: https://t.me/kryll_es
Discord : https://discord.gg/PDcHd8K
Facebook : https://www.facebook.com/kryll.io
Support : support@kryll.io