Part 2 - Step-by-step strategy creation
Welcome to the second part of this guide to using the Kryll Strategy Editor. In this section we will show you step by step how to create a simple trading bot using the Supertrend block, which is a conditional block based on the SuperTrend indicator. This is a useful indicator used by many traders to identify trends on assets.
Summary
Use this summary if you have missed the previous parts or want to move on to the next part
Kryll Editor: User Guide - Part 1
Kryll Editor: User Guide - Part 2 (you are here)
Kryll Editor: User Guide - Part 3
Kryll Editor: User Guide - Part 4 (coming soon)
Let's get the editor ready
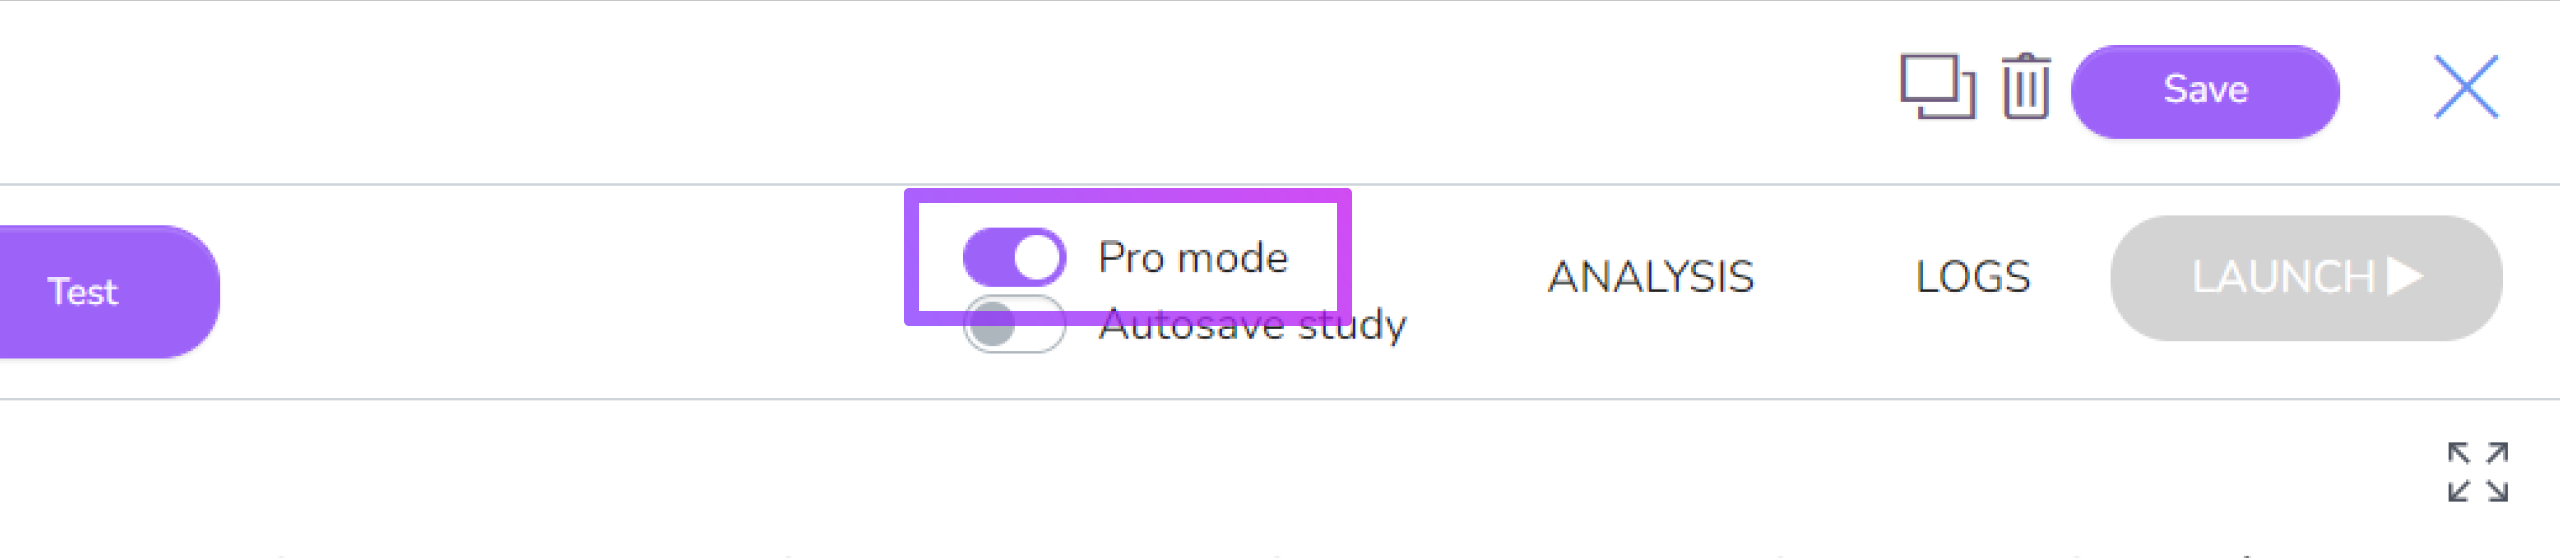
First, you will need to activate the Pro mode to display the TradingView chart so you can view your indicators.
To do this, simply click on the Pro mode button on the right of the settings bar:
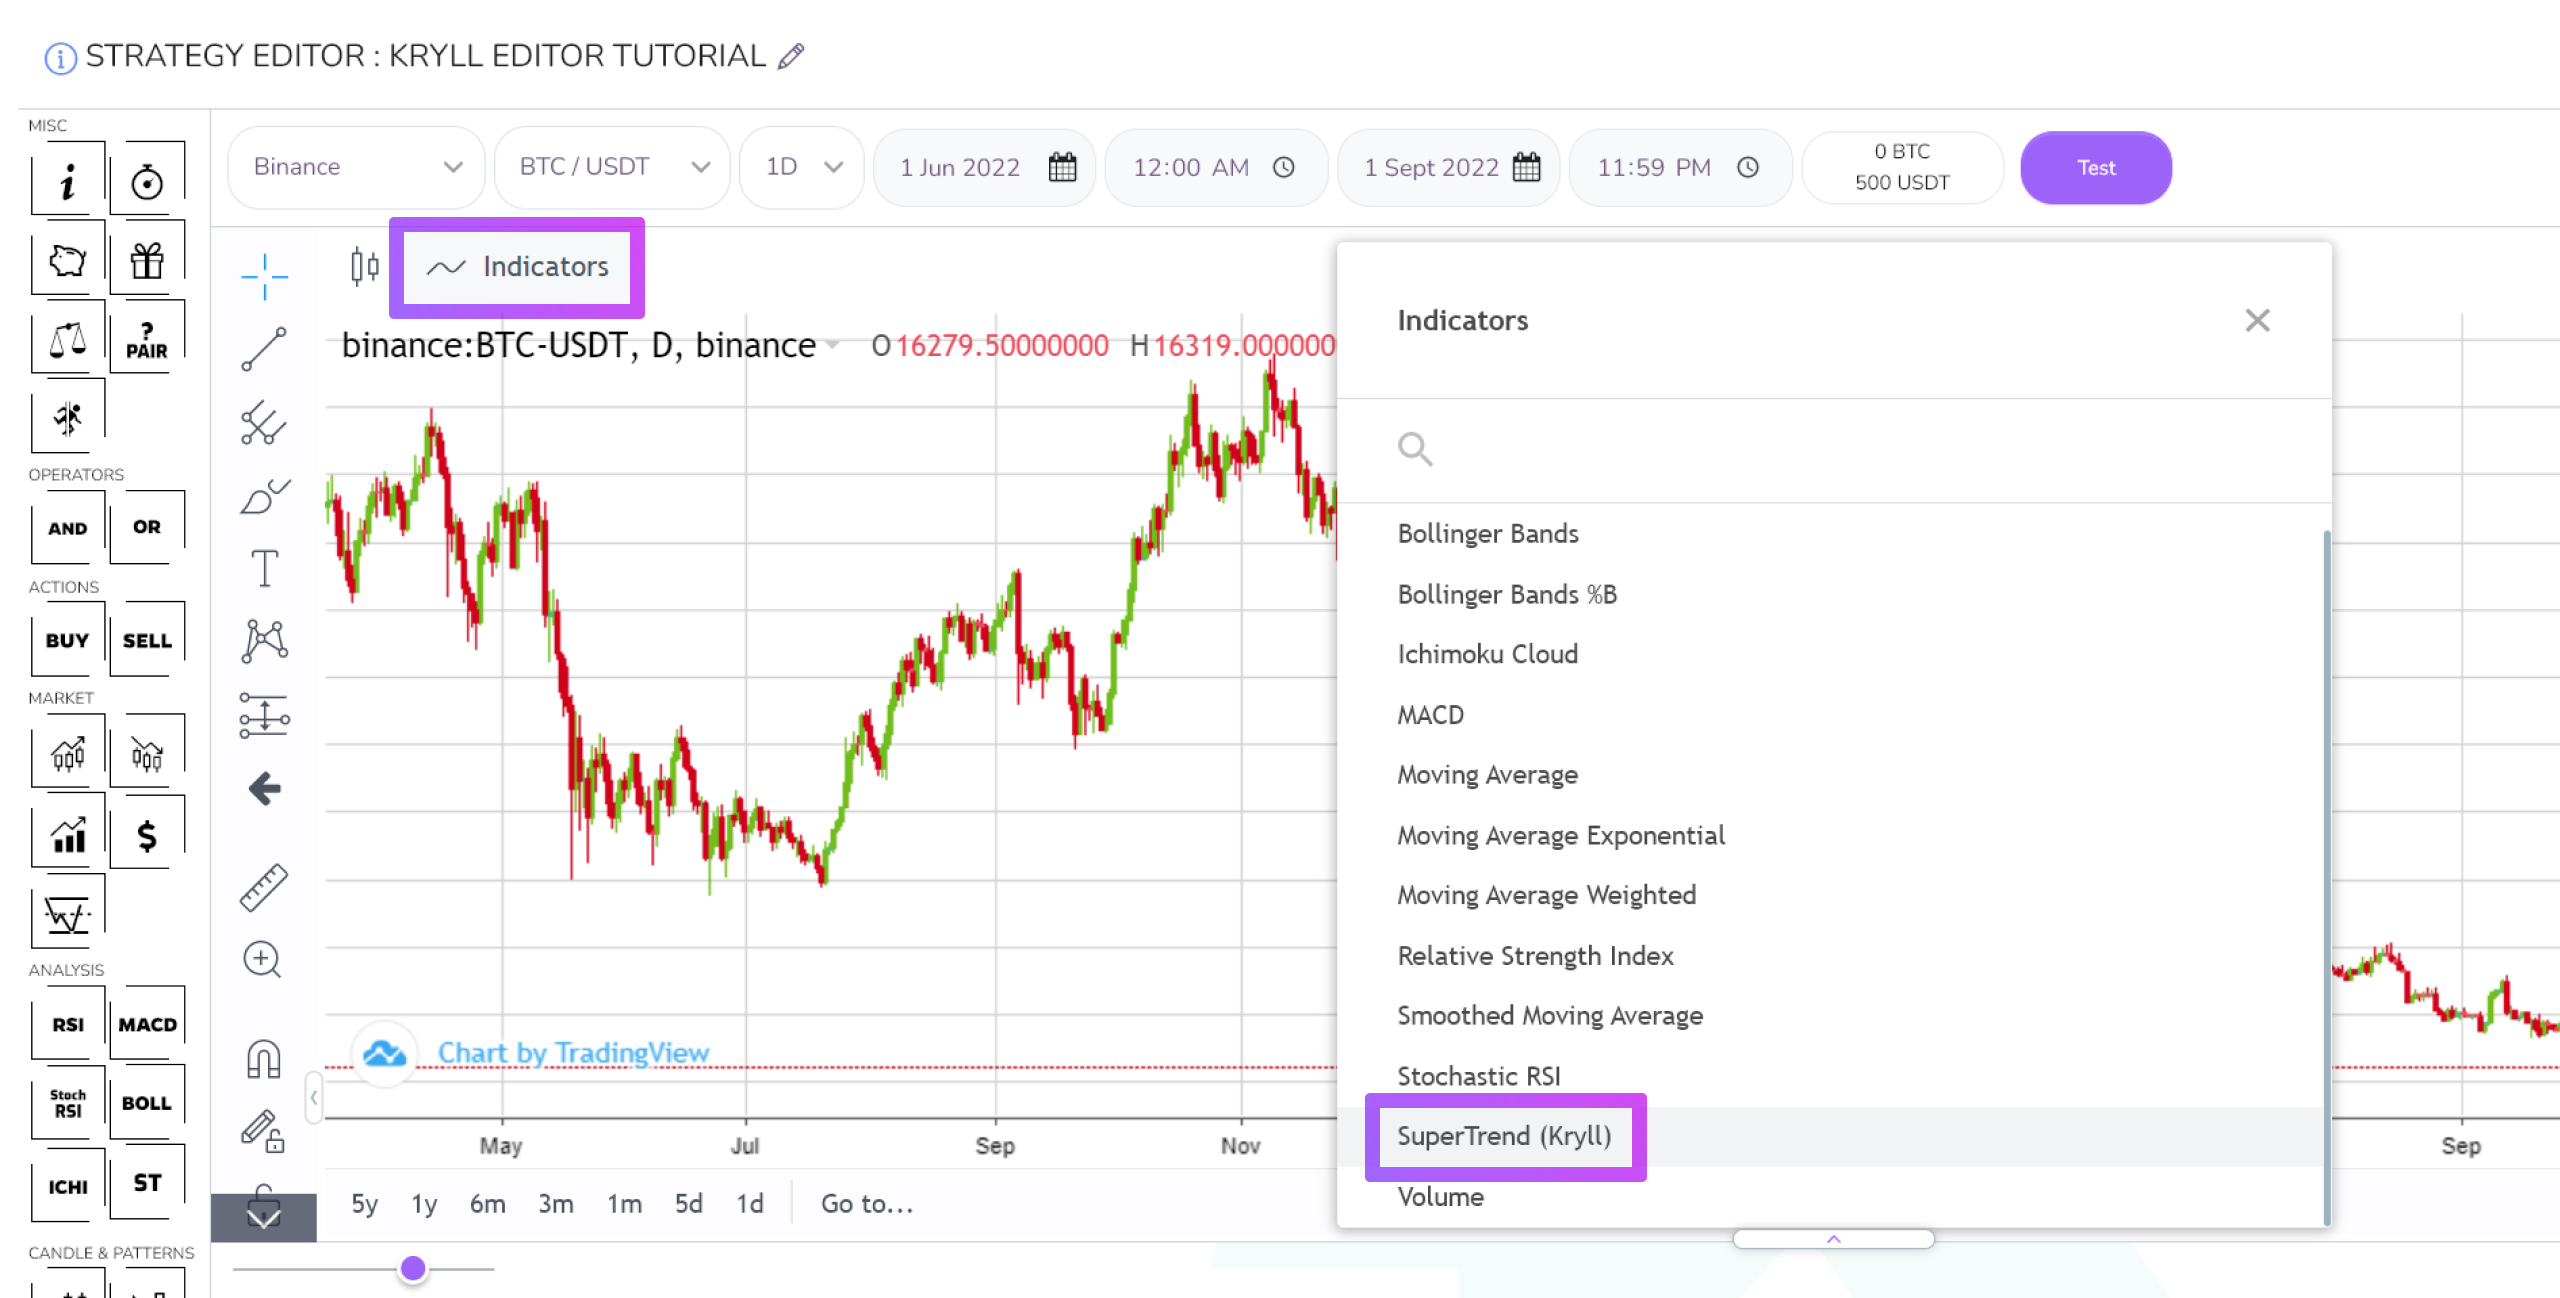
We can now add the SuperTrend indicator to the chart. To do this, simply click on the "Indicators" button at the top left of the chart and click on the indicator: "SuperTrend (Kryll)".
You can now see the indicator on your chart:
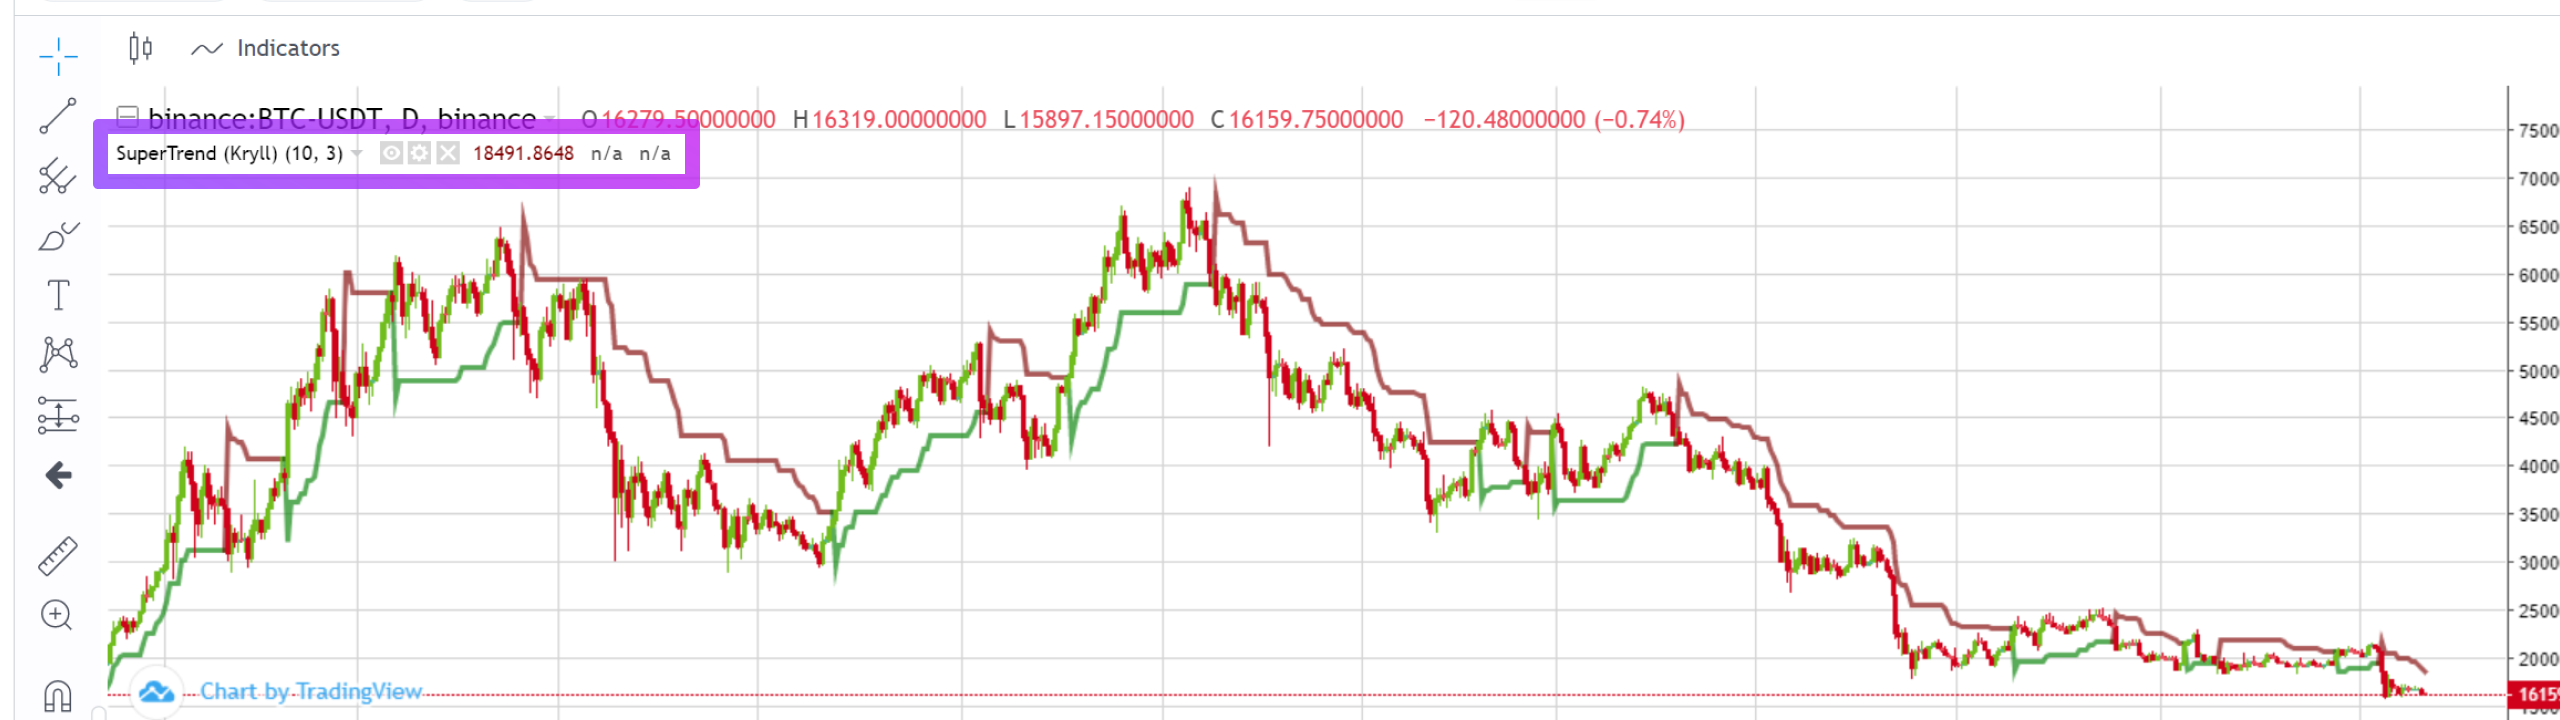
We also recommend that you select the 1 day time unit (1D) on the graph, as this is the one we will use for this tutorial:

It is now time to place your first blocks!
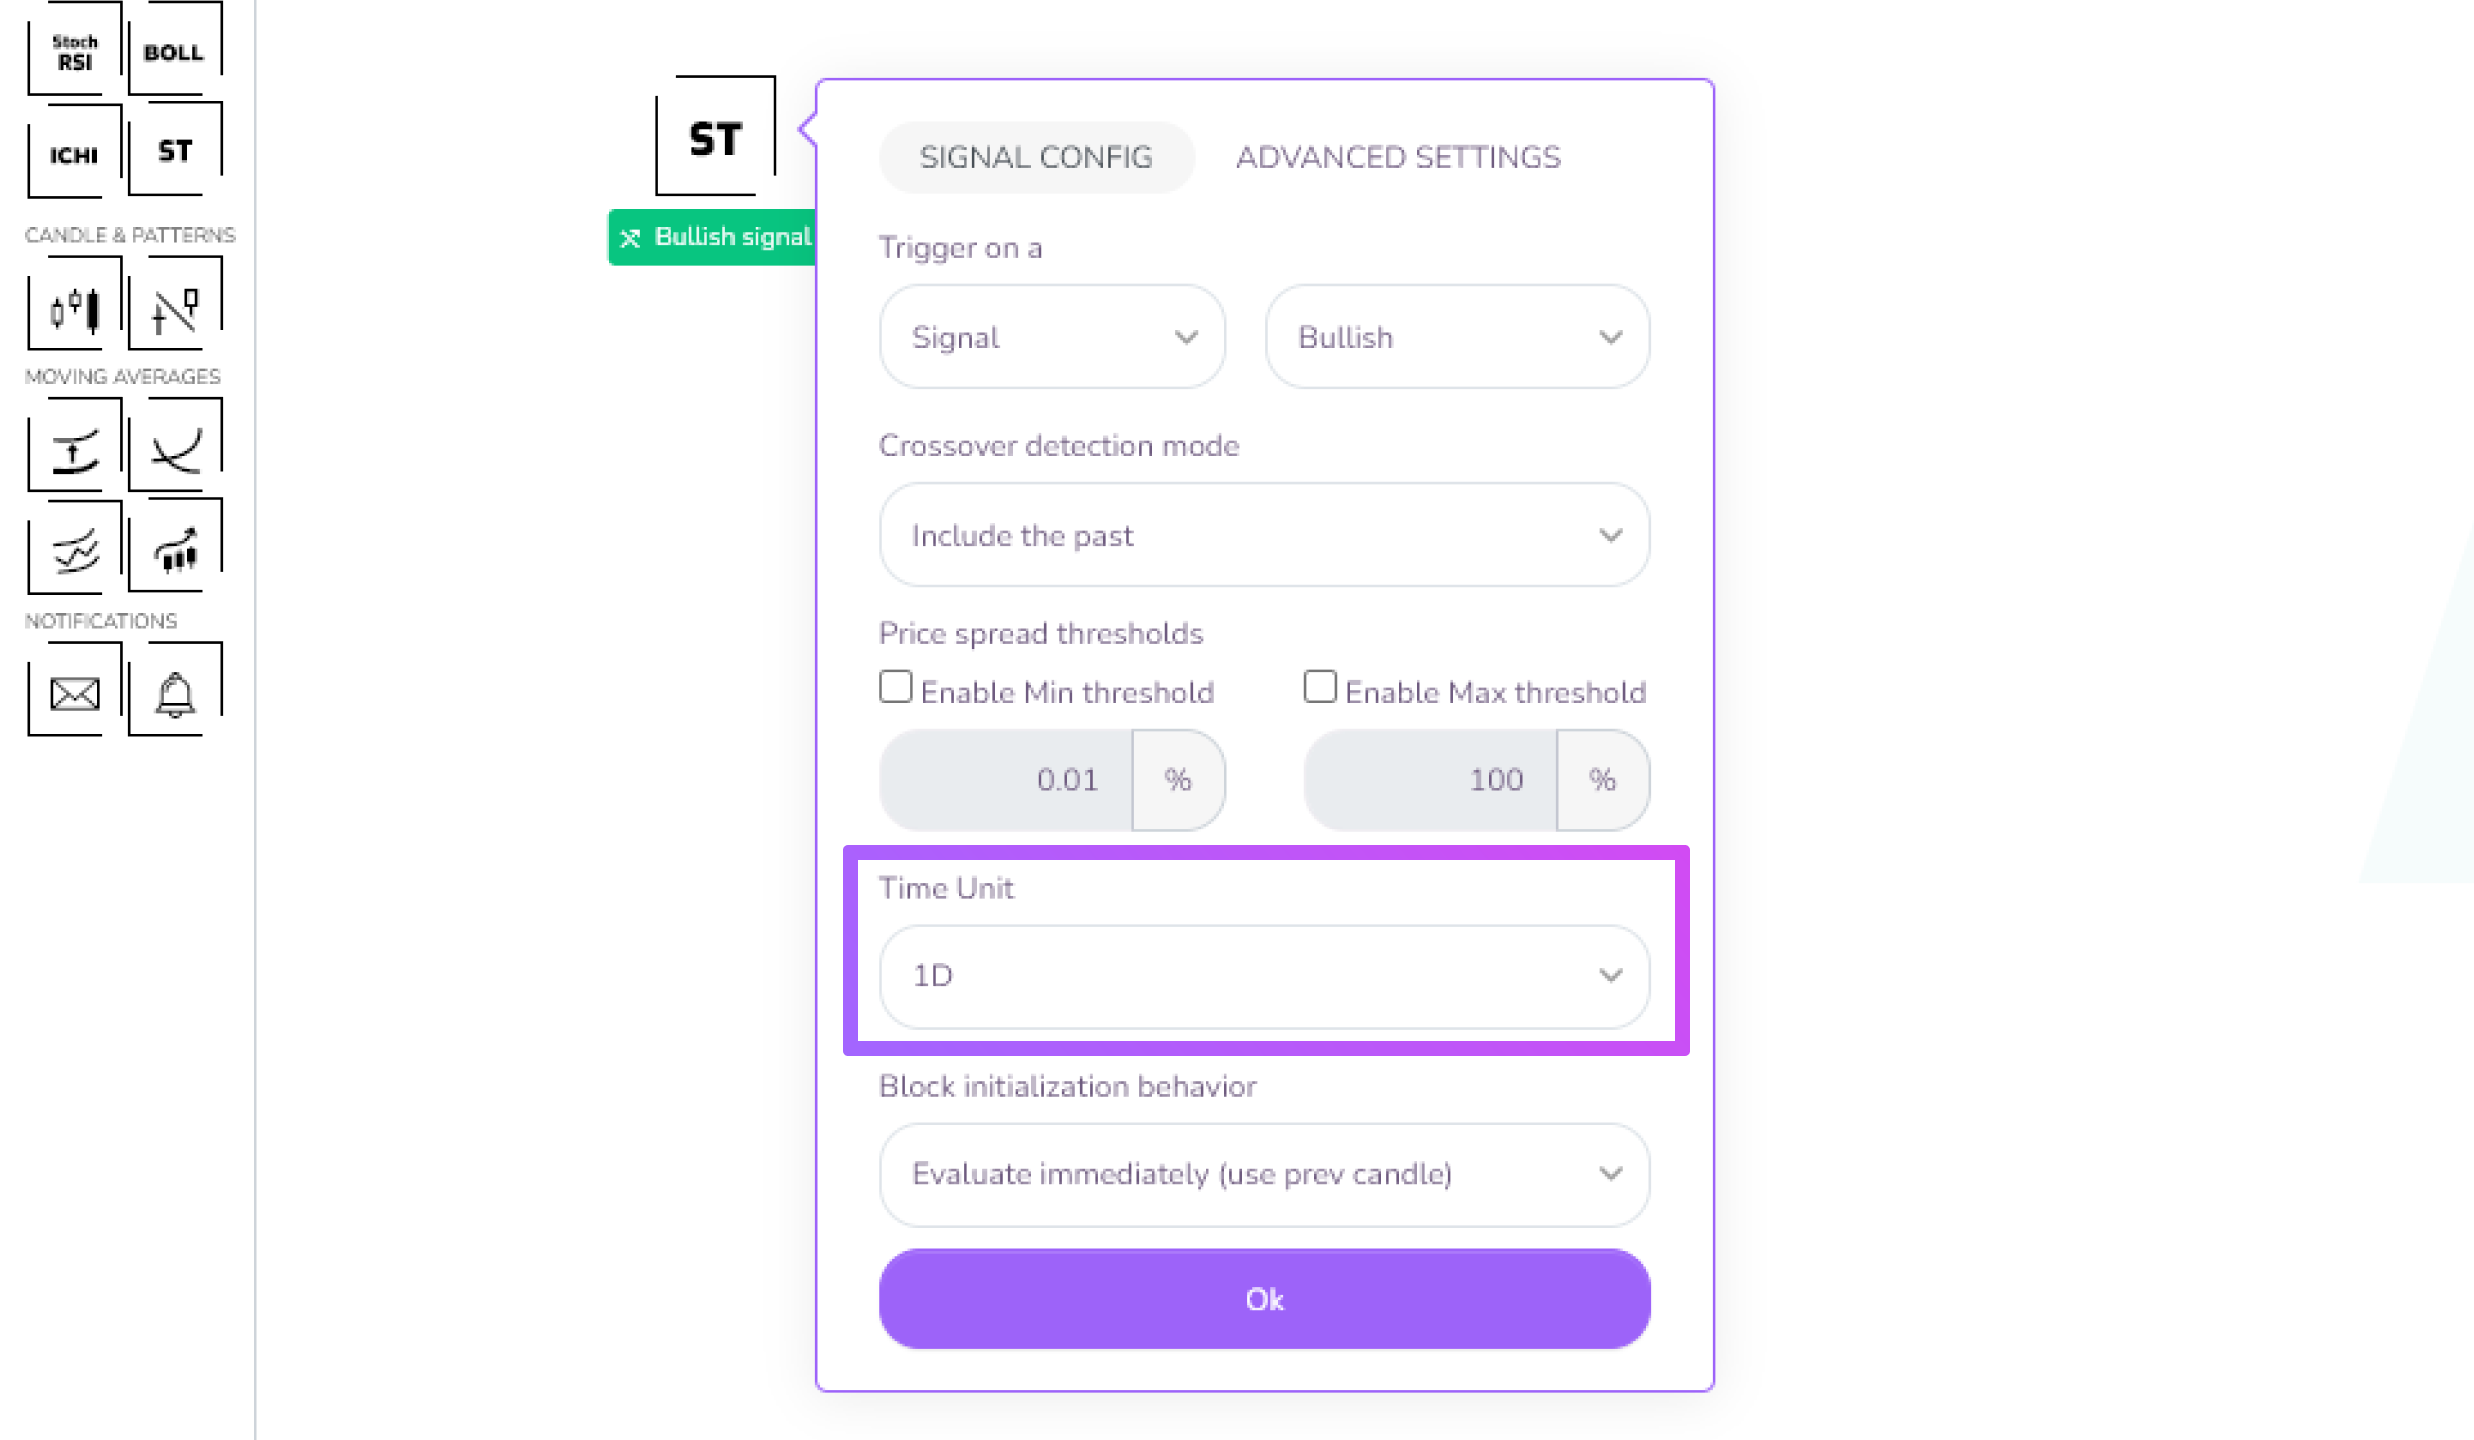
To do this, drag and drop the Supertrend block into the editing area. Set the time unit of this block to 1 day (1D) for the sake of the tutorial and close the window. This block will send a signal when it changes from a downtrend to an uptrend on the 1 day (1D) time unit.
As you can see in the editing area, one block is already present. It is the wallet block. It represents the portfolio of the strategy and is the absolute starting point of your behavior flow.
So we need to link our wallet block to our indicator as follows

We now need to link our Supertrend block to a buy block so that our bot can place a buy order when our Supertrend block sends a bullish signal:

All that remains is to add a sell signal followed by a sell block so that our strategy can close its trade. To do this, we will select and duplicate the Supertrend block by pressing the [D] key:

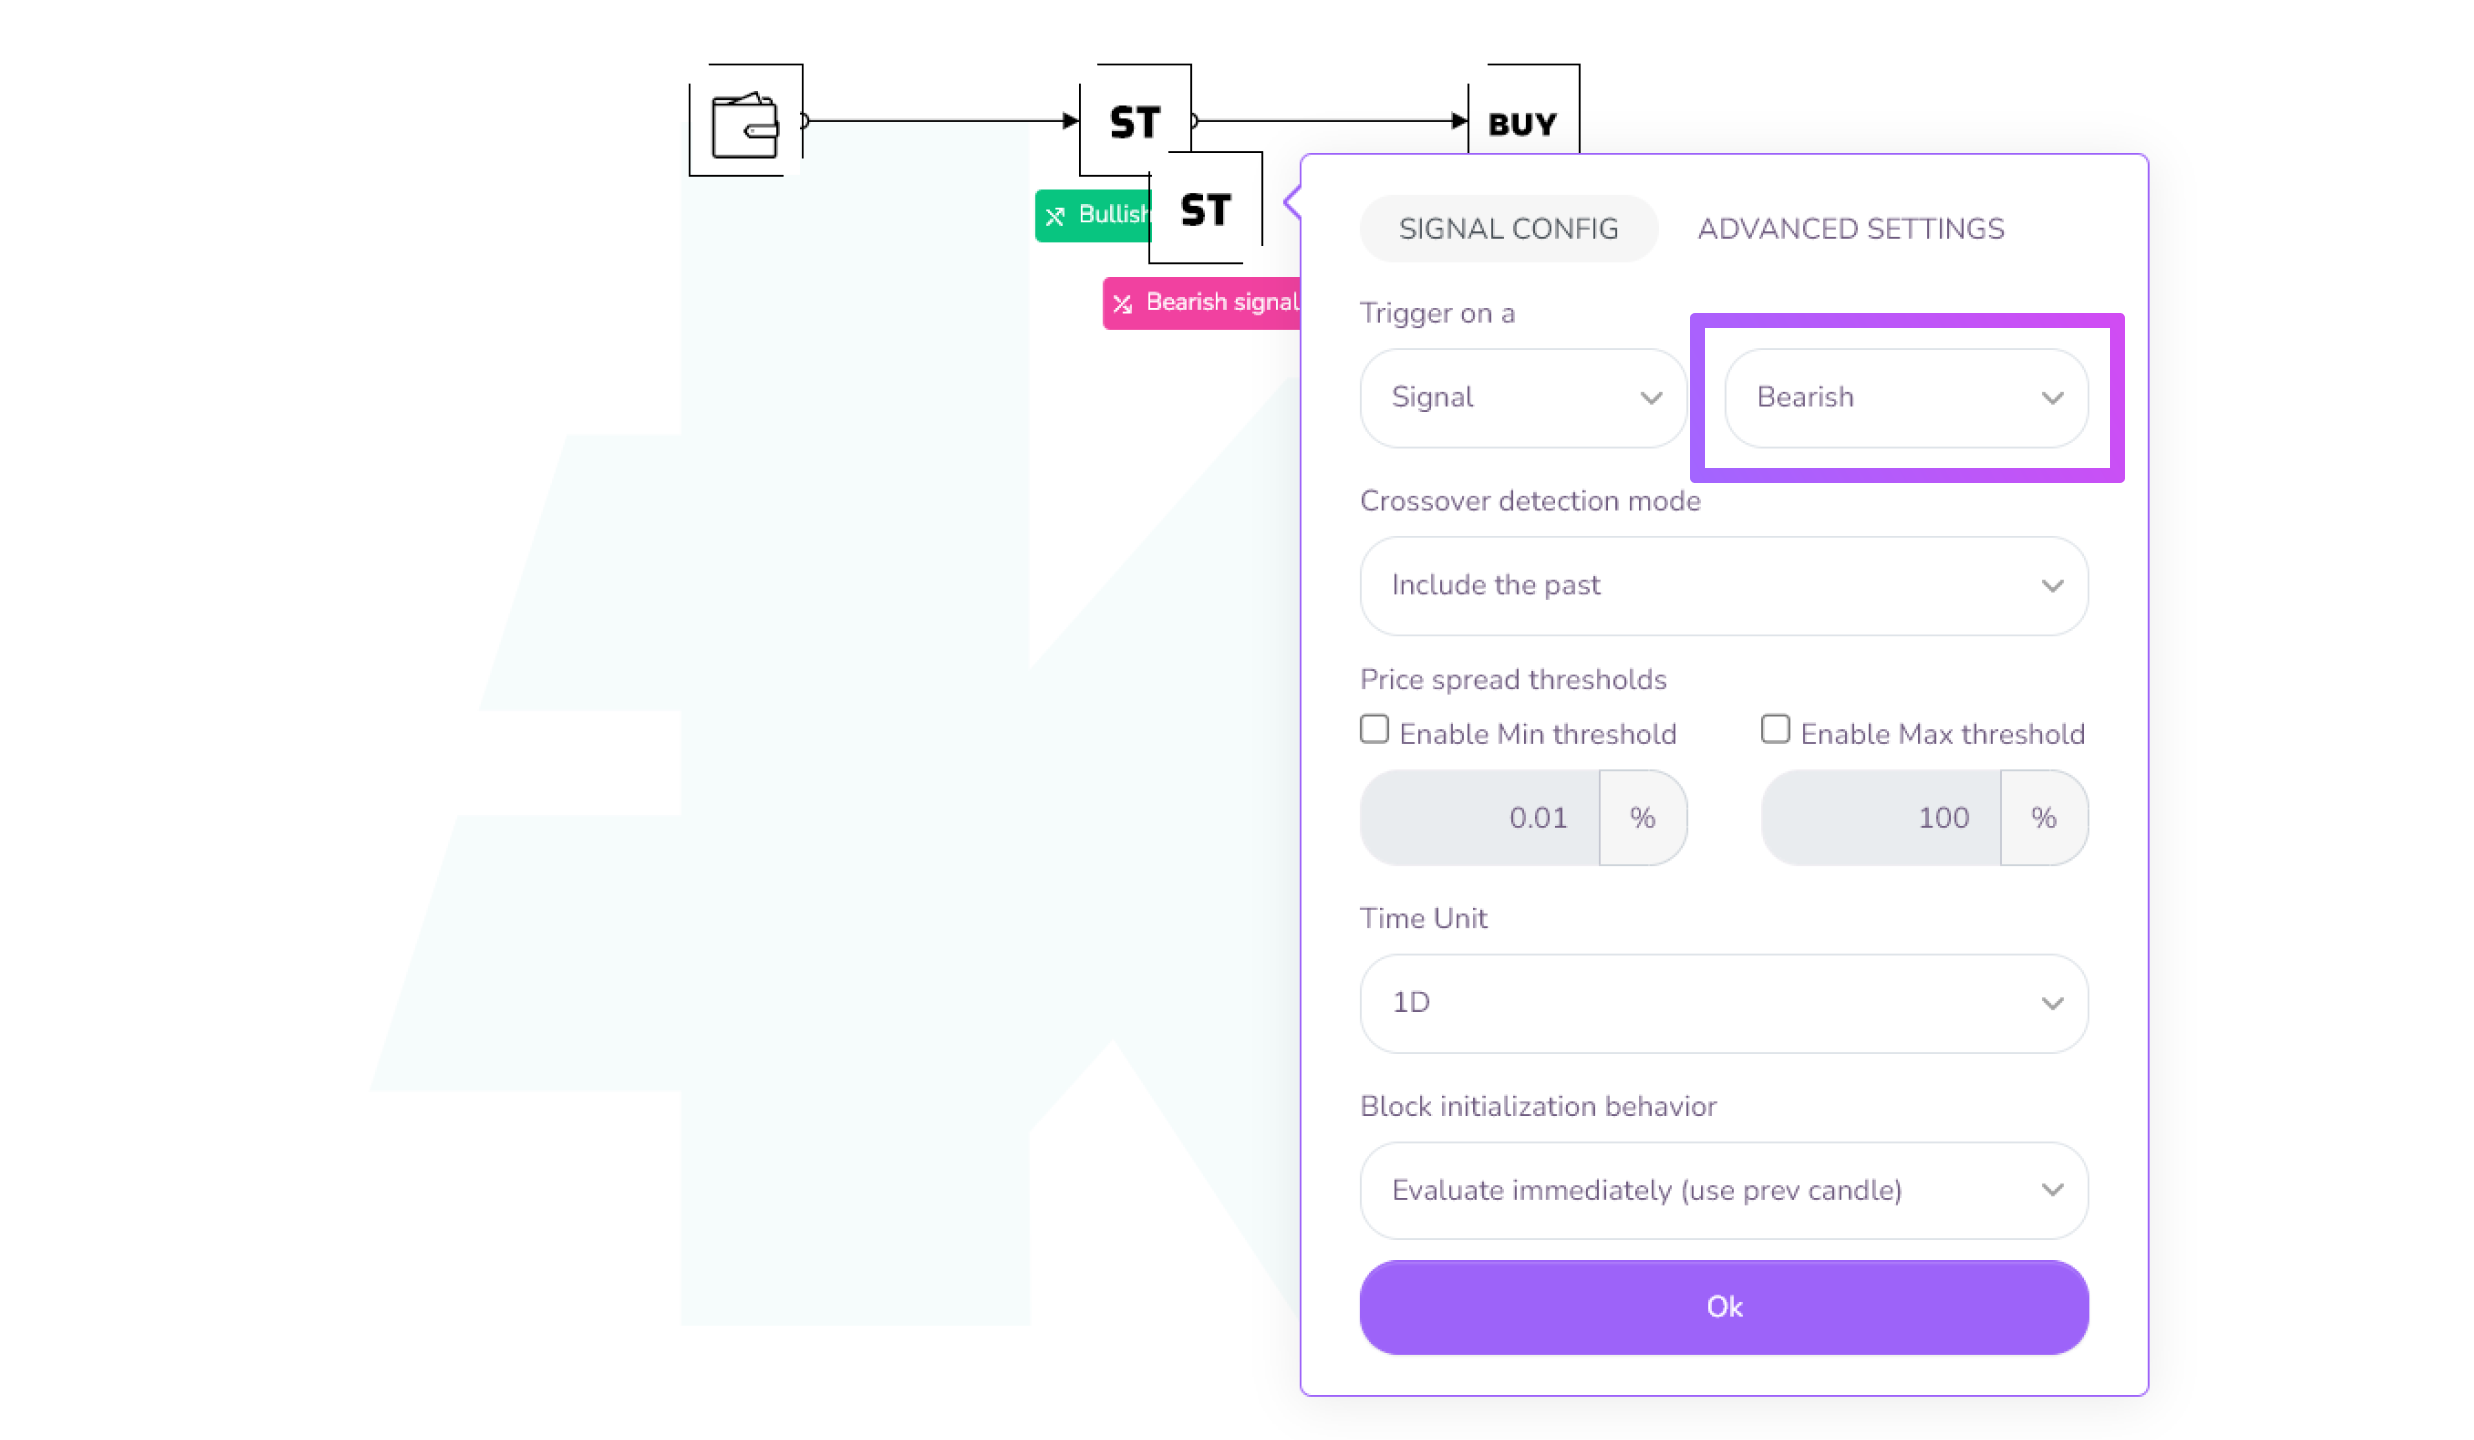
Following this, we need to change the parameters of this new block, so that it indicates a bearish signal. To do this, simply change its "bullish" parameter to "bearish" in the parameters window:
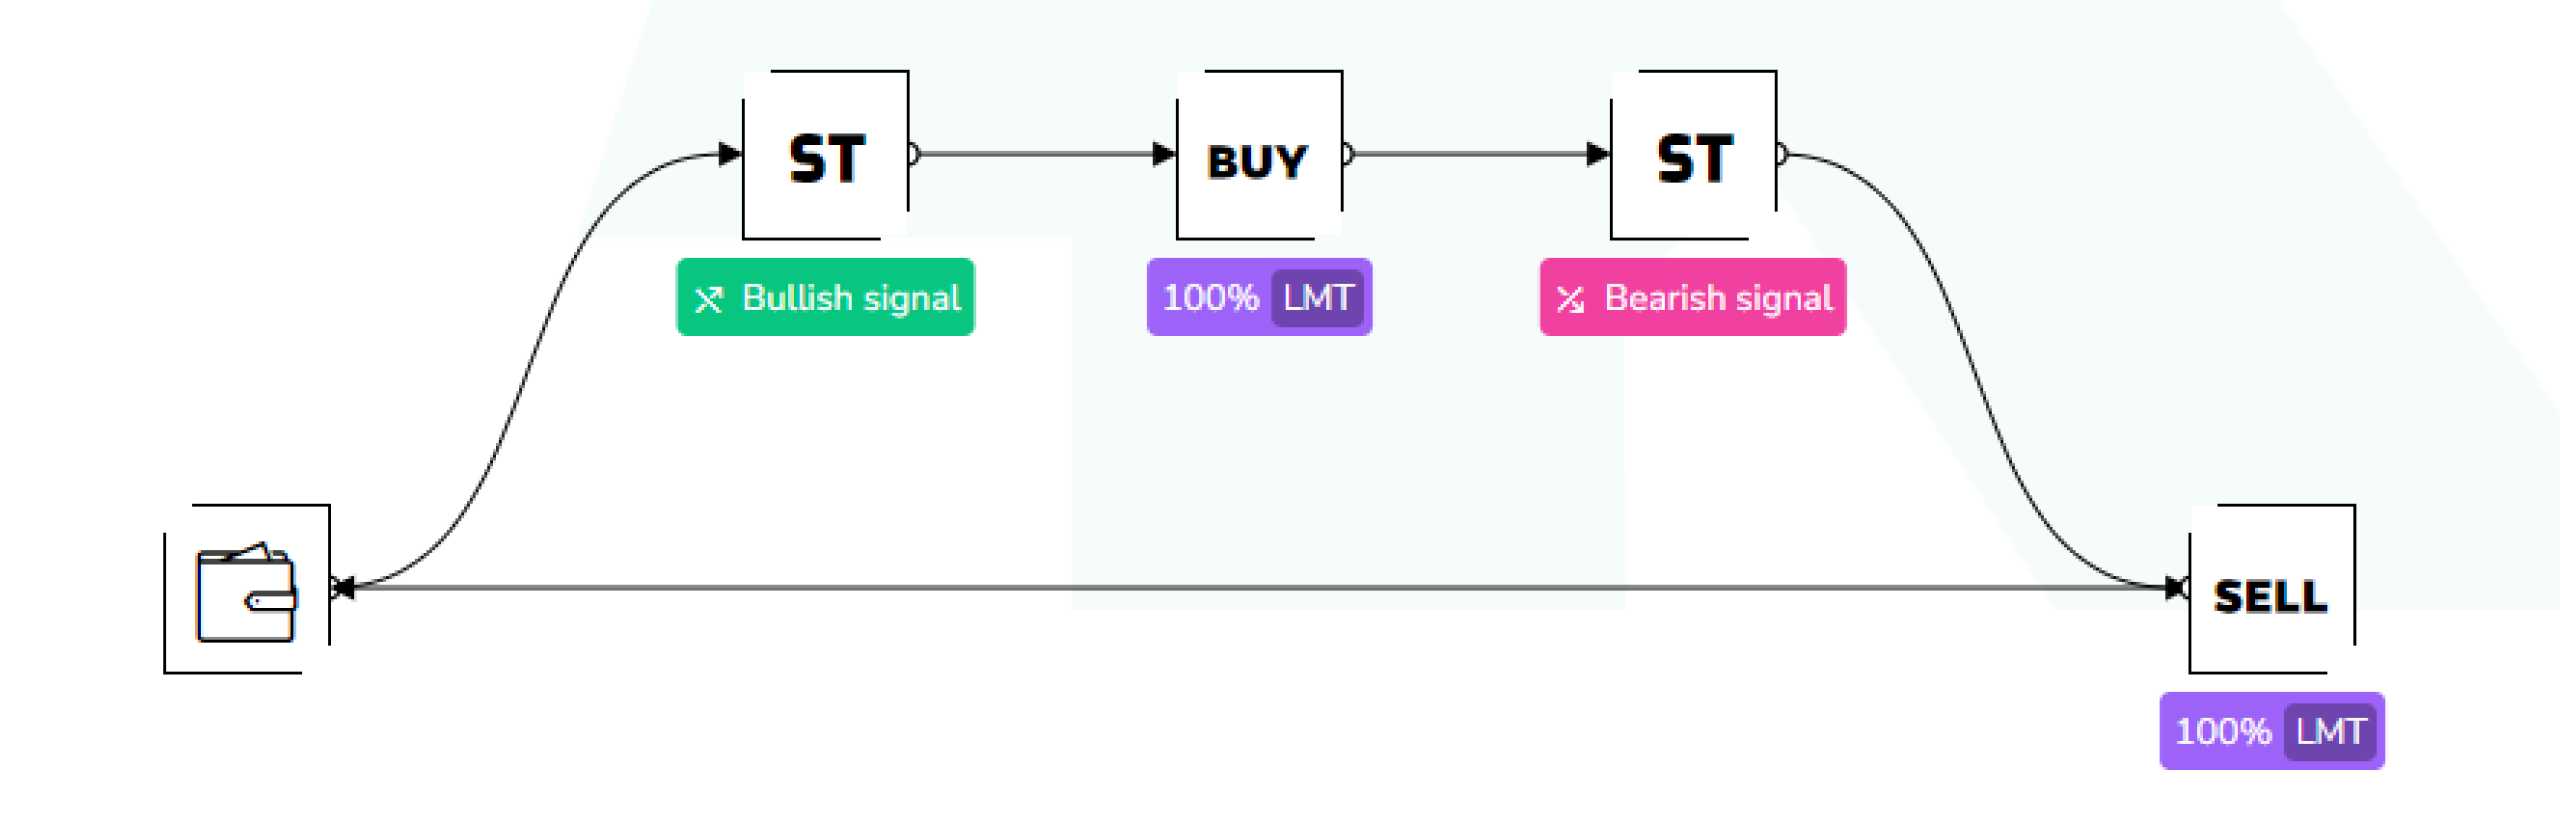
We can now place a sell block and link it all together to finally test your very first strategy on the Kryll editor!

Time for the backtest!
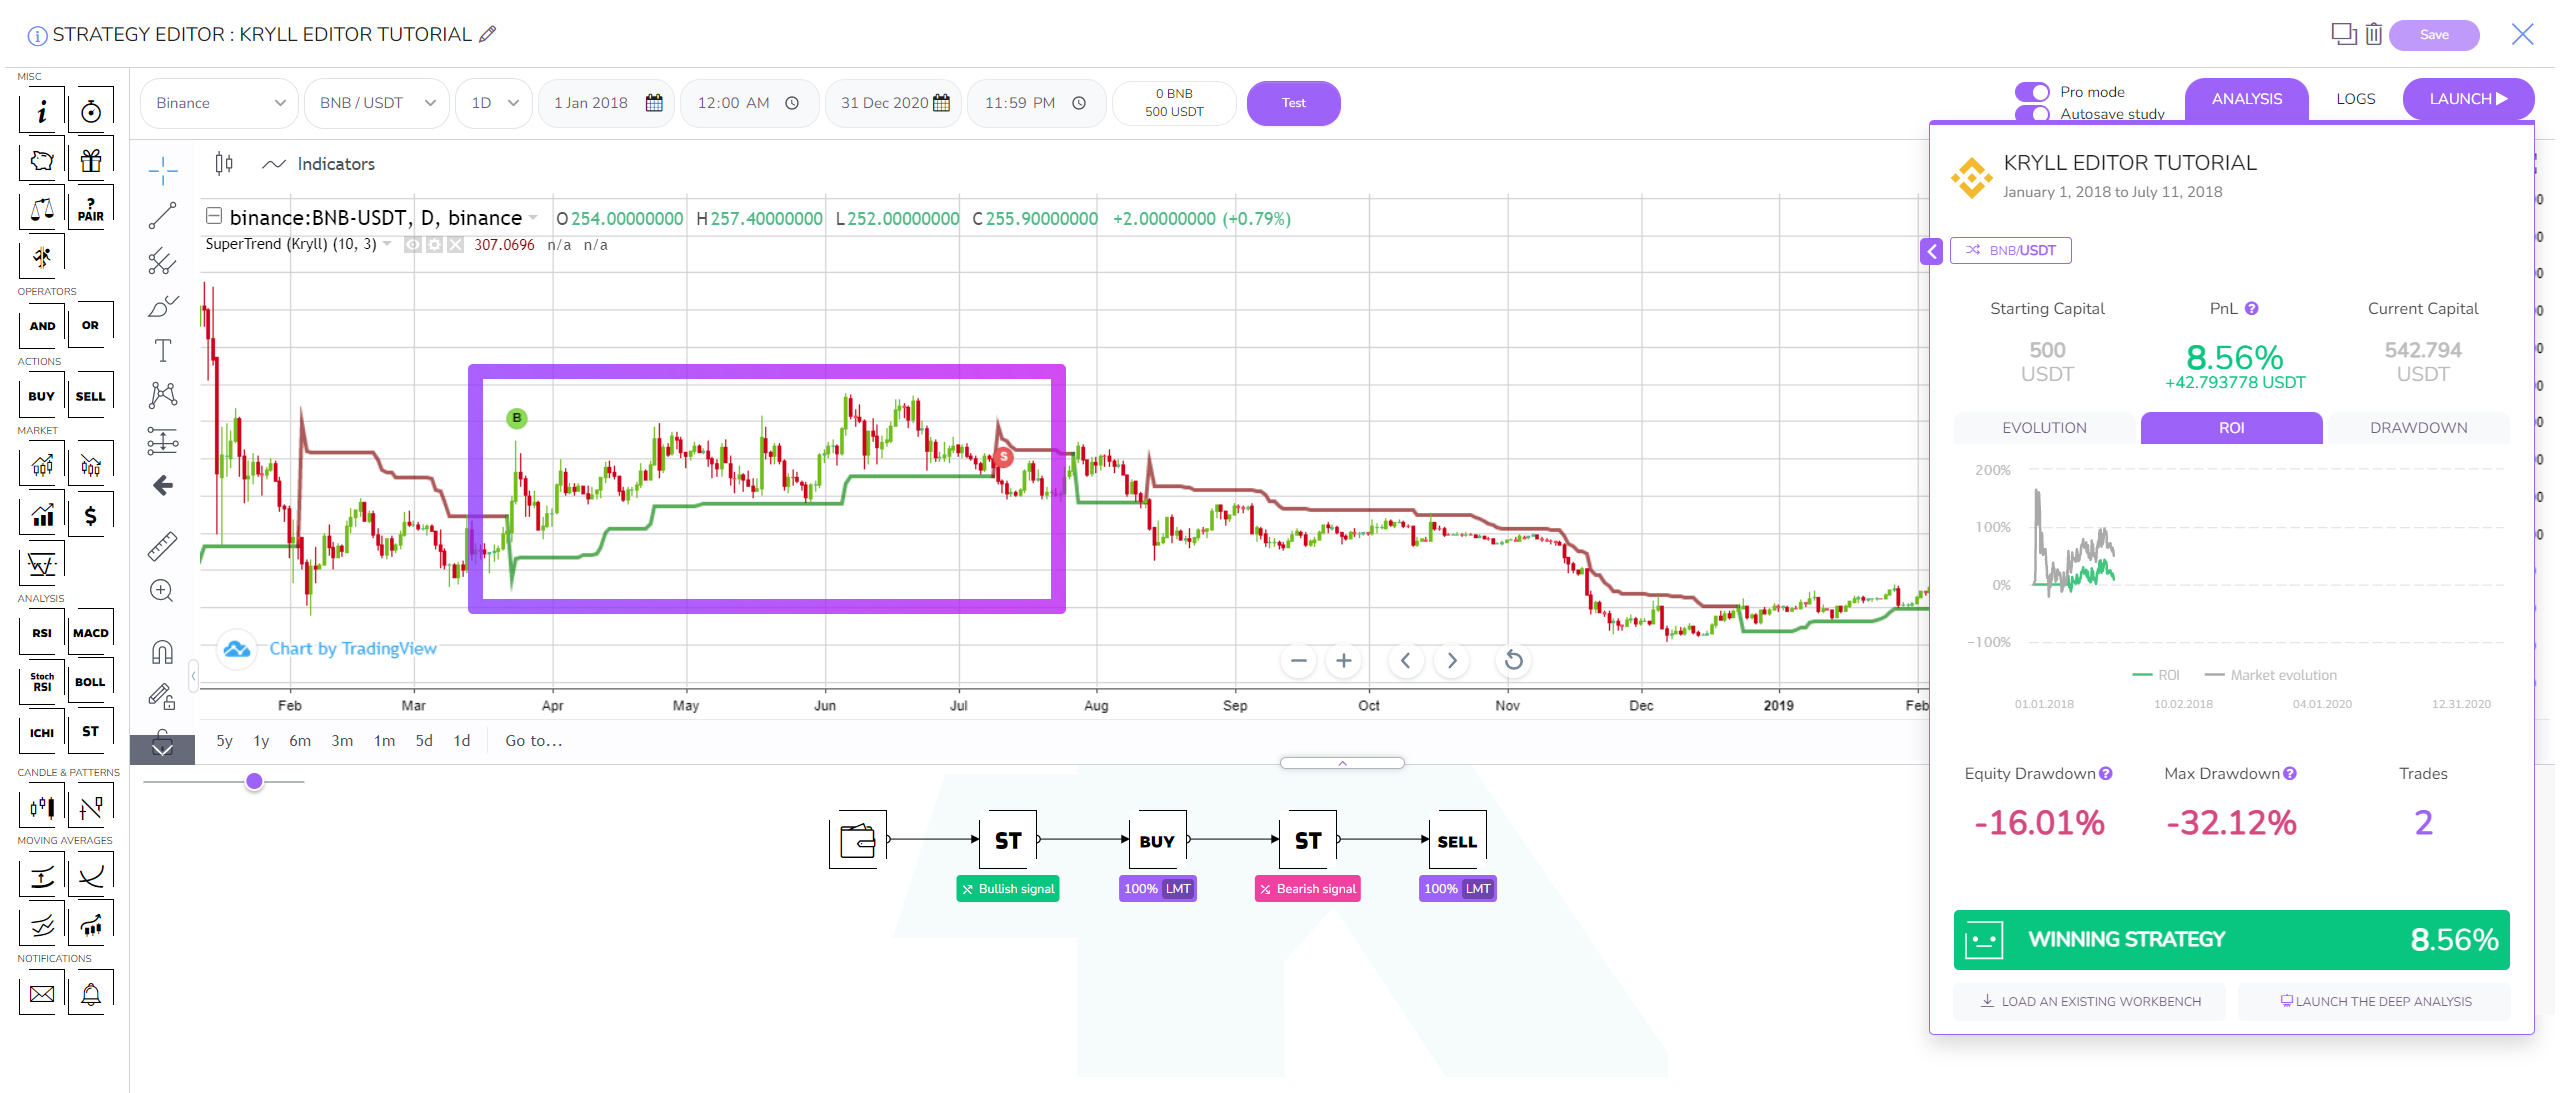
Now that our trading bot is ready, we can backtest it to see how it performs. We will choose the BNB/USDT pair on the Binance exchange over the period of 1 January 2018 to 31 December 2020. Once this is done, you will just have to click on the "Test" button to start the simulation:

The analysis window opens and a loading bar appears to show you the progress of the backtest. The duration of the backtest may vary depending on a number of factors, including the time period, the time units used and the complexity of the strategy.

Once you have completed your backtest, you will probably have noticed that your strategy has only made one buy order followed by one sell order and then stopped. This is due to a very simple reason, the behavior flow ends at our sell block.
This is quite normal because we have created a "one shot" bot. It stops once the last block has been executed. To solve this problem, we simply need to create a loop and there are two different ways to do this:
1 - Create a loop with links.
This is the easiest way to create a loop but it can quickly make the organisation of the blocks in your strategy complicated if you have more blocks.
To do this, simply link your last block to your wallet block:
2 - Create a loop with the GoTo block.
This block allows you to redirect the flow without displaying any links. It will probably be your best ally throughout your strategy creation journey, even more so if you are an organisation freak.
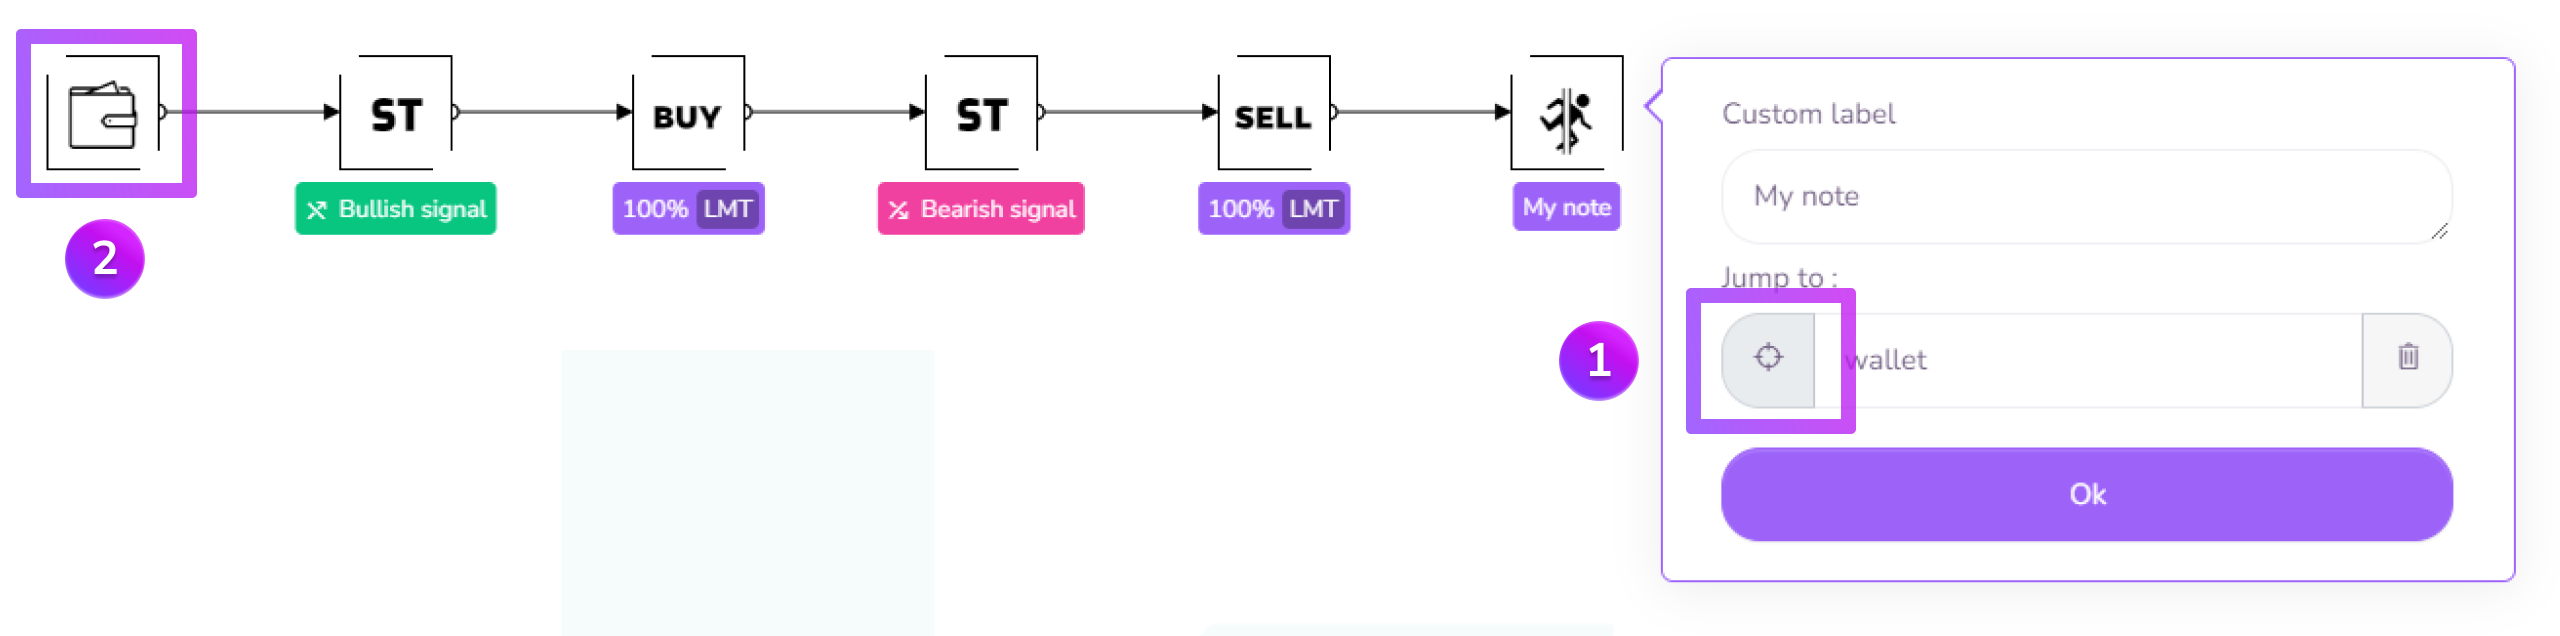
Here's how to add it to our trading bot:
Add the GoTo block in the editing area, click on the first button shown in the image and select the block you want the flow to be redirected to, in this case the Wallet block. Once this is done, close the window and link the sell block to the GoTo block we have just placed and set up to form the loop.
Please note that it is possible to view the GoTo block links by pressing the [G] key on your keyboard, this will quickly show you where you've linked your block and is a handy shortcut when you use this block repeatedly:

We can now run a backtest following the change we have just made:
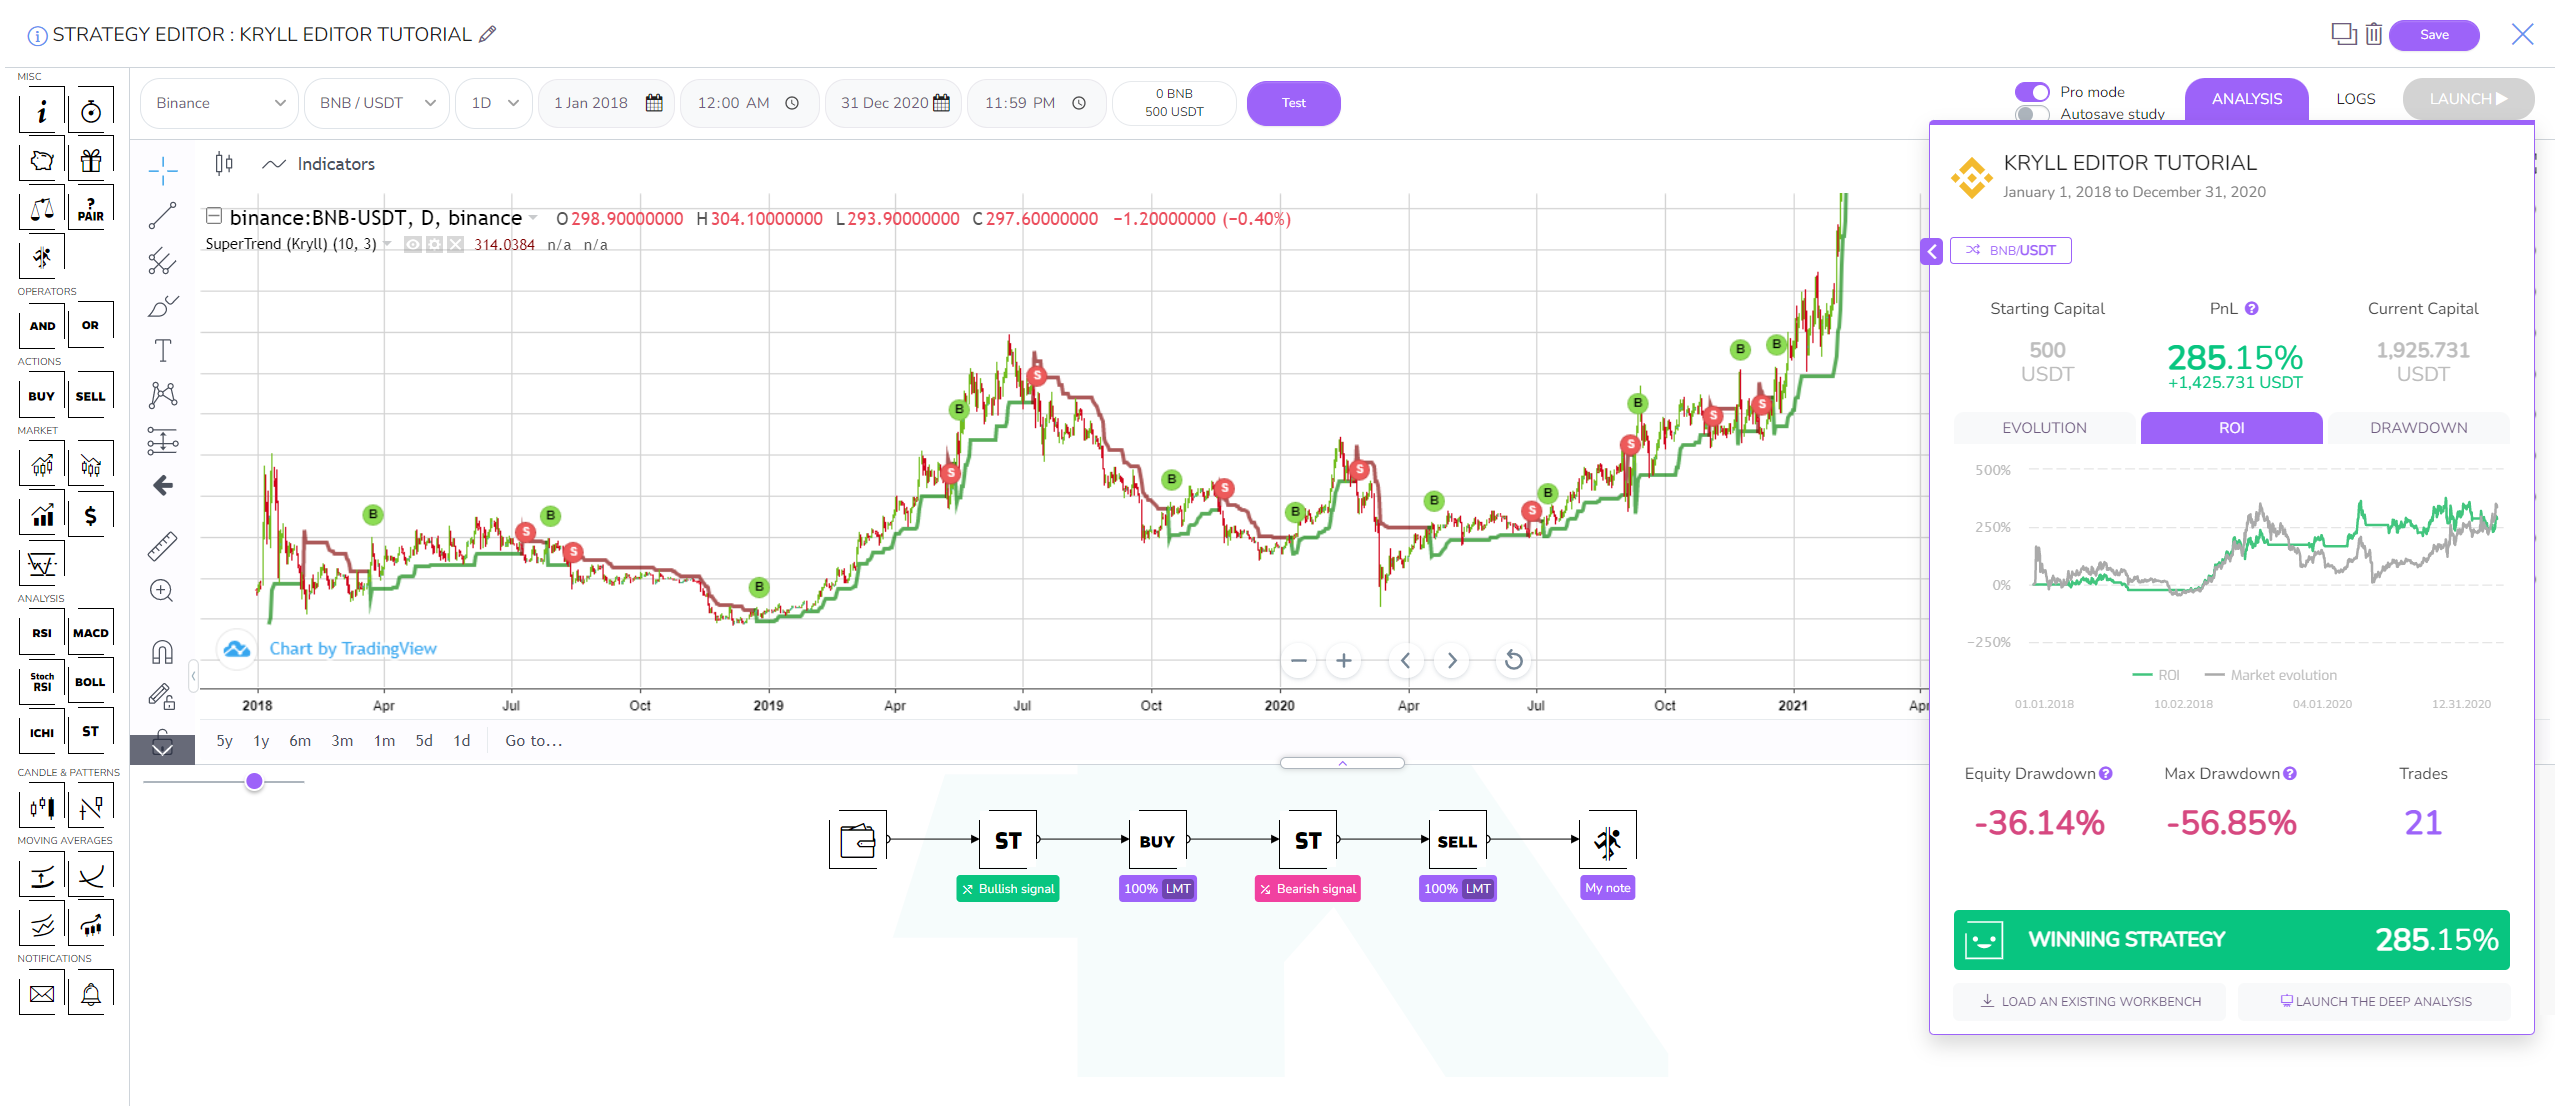
Our strategy is now running in a loop and has stopped at the requested date. Once the backtest is complete, you can see the results in the analysis window on the right including percentage profits, number of trades, max drawdown and equity drawdown.
You can now go to part 3 from the summary below to learn how to improve the strategy base we have just created.
Summary
Use this summary if you have missed the previous parts or want to move on to the next part
Kryll Editor: User Guide - Part 1
Kryll Editor: User Guide - Part 2 (you are here)
Kryll Editor: User Guide - Part 3
Kryll Editor: User Guide - Part 4 (coming soon)

Happy Trading,
Website: https://kryll.io
Twitter: @Kryll_io
Telegram EN: https://t.me/kryll_io
Telegram FR: https://t.me/kryll_fr
Telegram ES: https://t.me/kryll_es
Discord: https://discord.gg/PDcHd8K
Reddit: https://reddit.com/r/Kryll_io
Facebook: https://www.facebook.com/kryll.io
Support: support@kryll.io