If you're here, it's because you want to run KryllOS 24/7, which means you need a VPS. Good news: you're in the right place, and you don't need any technical skills to follow this guide.
We'll cover the whole journey, from A to Z:
- Ordering your VPS on Netcup
- Paying for your order from your customer account
- Accessing your server's admin panel
- Grabbing your IP address and root password to launch the KryllOS install
What is a VPS?
A VPS (Virtual Private Server) is a small computer that runs around the clock in a datacenter, which you rent for a few euros a month. It's what runs your strategies while you sleep. For this guide, we picked Netcup: a European host known for its excellent price-to-performance ratio, perfect for KryllOS.
Which Netcup VPS plan should you choose? (and what it really costs)
Netcup offers several tiers. For KryllOS, we recommend at least 2 vCPU and 4 GB of RAM. The smallest plan is plenty to get started; if you're planning to run lots of strategies in parallel or do a ton of backtests, aim for the next plan up.
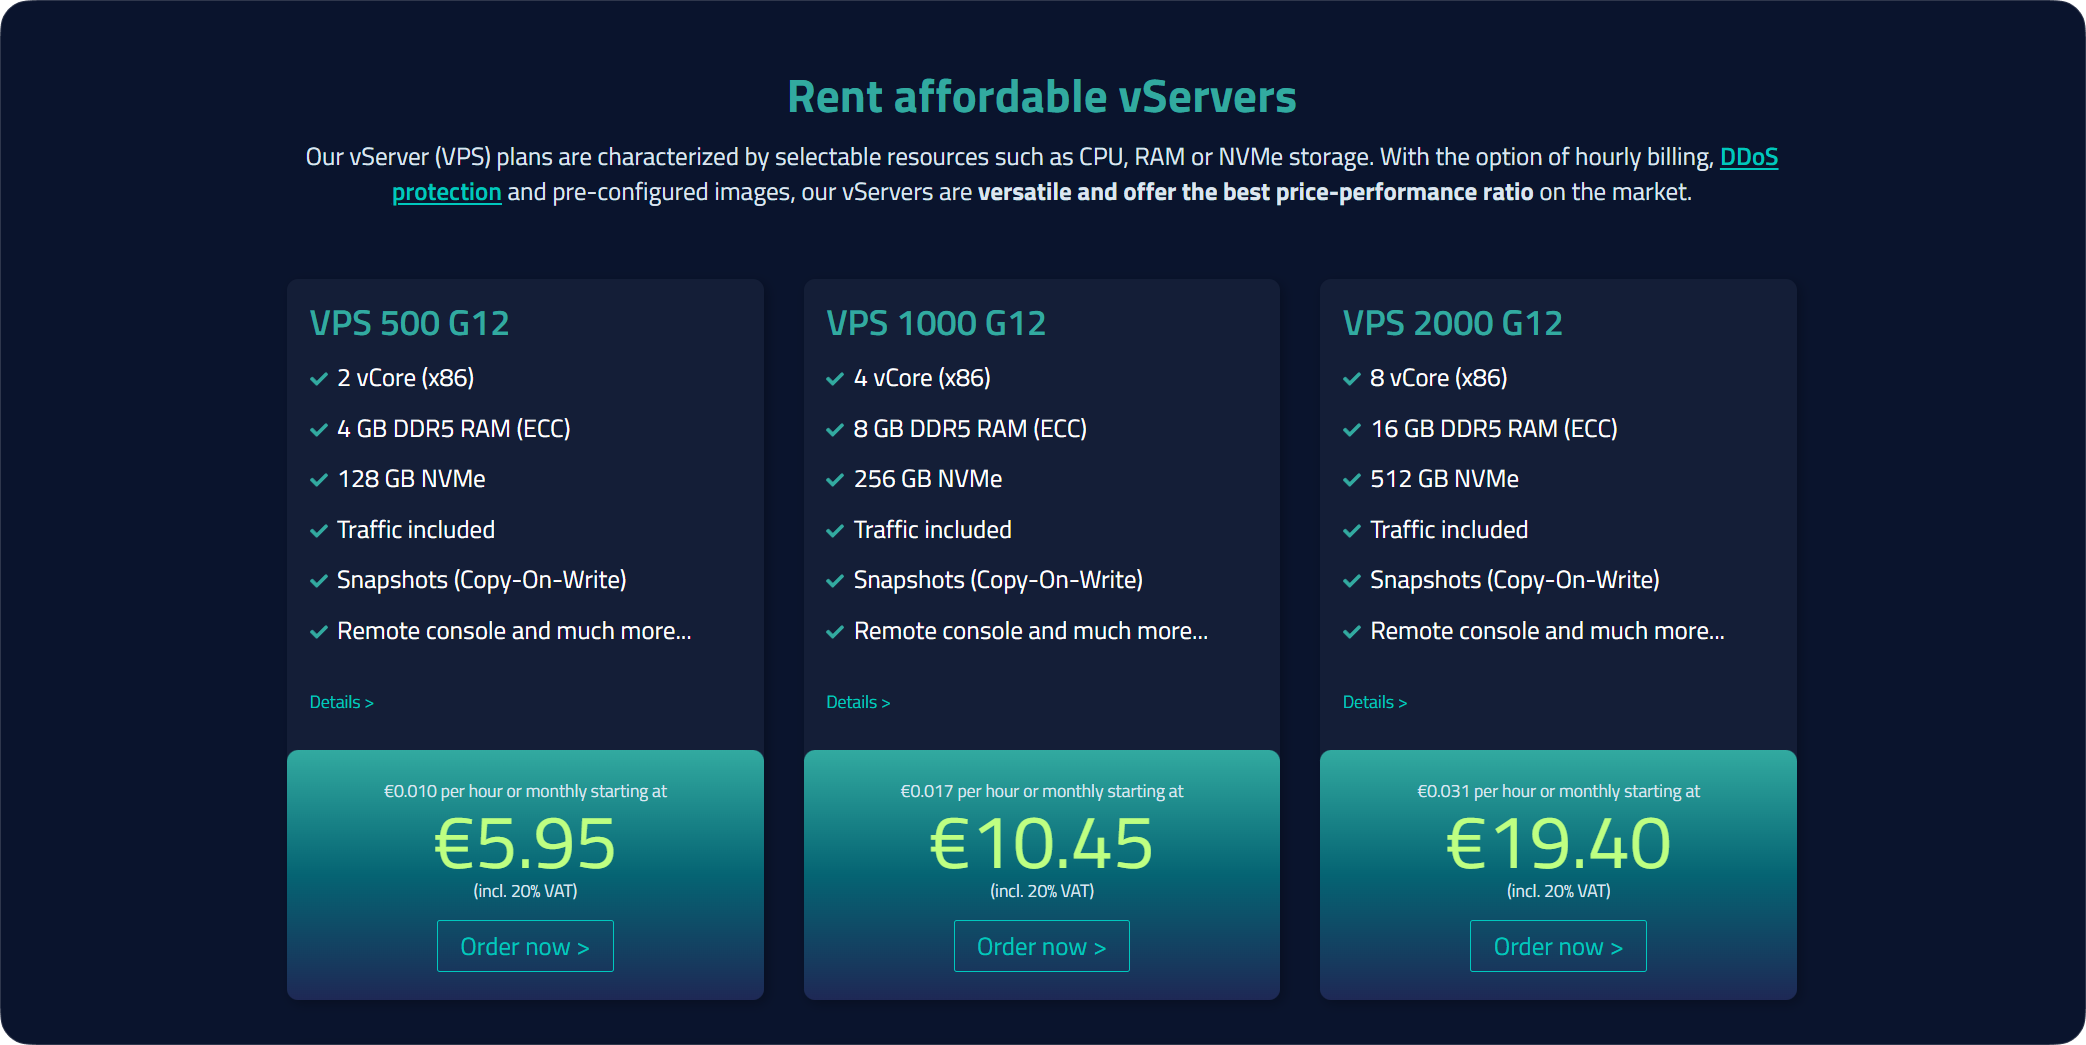
Our advice: start with the VPS 500 G12. It's the ideal plan to get going on KryllOS: cheap, and more than enough. You can always move up to a bigger plan later if you need to.
Part 1: Ordering your VPS
Step 1: Choose your plan
To get started, head over to Netcup's website to browse their VPS plans. You'll see the three plans shown just above. Under the VPS 500 G12, click the "Order now" button.
Step 2: Configure your VPS
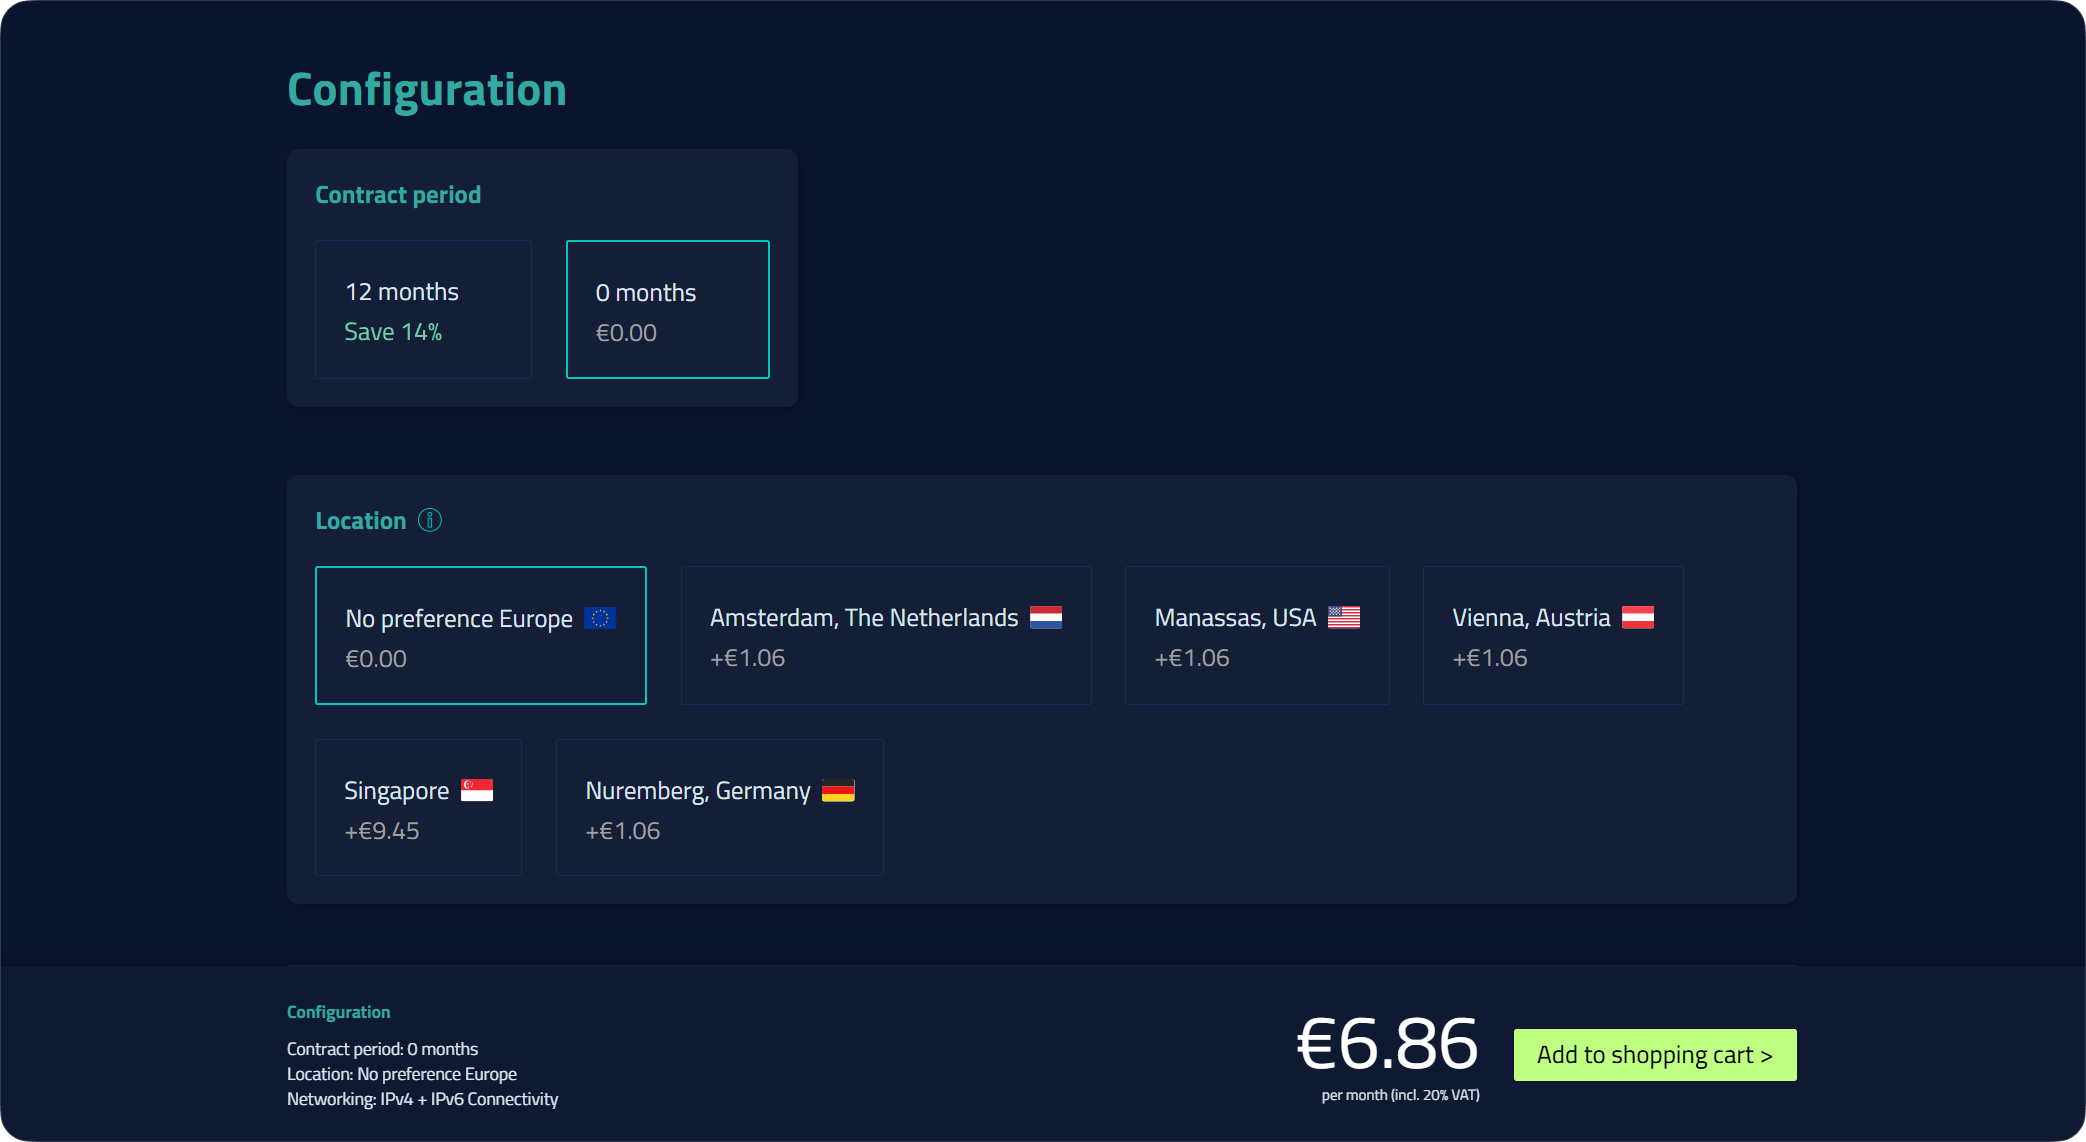
You'll land on the configuration screen. Two settings matter here.
The commitment length :
- "0 months" (no commitment): you pay monthly and can cancel whenever you want. Perfect for testing KryllOS at your own pace.
- "12 months, Save 14%": like most hosts, committing for a year lowers your monthly cost. The right call if you already know you're staying. (Small bonus: if you go with an annual plan, we may be able to give you a promo code. Feel free to join our Telegram group to ask for one.)
The location : we recommend leaving "No preference Europe," shown at +€0.00. The other cities (Amsterdam, Vienna, Nuremberg, and so on) add a small surcharge, and Singapore is noticeably pricier. With "No preference Europe," your server will be placed in Europe with no extra charge.
Once your config is set, click "Add to shopping cart."
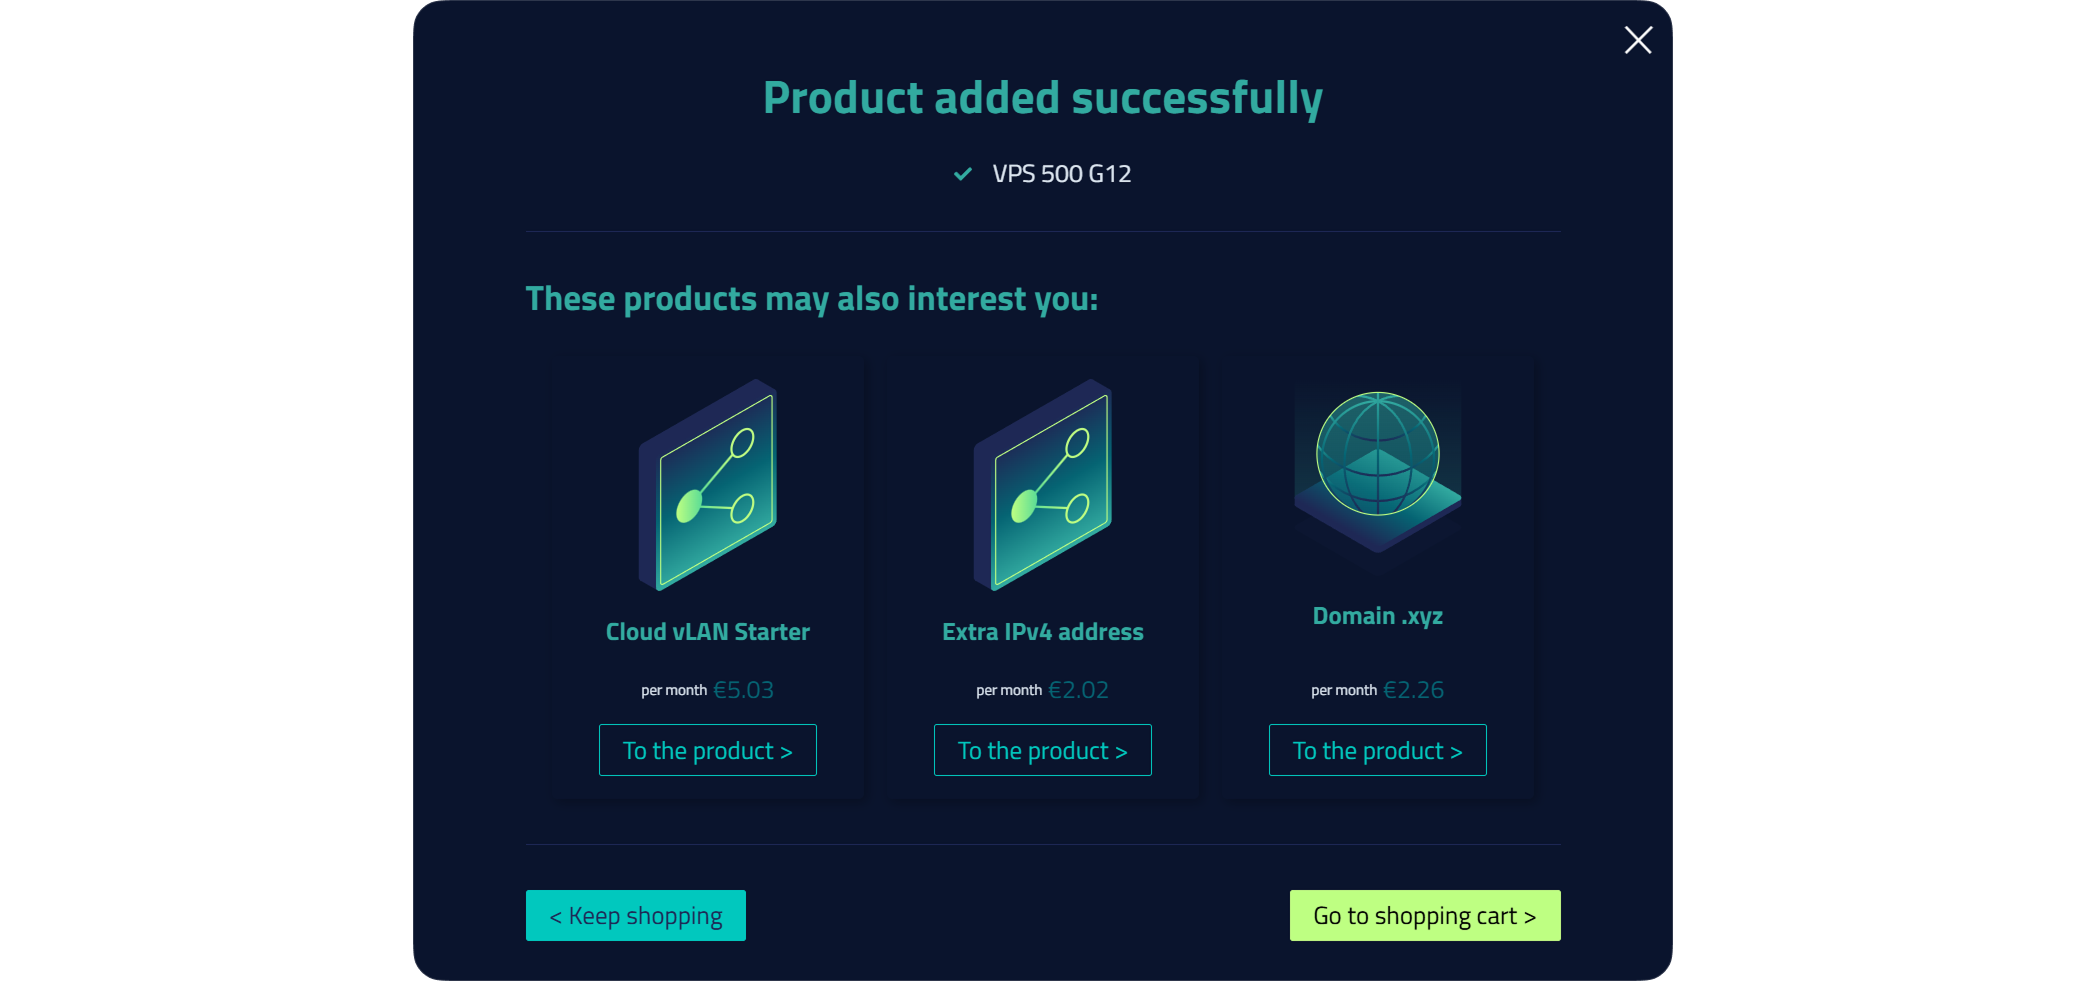
Step 3: Skip the add-ons
A window confirms your VPS was added, and Netcup takes the chance to offer you extra options (vLAN, an additional IPv4, a domain name, and so on). You don't need any of them for KryllOS.
Just click "Go to shopping cart."
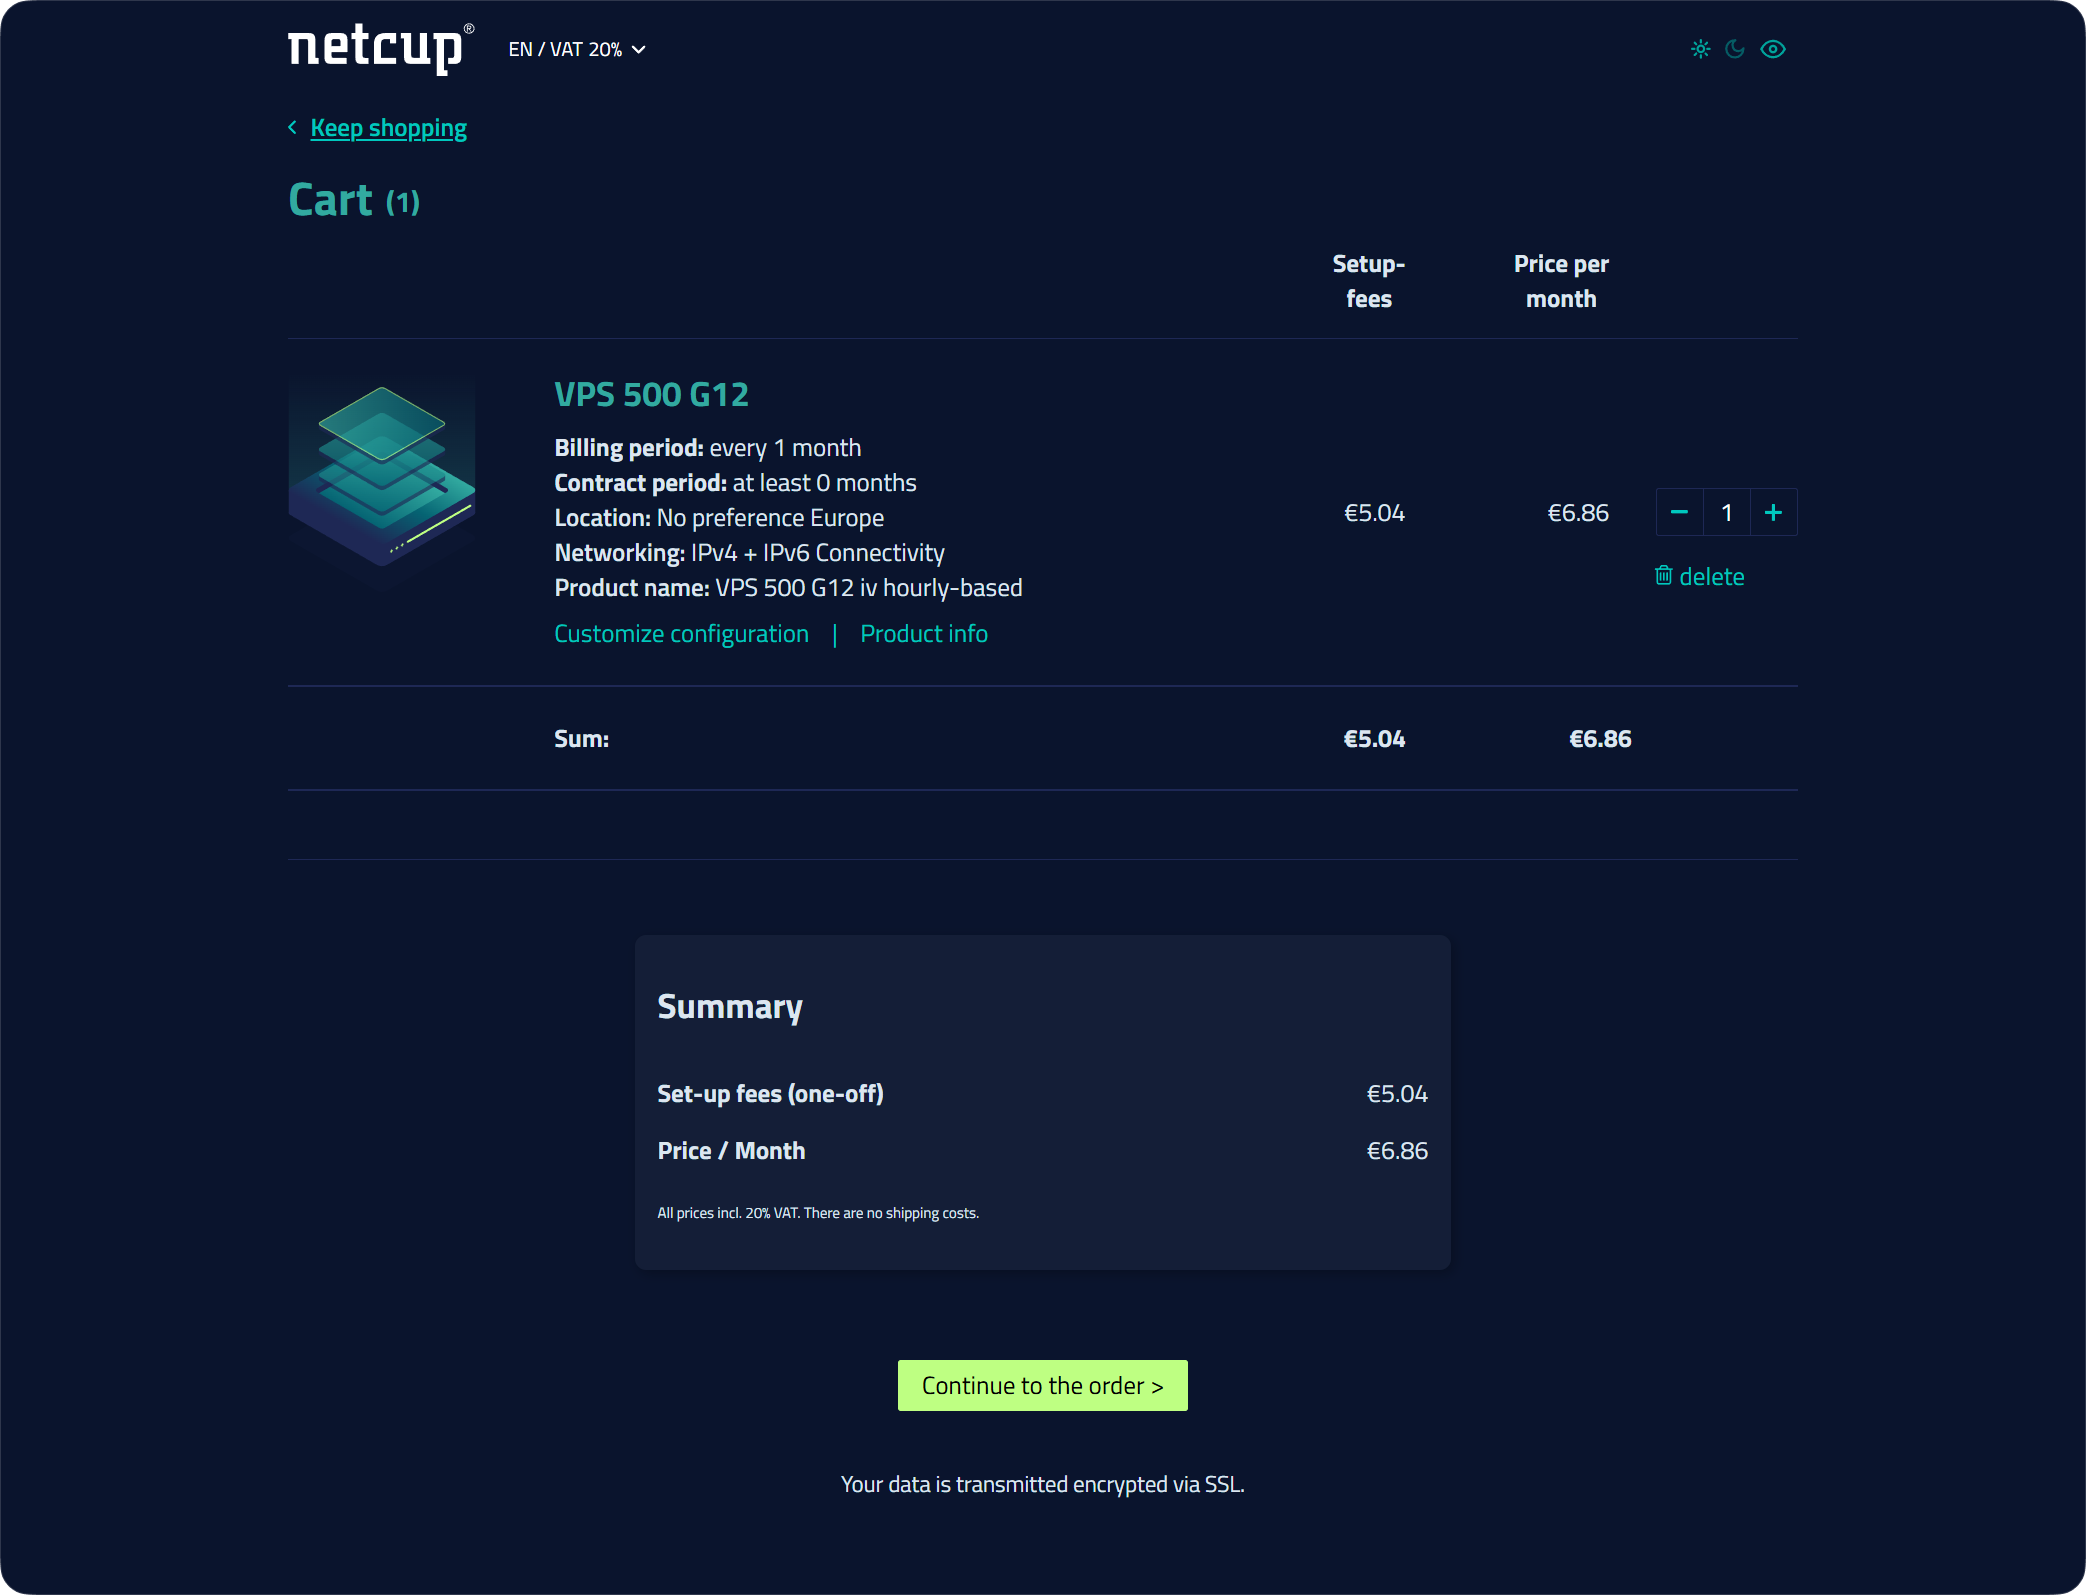
Step 4: Check your cart
Your cart shows your VPS 500 G12 with its price. You can see the breakdown: one-time setup fees and the monthly price.
Click "Continue to the order."
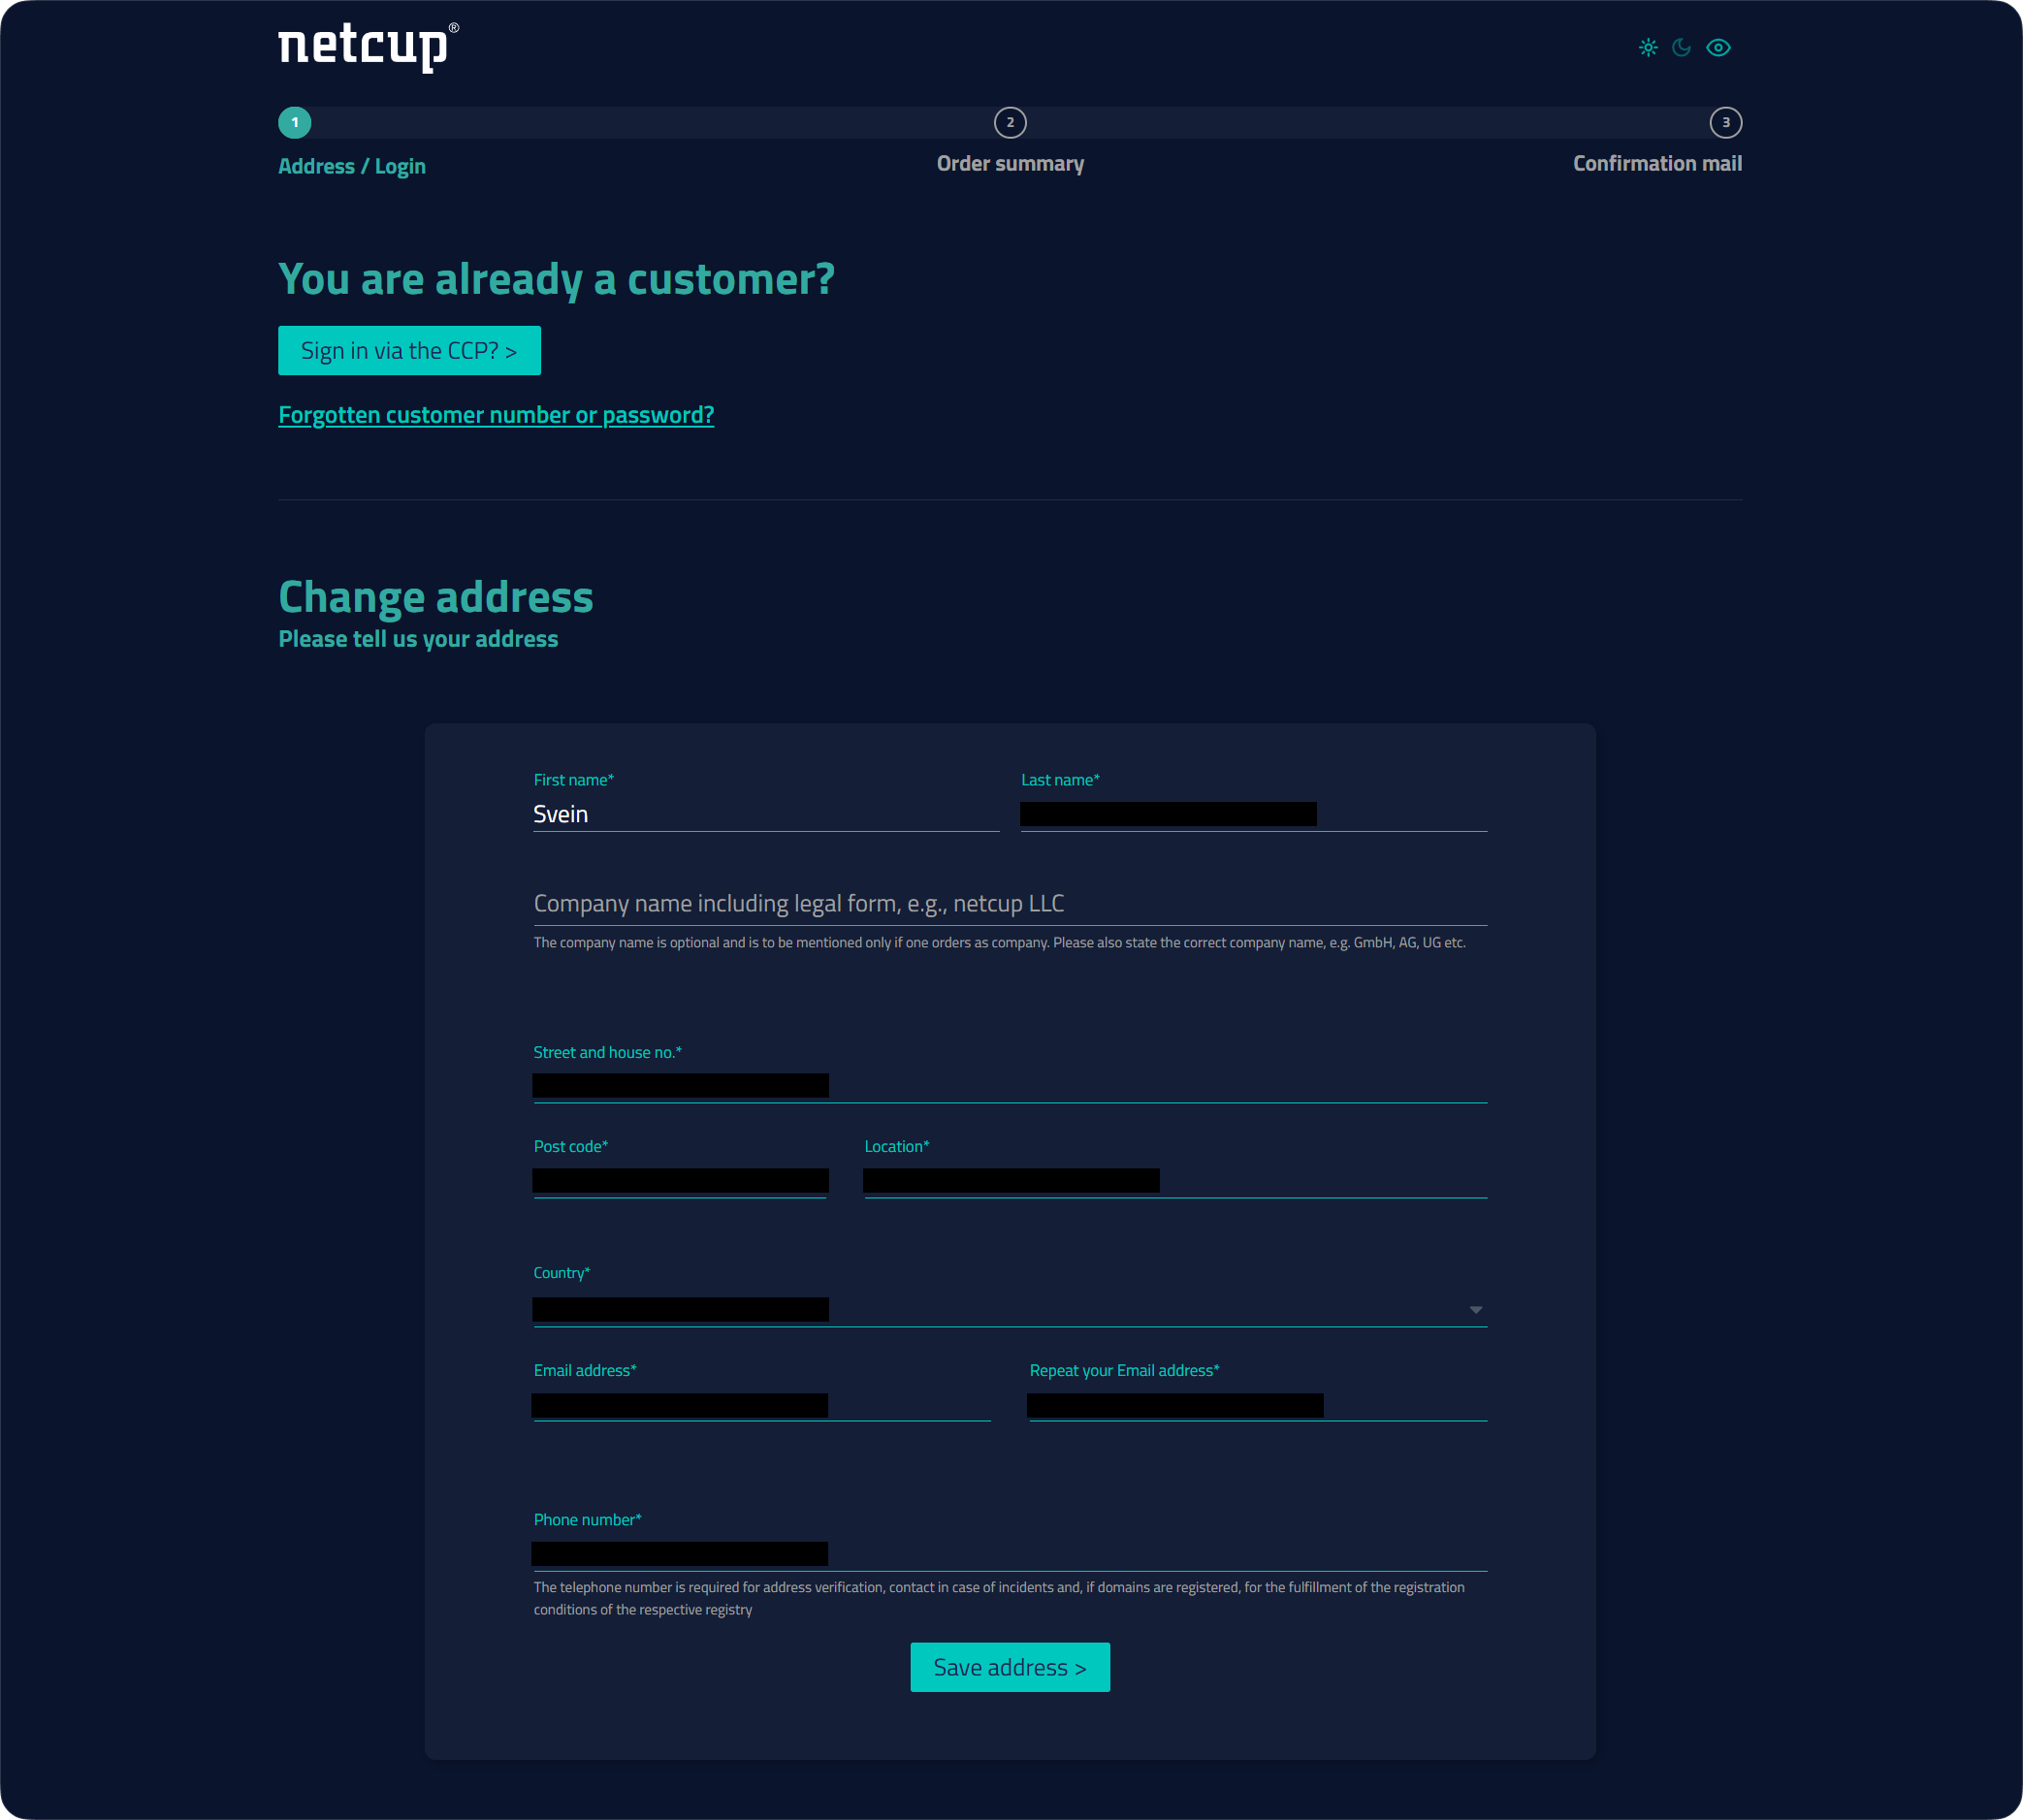
Step 5: Enter your billing address
This is the most important step to fill in correctly. Netcup verifies addresses (that's actually why a phone number is required). So give your real, complete address, exactly as it appears on an official document: a made-up address can block or delay your order.
Important: if you don't have a street number, just add a 0 at the start (e.g., 0 Your Addresse). Without a number, your order may not be accepted.
Once everything is filled in, click "Save address."
Step 6: Confirm the save
A window confirms your address was saved. Click "Go to order."

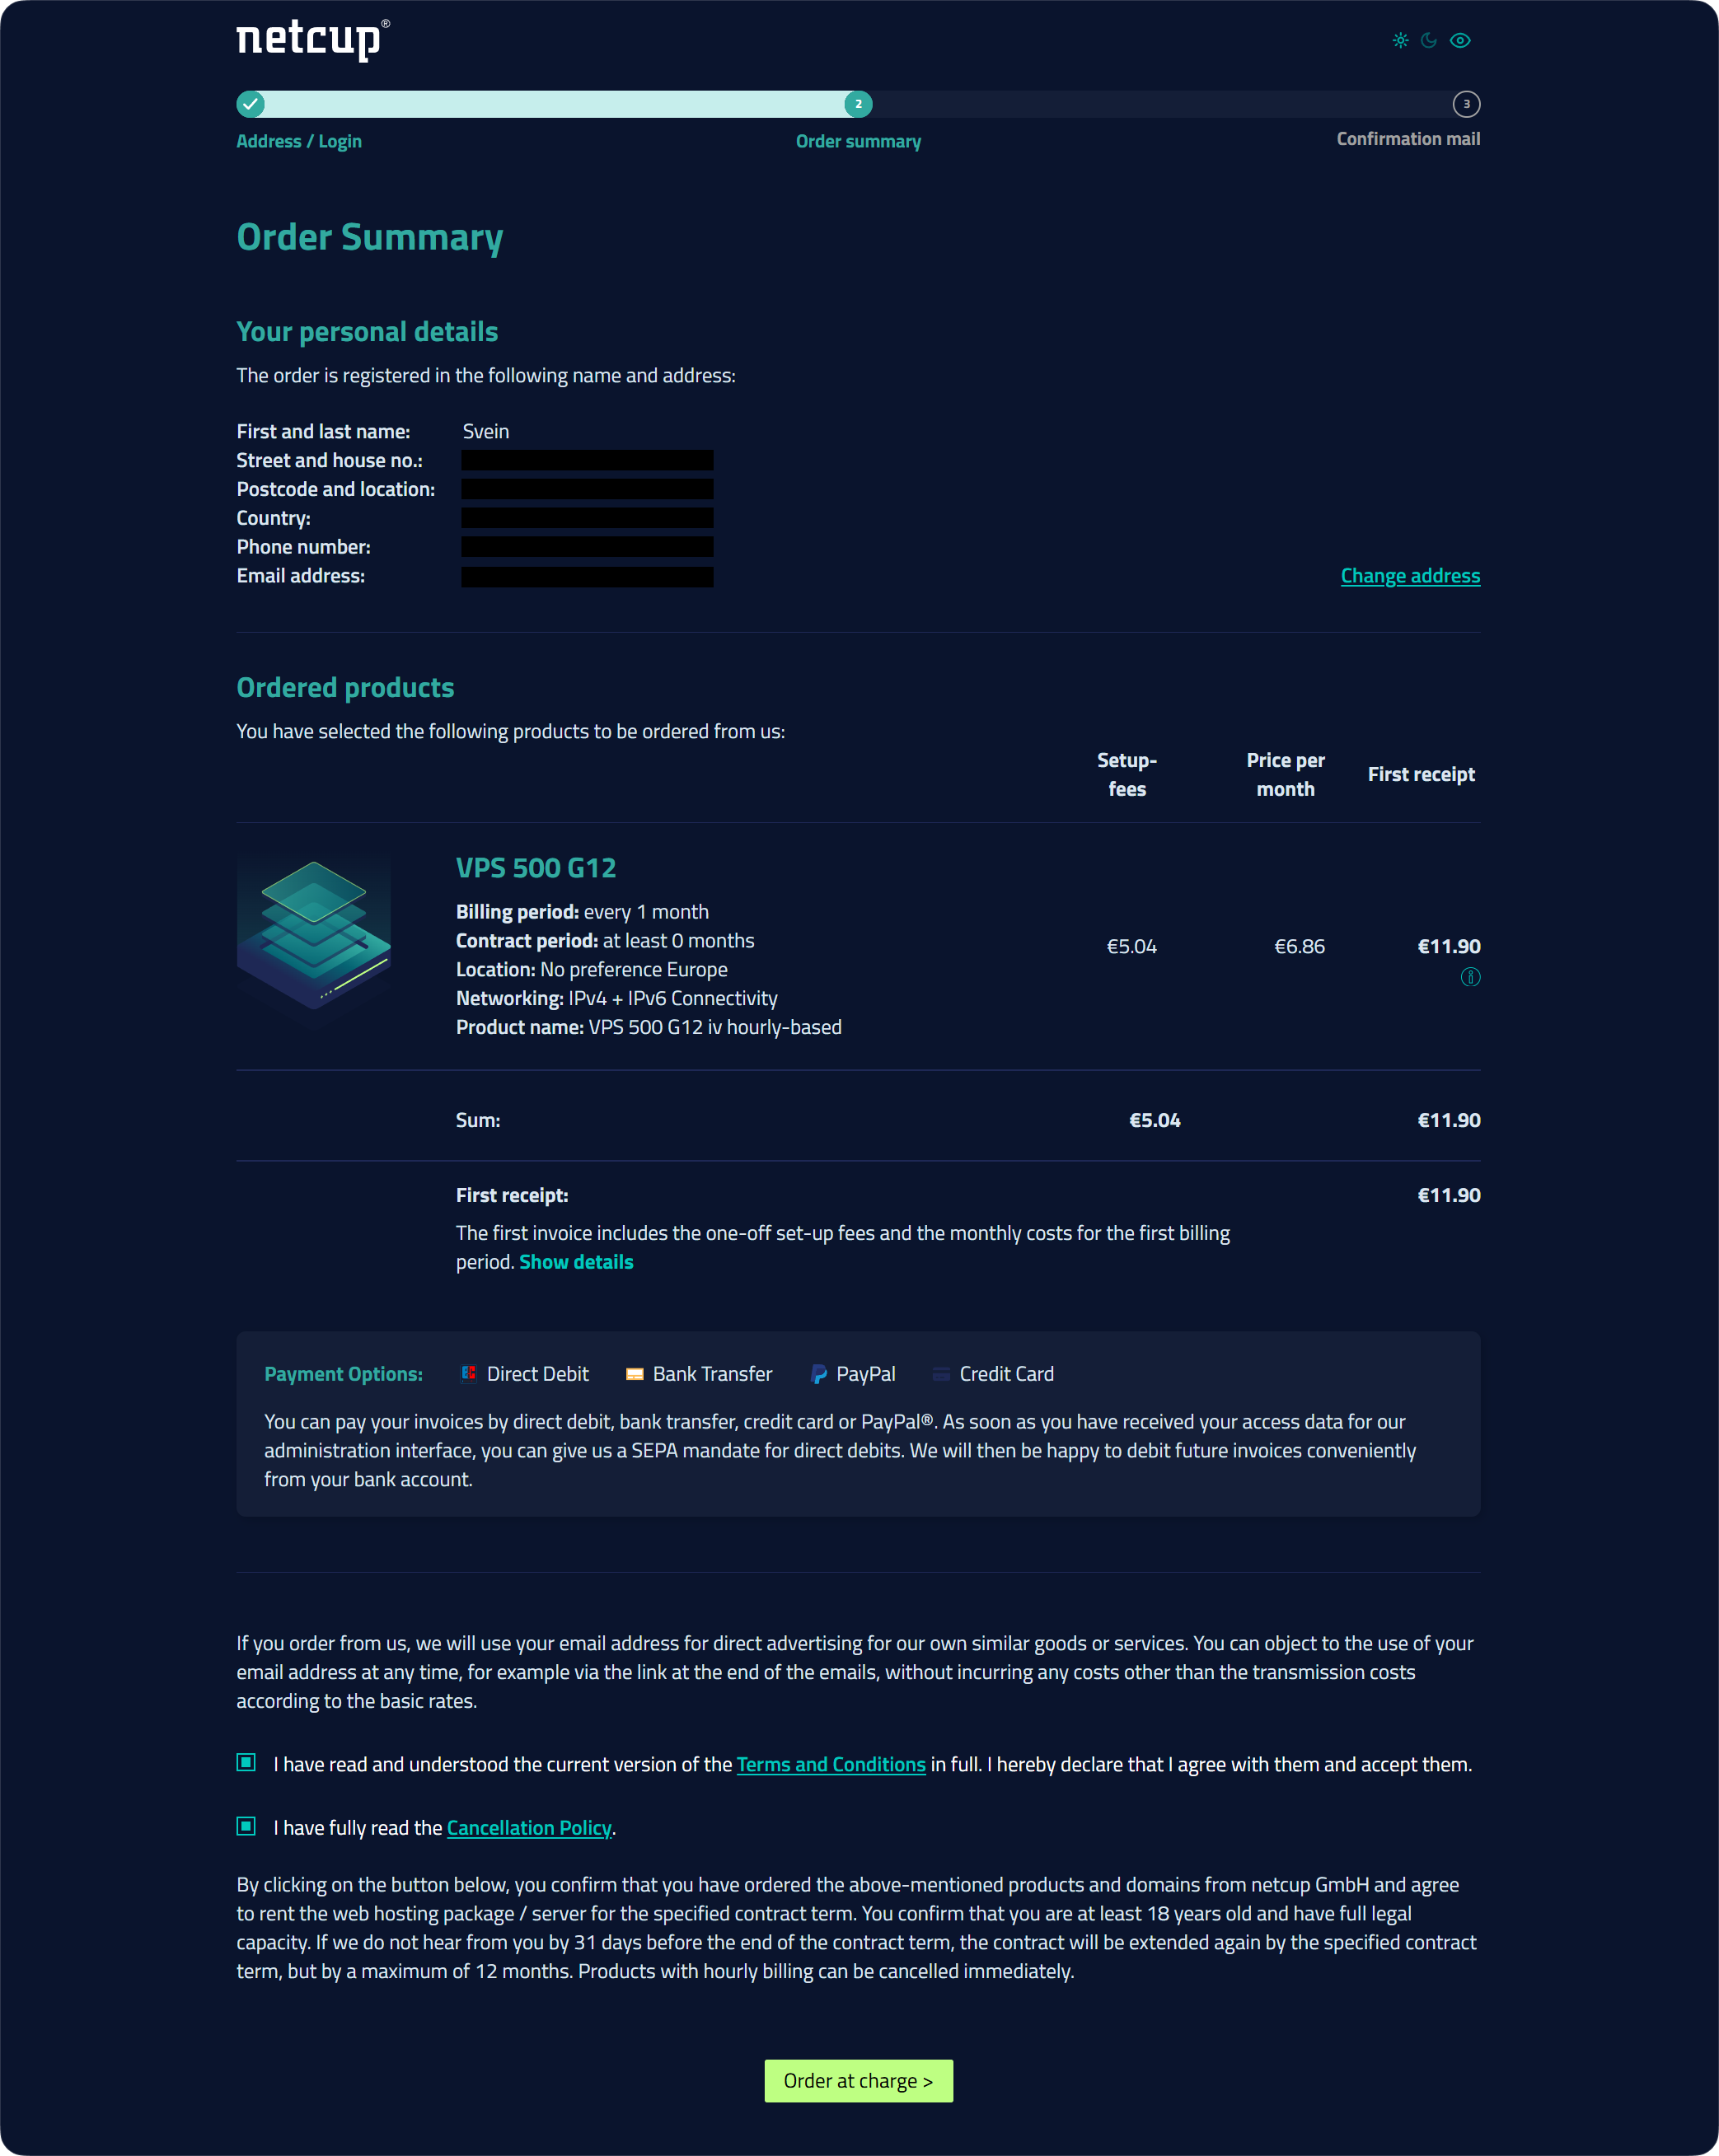
Step 7: Review the summary
You'll arrive at the order summary. Take 30 seconds to double-check your info: identity, address, and the product ordered (your VPS 500 G12).
You'll notice a "First receipt" line that's a bit higher than the monthly price: that's normal, it includes the one-time setup fees on top of the first month.
Before confirming, tick the two boxes at the bottom, then click "Order at charge."
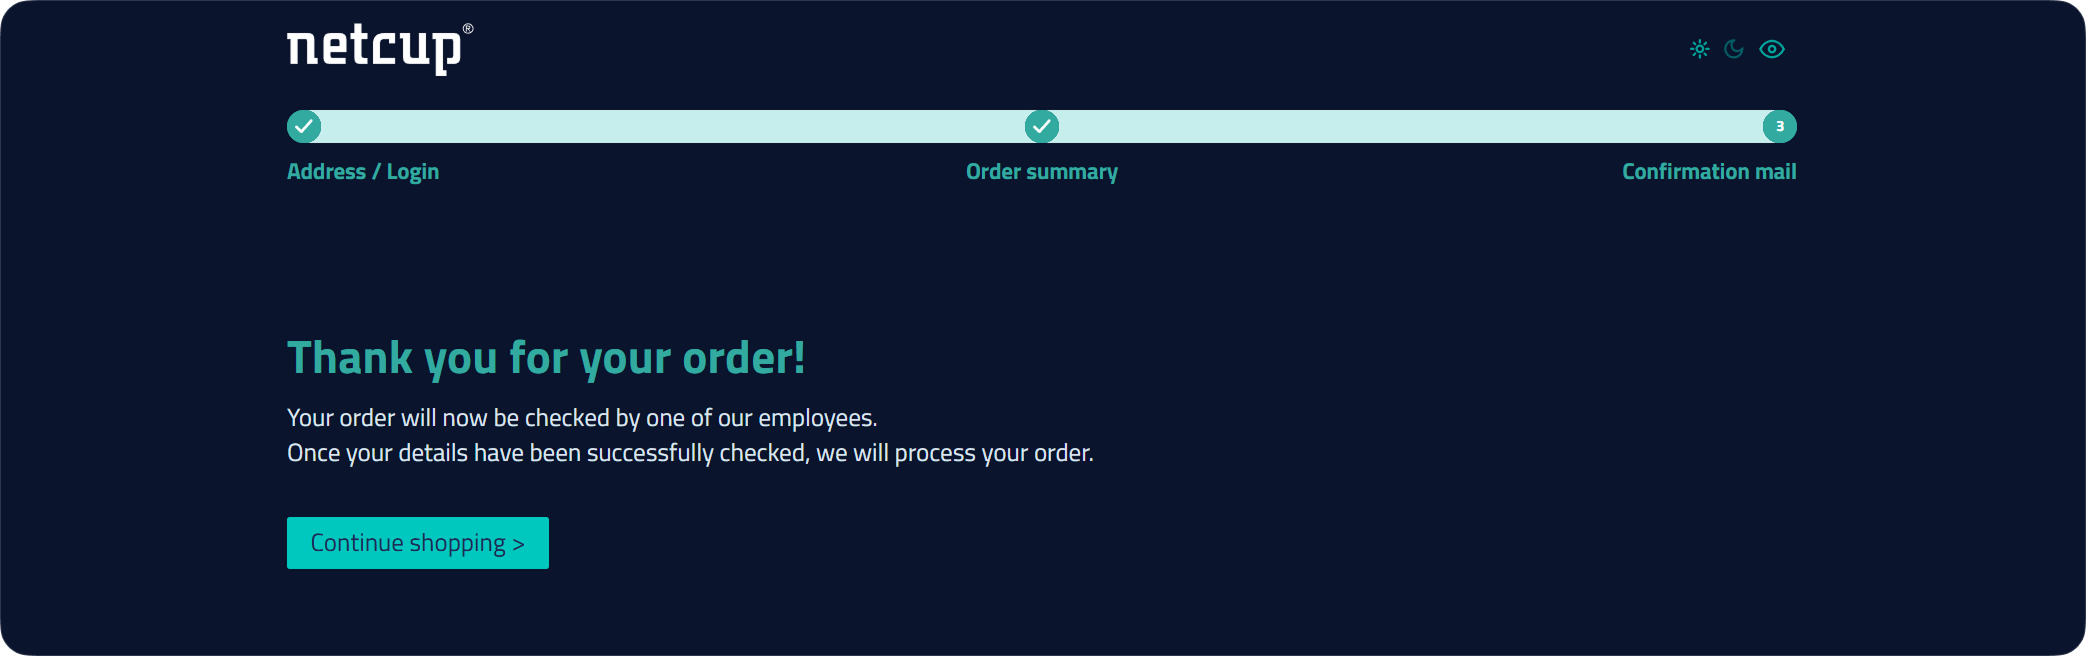
Step 8: Order confirmed
A "Thank you for your order!" message appears: your order is registered.
Important point: with Netcup, you don't pay right at checkout. Here's how it works: Netcup will email you your customer account credentials, and it's from that account that you'll pay your invoice. Once the payment goes through, you'll get access to your VPS.
So let's move on to Part 2: payment.
Part 2: Paying for your order from your customer account
Step 1: Get your username and password
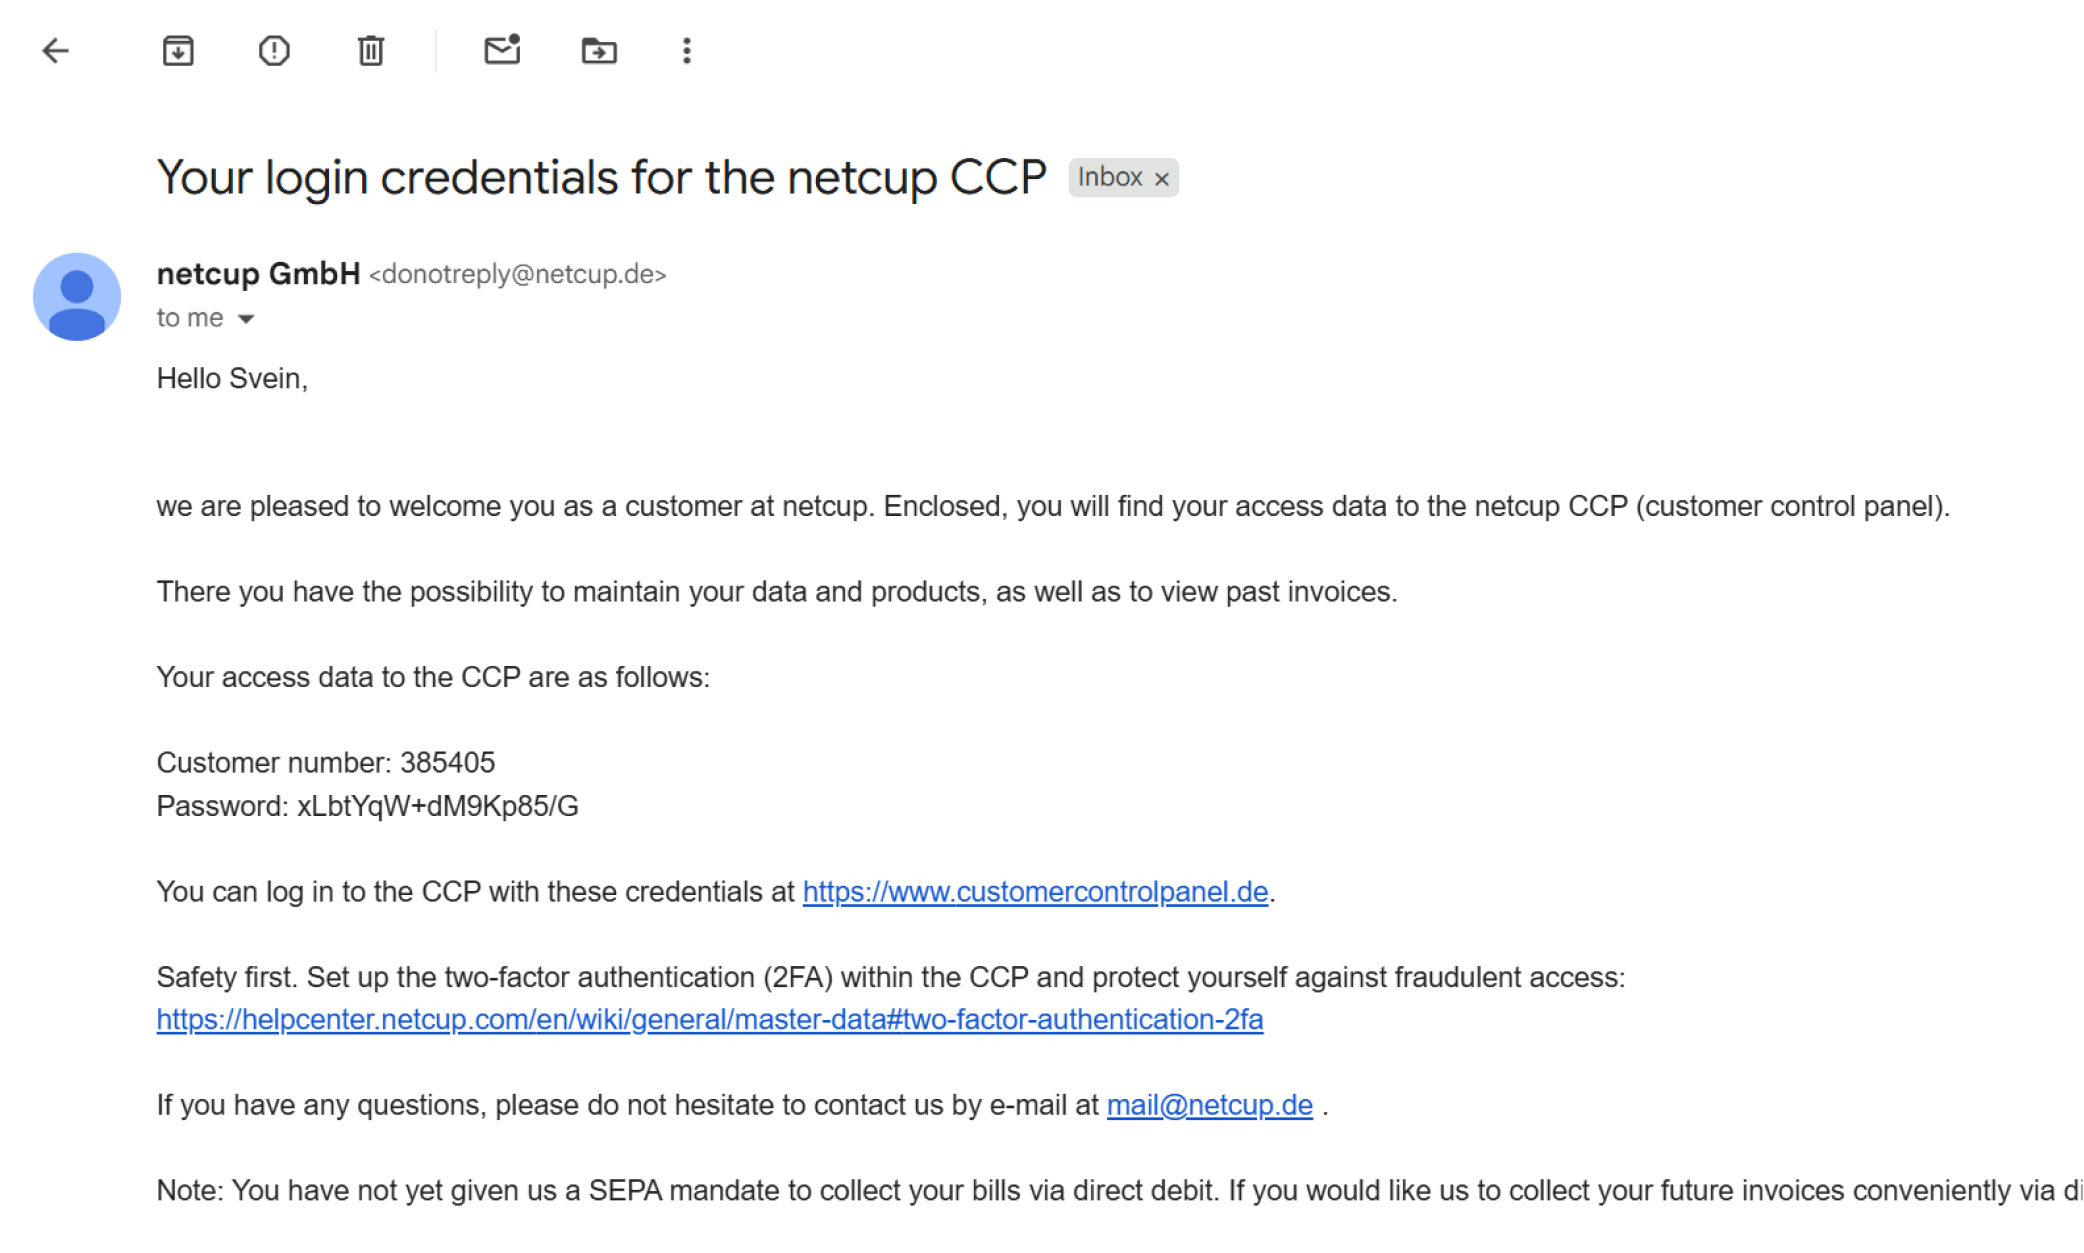
Keep an eye on your inbox. You'll get two emails:
- A first email about payment that you can ignore.
- Right after, an email titled "Your login credentials for the netcup CCP" → that's the one that matters. Keep it handy: it holds your access to the customer account (the Customer Control Panel, or CCP).
Inside, you'll find:
- Customer number → your customer number (your login ID)
- Password → your password
Step 2: Log in to your customer account
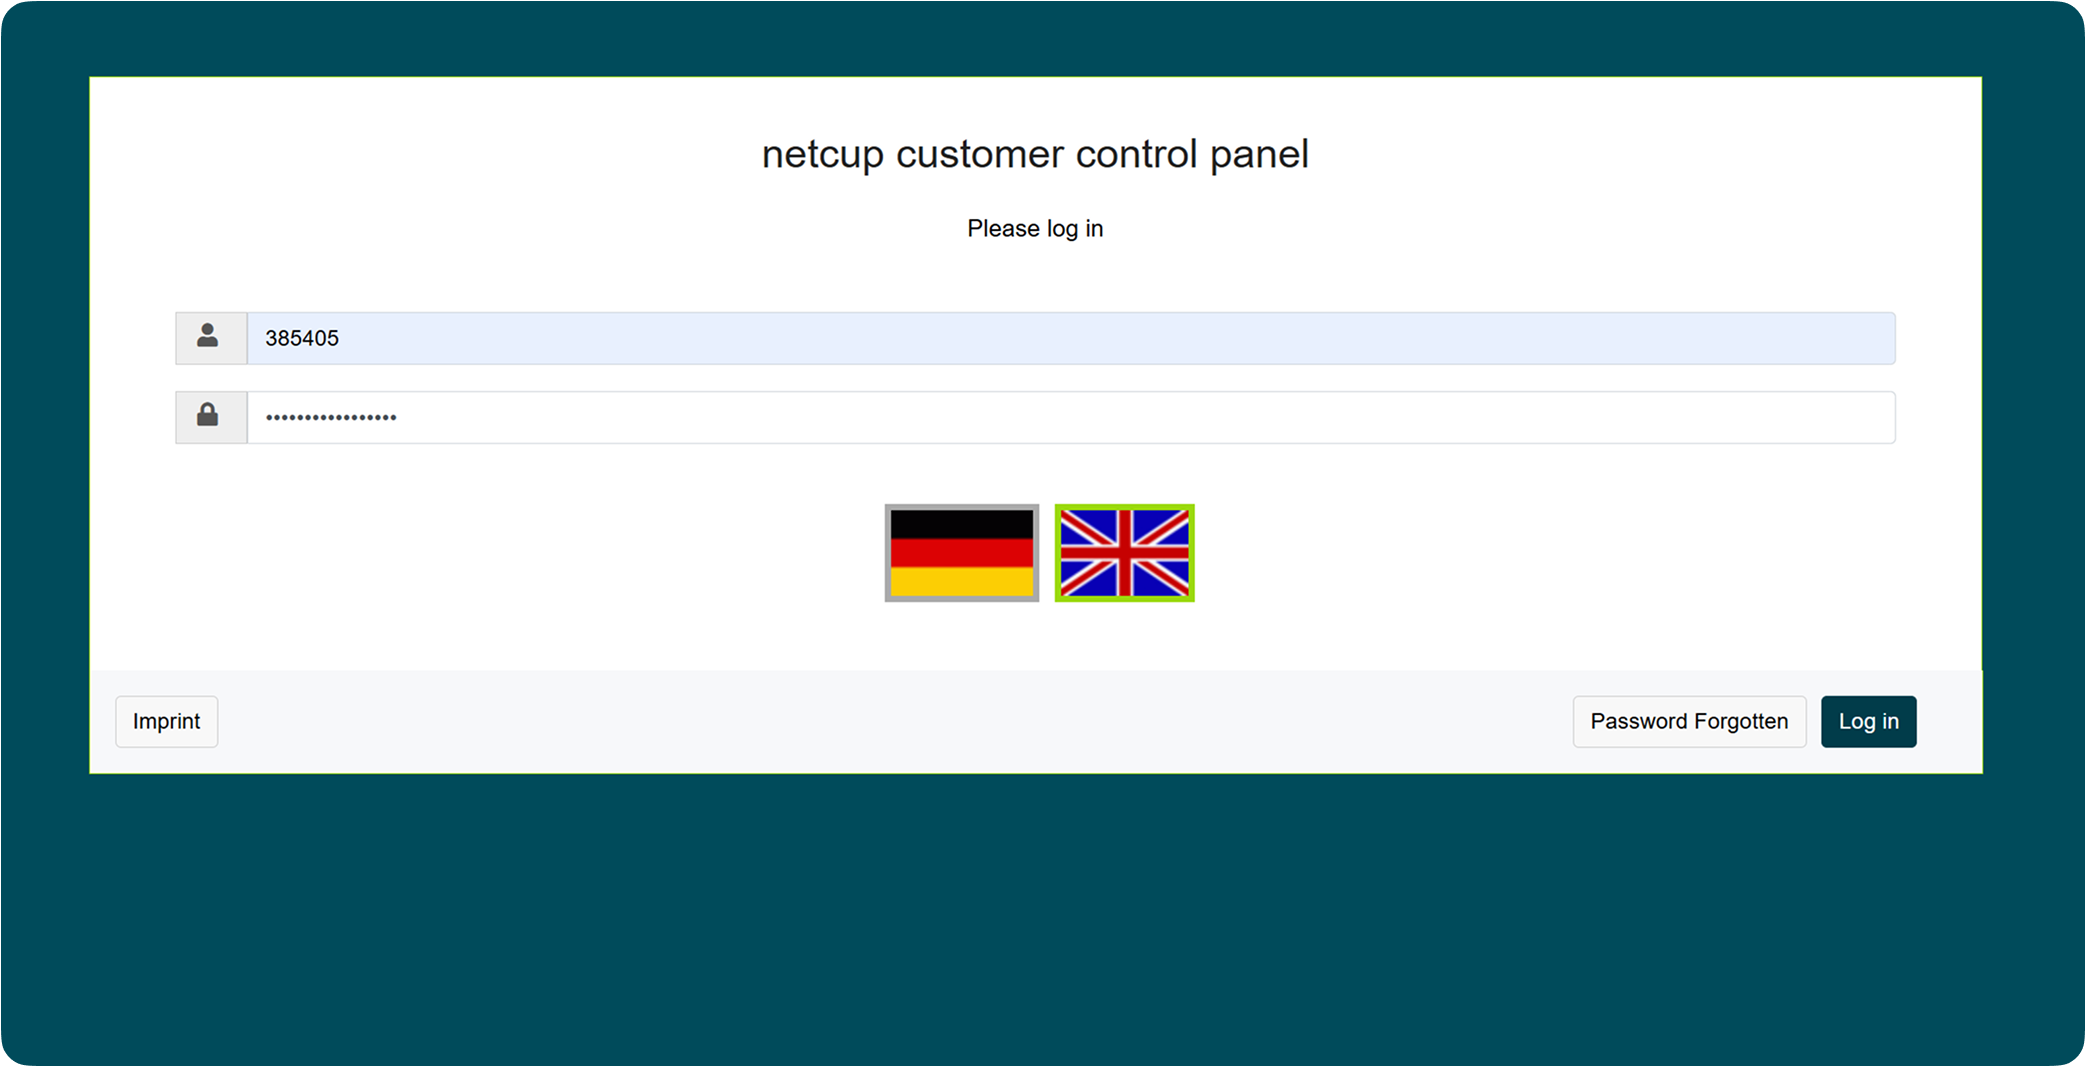
Go to Netcup's official customer account site: customercontrolpanel.de
Log in by copy-pasting the customer number and password you received by email, then click "Log in."
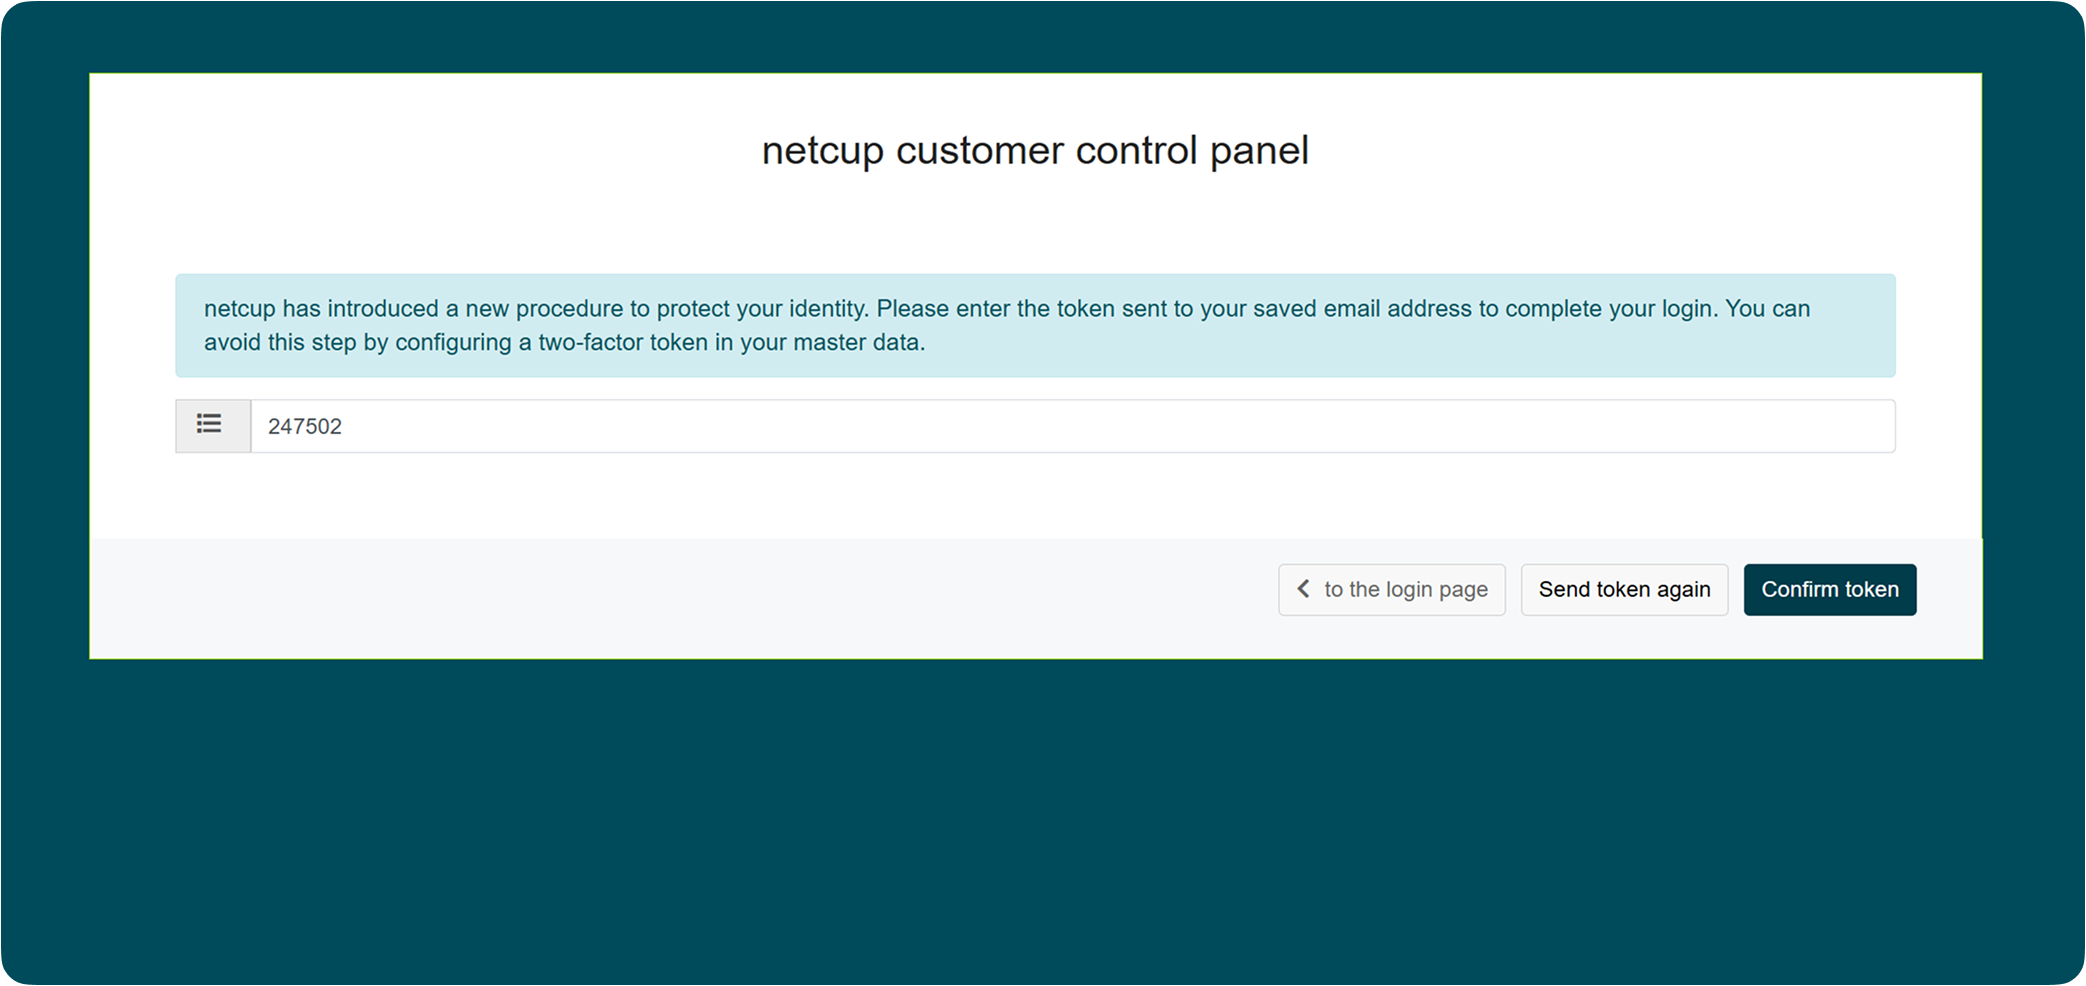
Step 3: Confirm the security code (2FA)
Netcup will ask for a code (token) sent to your email address: it's their two-factor authentication (2FA) system, enabled by default, an extra layer of security to protect your account.
Grab the code from your inbox, paste it, then click "Confirm token." Need a new code? Click "Send token again."
Step 4: Pay your invoice
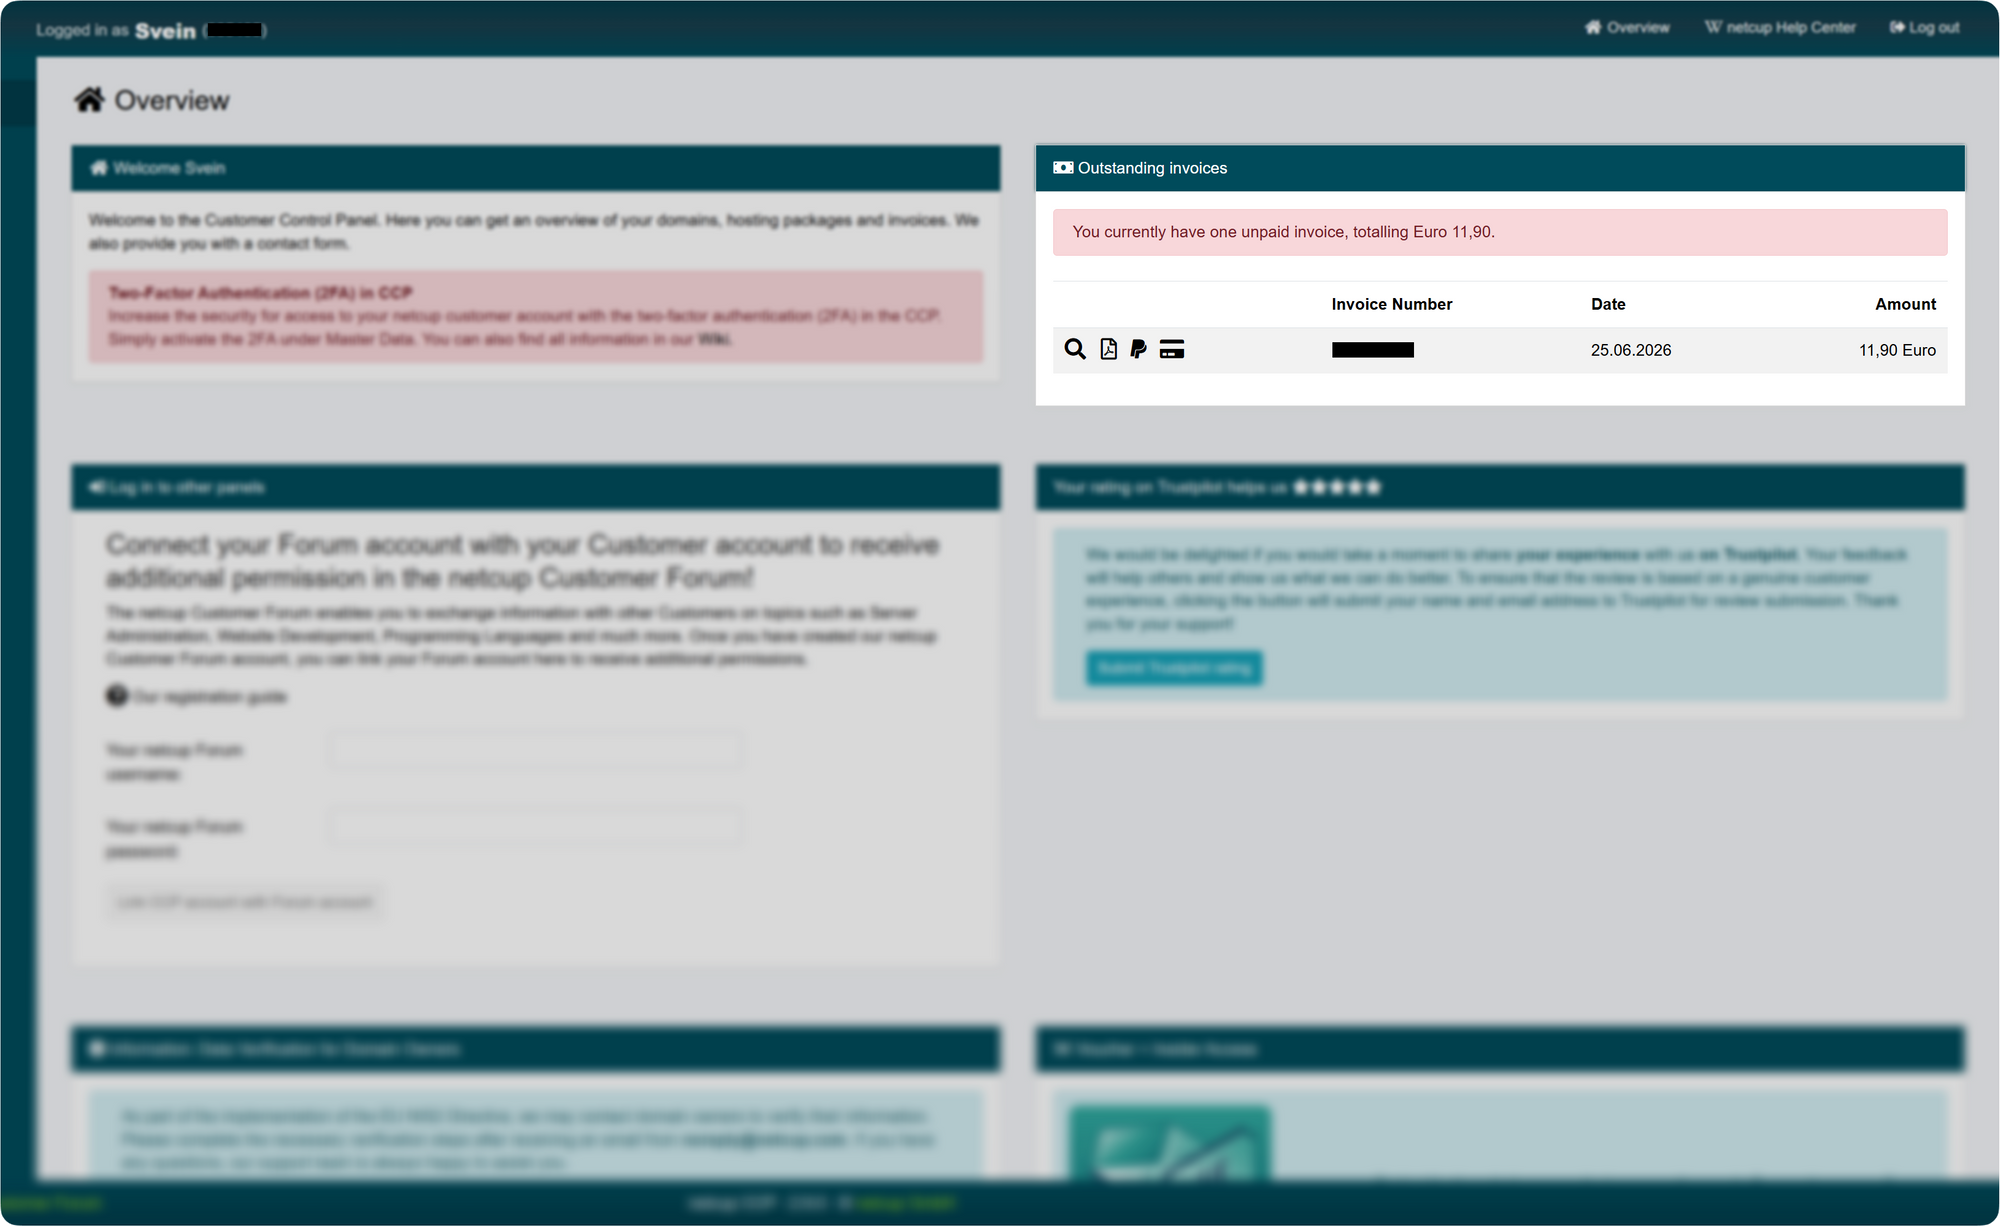
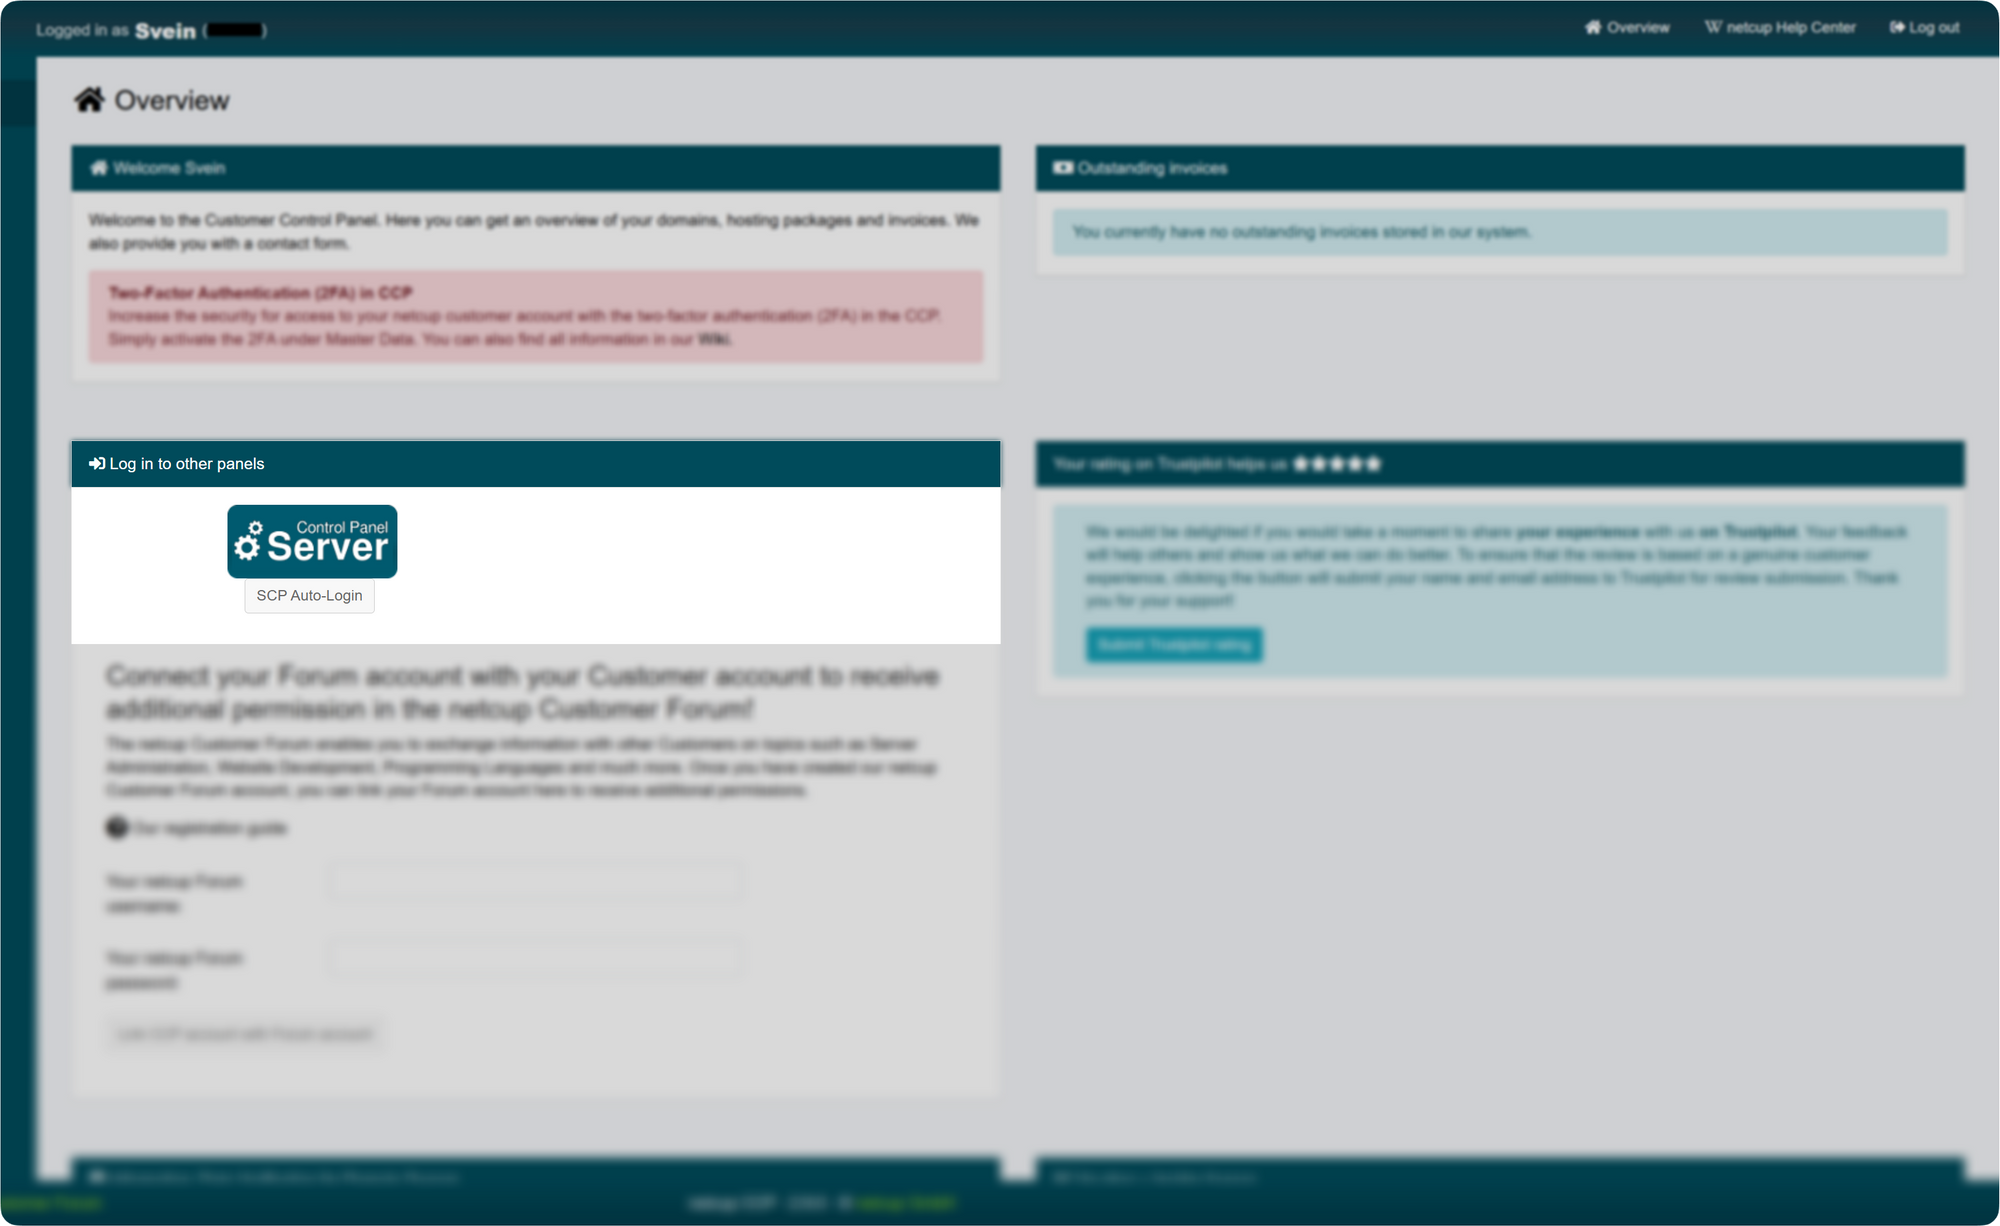
You're now logged into your customer account. In the top right, under "Outstanding invoices," you'll see your order awaiting payment (in our example, €11.90).
Click the credit card or PayPal logo next to the invoice, then follow the prompts to complete the payment.
Part 3: Accessing your VPS admin panel
Once your invoice is paid, you can finally access your server.
Still on the same page of your customer account, find the "Log in to other panels" box and click the "SCP Auto-Login" button.
What's the SCP? The Server Control Panel (SCP) is the panel that lets you manage your VPS. The "SCP Auto-Login" button is the fastest way to connect, with no credentials to re-enter. Note that you can also log in manually with dedicated login/password credentials, sent in a separate email (these are different from your customer account credentials).
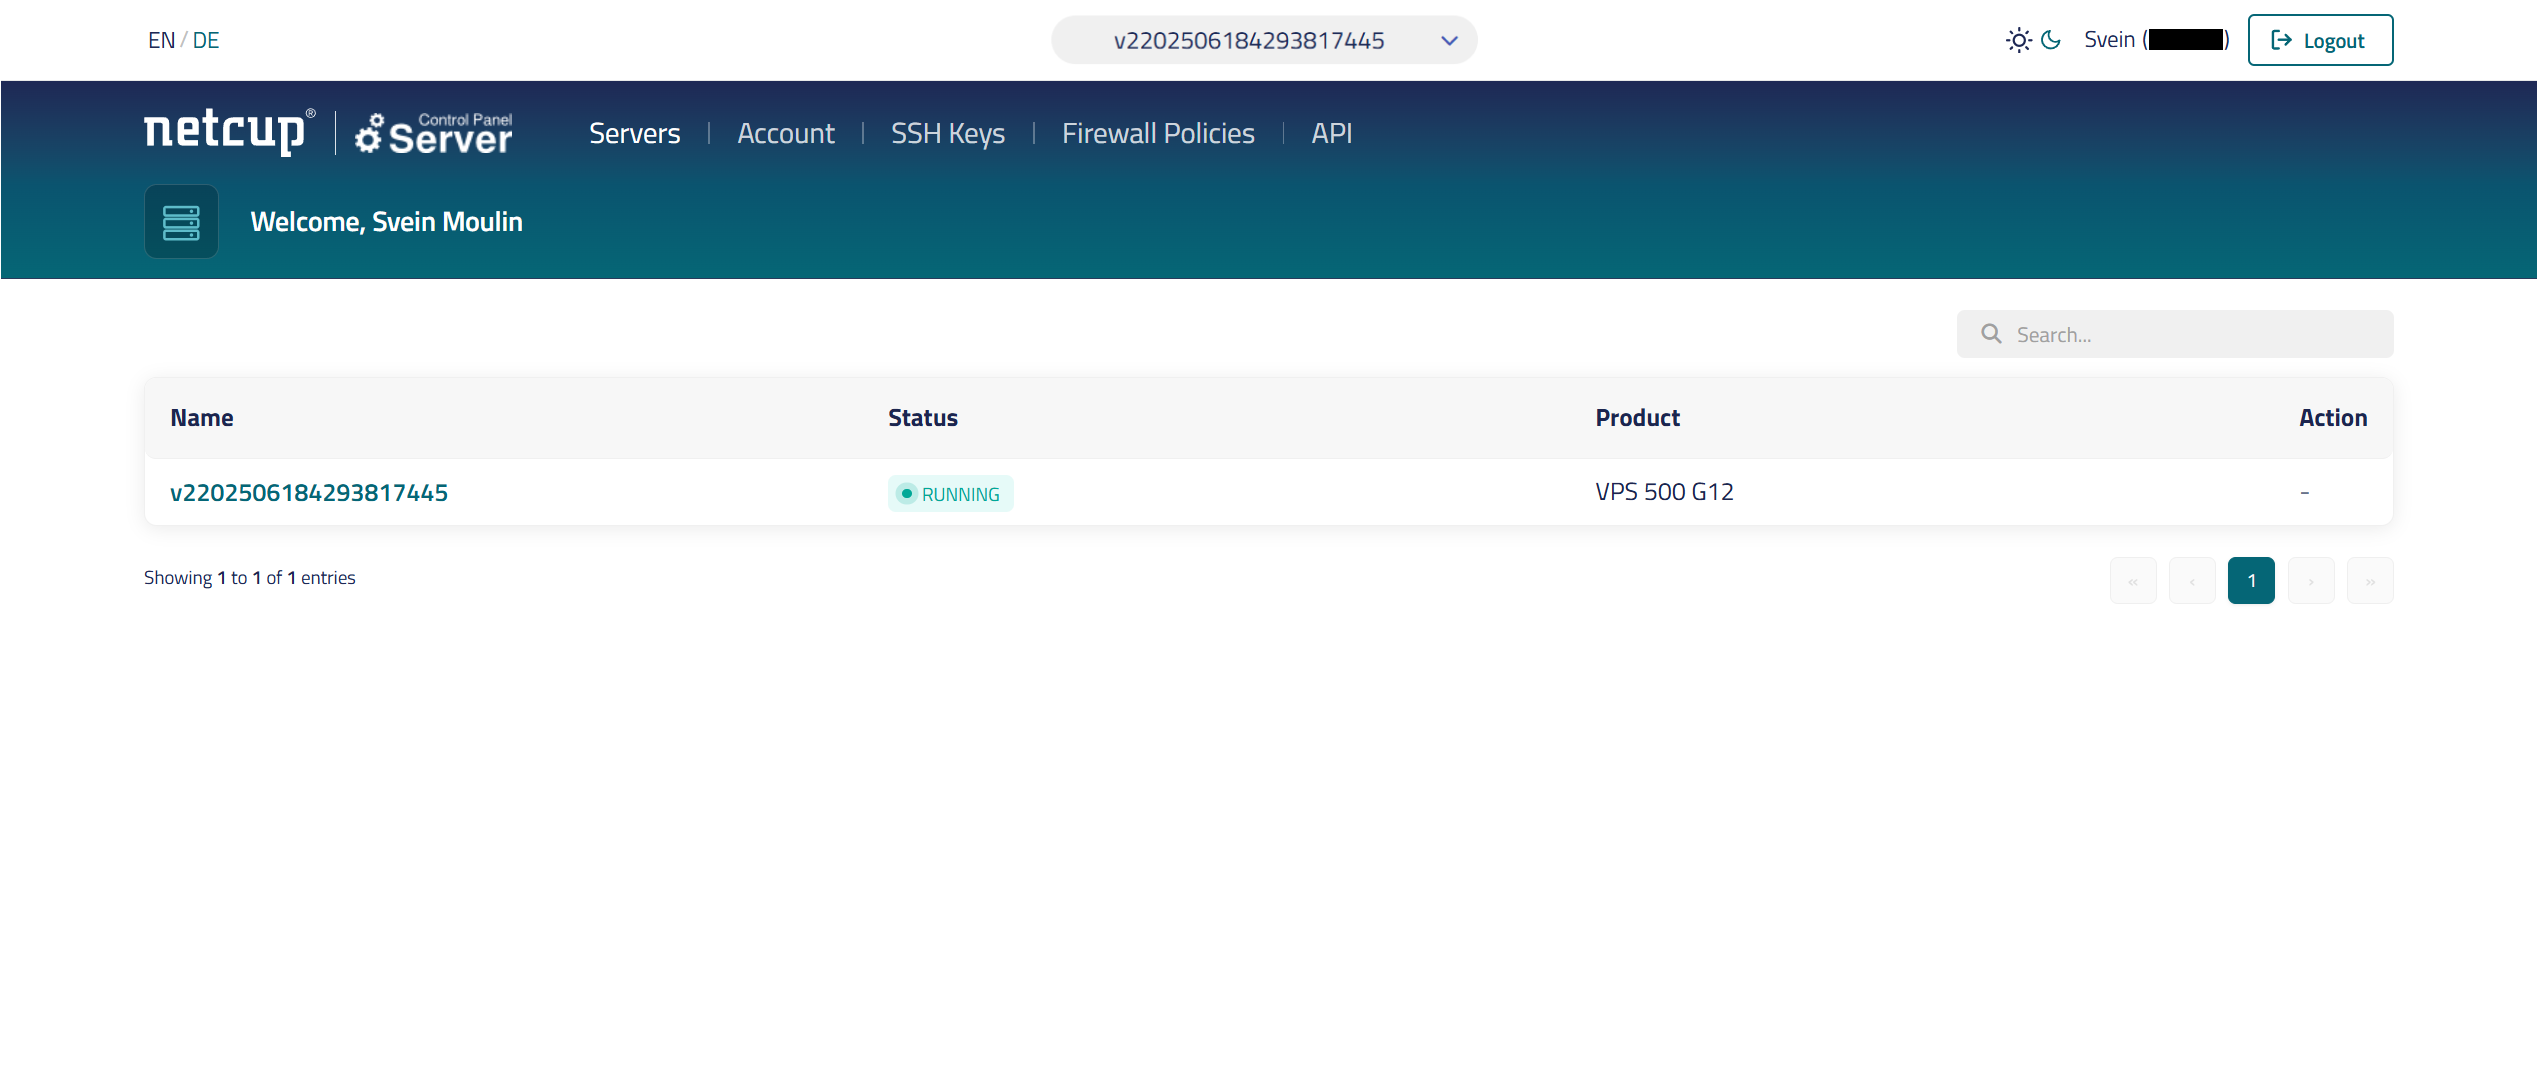
You'll then land on the Server Control Panel, a separate platform dedicated to managing your VPS. To open your server's settings, click its name in the list, a long identifier that starts with v22… (e.g., v2202506184293817445).
Part 4: Grabbing your IP and root password
This is the home stretch: these two pieces of info are all KryllOS needs to install.
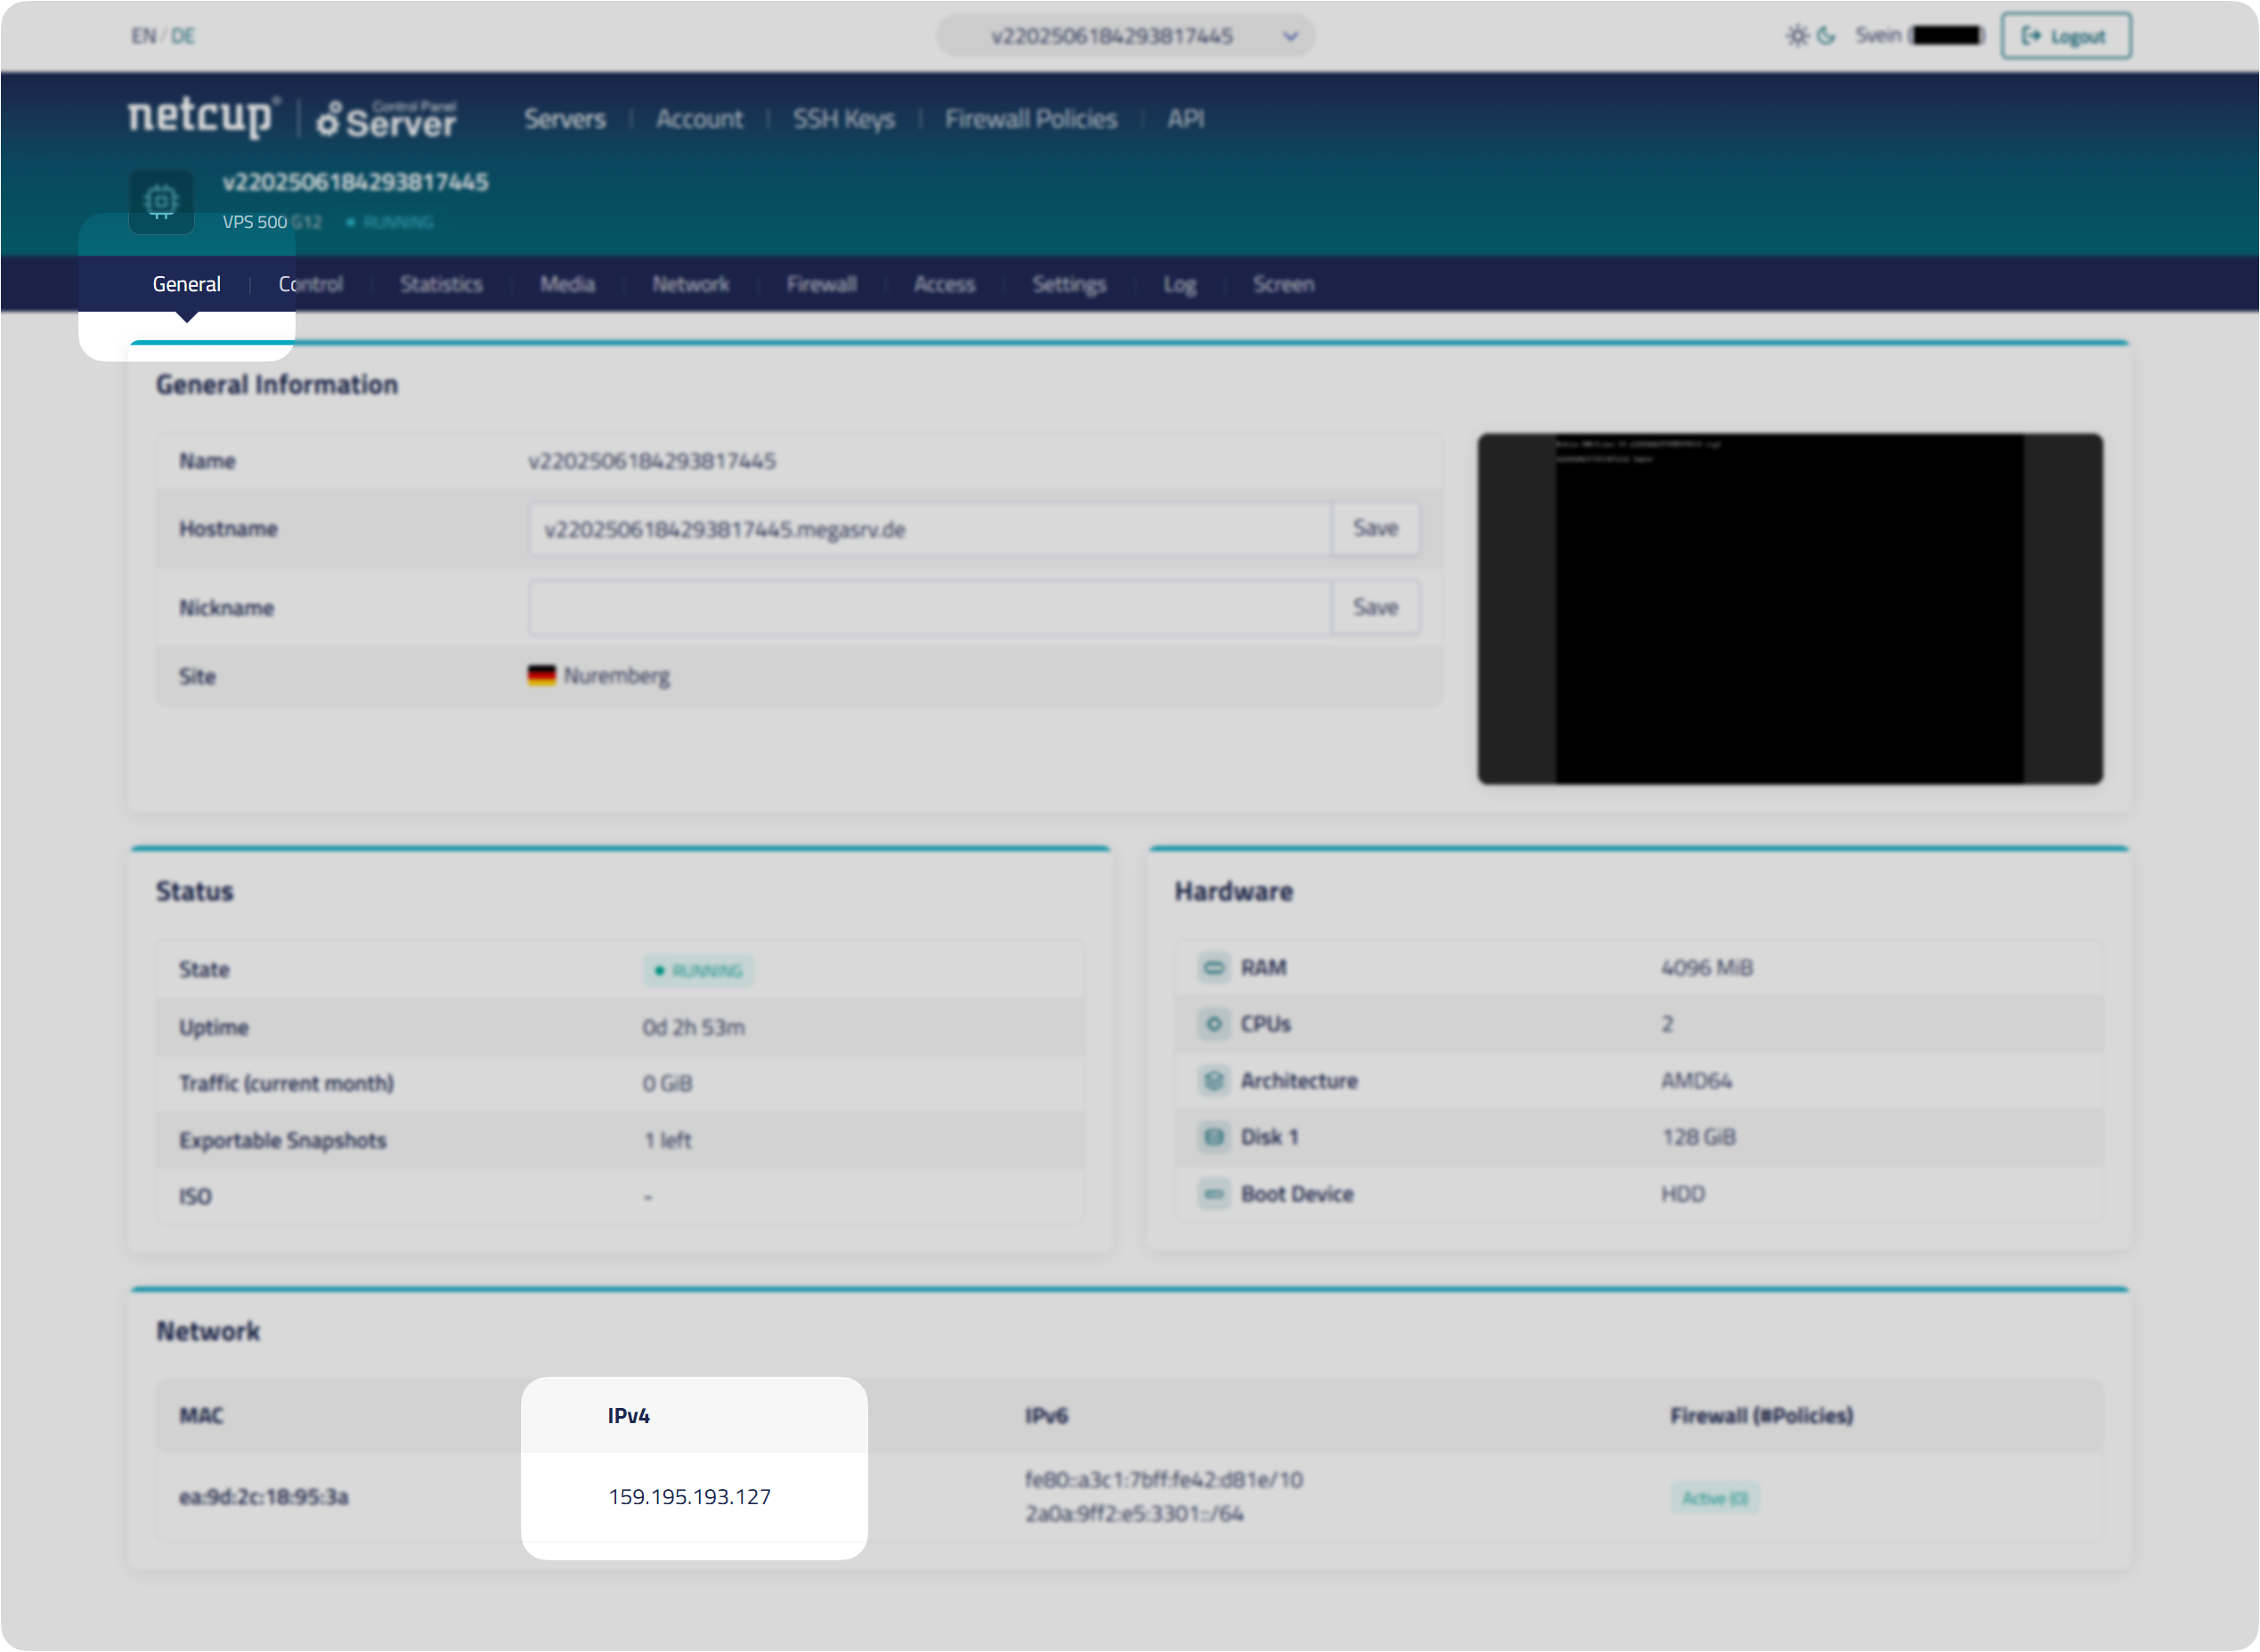
Step 1: Finding your IP address
After clicking your server's name (previous step), open the "General" tab. Scroll down to the "Network" section: your IP address is shown in the "IPv4" column (e.g., 159.195.193.127).
This is your machine's public identity. Write it down somewhere safe, you'll need it during the KryllOS install.
Step 2: Setting and grabbing your root password
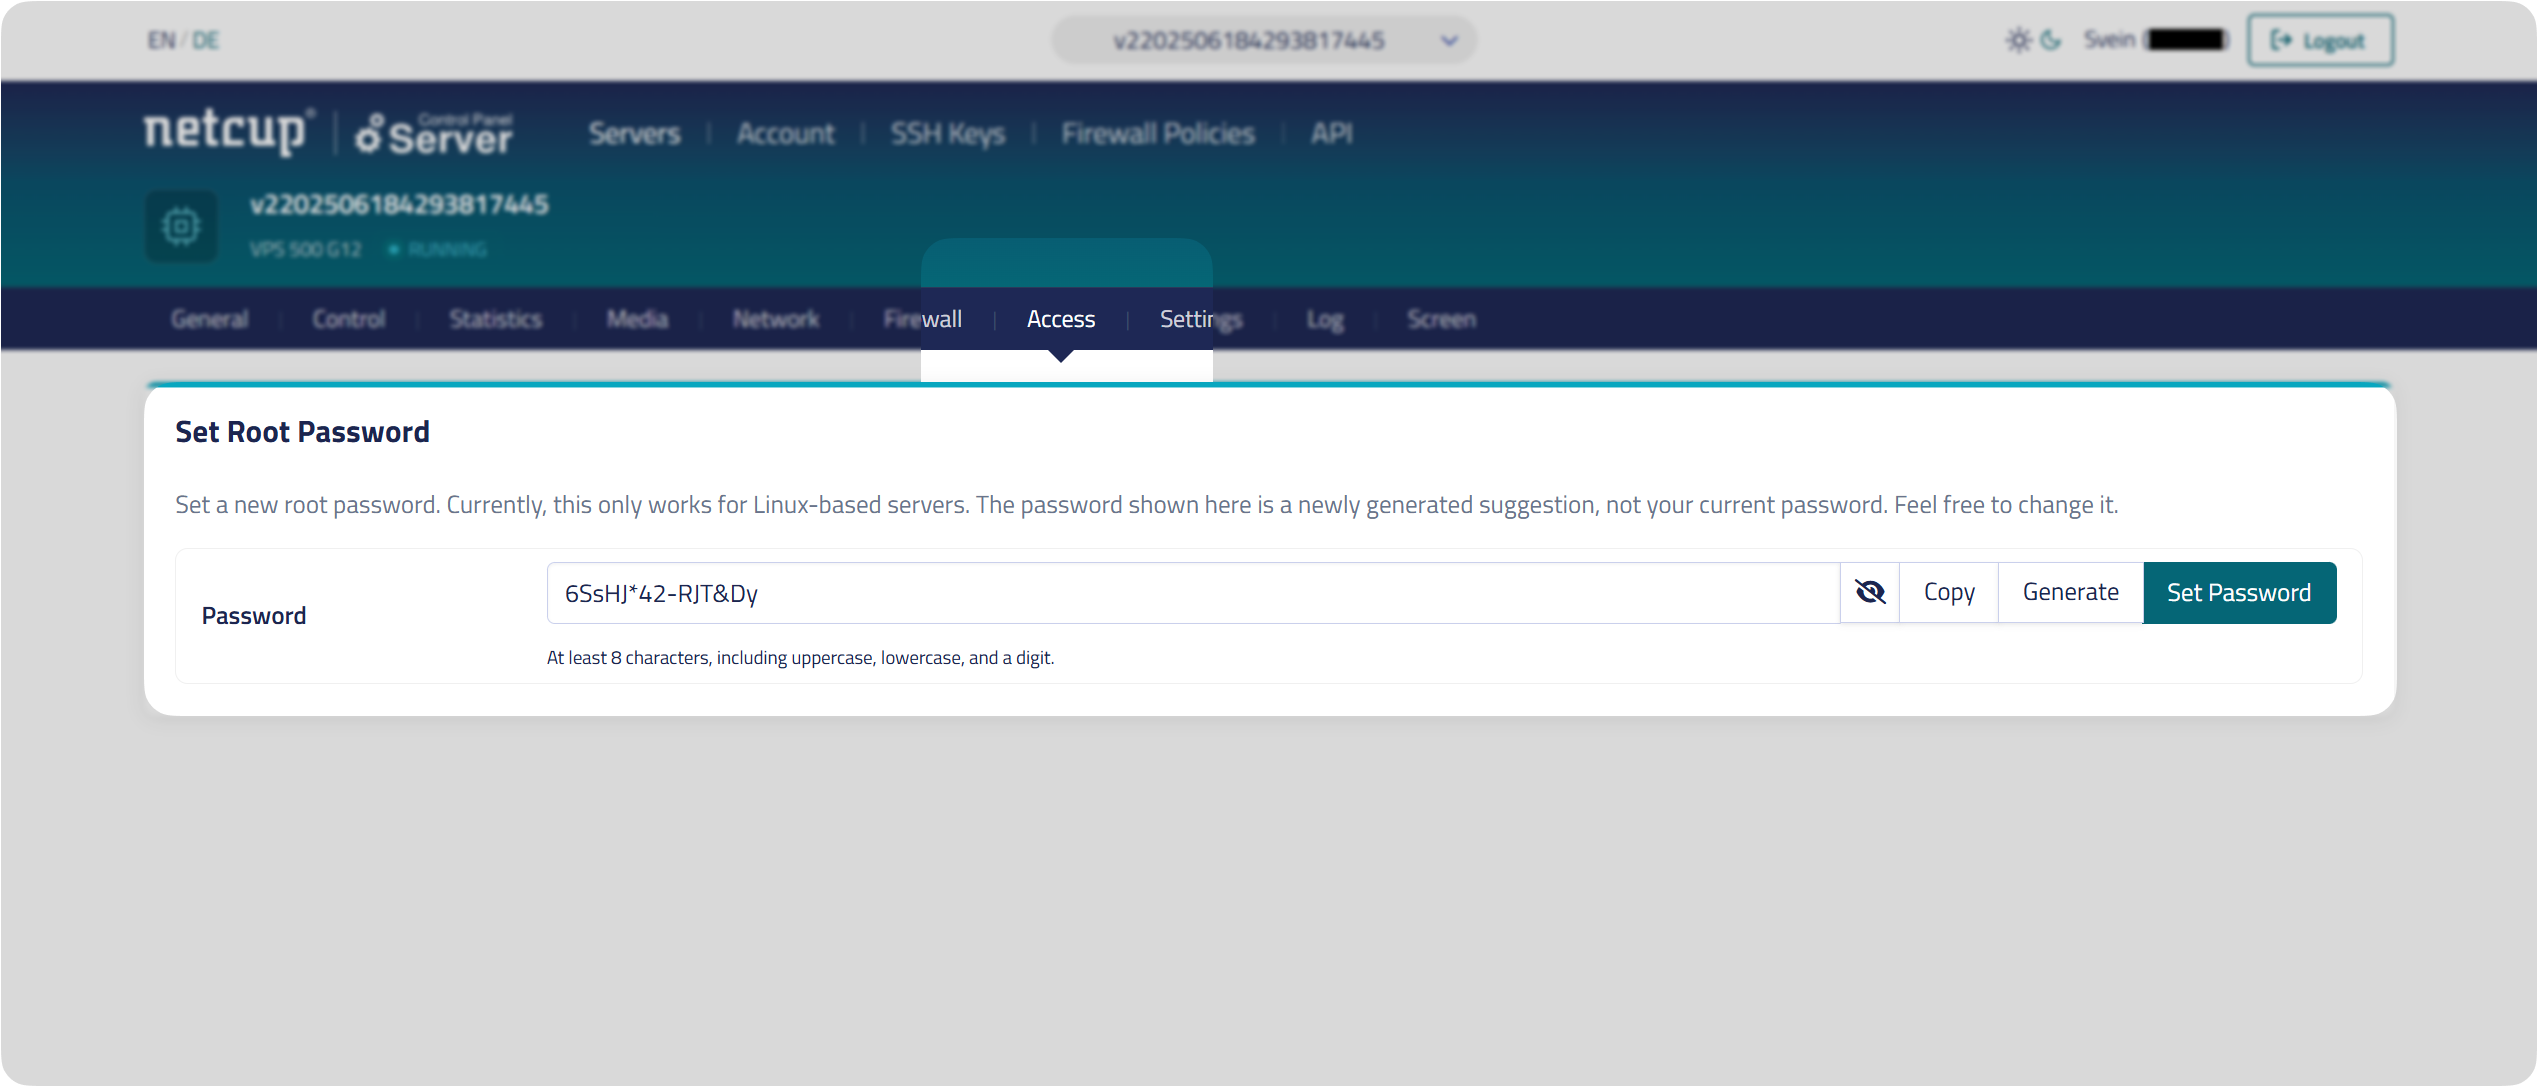
Now go to the "Access" tab.
Netcup has already pre-generated a password for you (so the field isn't empty). Here's what to do:
- First, copy the displayed password (the "Copy" button) and paste it somewhere safe.
- Then click "Set Password" to actually apply it to your server.
This is the access key to your machine. Write it down somewhere safe, you'll need it during the KryllOS install.
And there you go, you're ready!
You now have in hand:
- Your VPS IP address
- Your root password
All that's left is to launch the KryllOS install. We walk you through everything, step by step, in our dedicated guide: KryllOS Installation Guide →
A question? Stuck?
No worries, you're not alone. Join our official Telegram group, where the KryllOS team and community answer your questions: Join the Telegram →
Frequently Asked Questions
What's a VPS, and why do I need one for KryllOS?
A VPS (Virtual Private Server) is a server that runs around the clock in a datacenter, rented for a few euros a month. KryllOS hosts its engine on it, which lets your strategies trade 24/7, even when your computer is off.
Why Netcup?
Netcup is a European host with a great price-to-performance ratio, fast NVMe VPS plans, and some of the lowest prices on the market. It's a solid, budget-friendly choice for running KryllOS.
Which Netcup plan should I choose for KryllOS?
The VPS 500 G12 (2 vCore, 4 GB RAM, 128 GB NVMe) is plenty to get started. If you're planning to run lots of strategies in parallel or do many backtests, step up to the VPS 1000 G12 (4 vCore, 8 GB RAM). You can always upgrade later.
What does it really cost?
From around €6/month for the VPS 500 G12. Heads up: the first invoice is a bit higher, because it includes one-time setup fees on top of the first month (in our example: €5.04 in fees + €6.86 = €11.90 total).
0-month or 12-month commitment, which do I pick?
The "0 months" option (no commitment) lets you pay monthly and cancel whenever you want: ideal for testing. The "12 months" option saves you ~14% per month but locks you in for a year. To get started with peace of mind, no commitment is perfect.
Which location should I choose?
Leave "No preference Europe": your server will be in Europe, with no surcharge. The other cities add a few euros per month for no real reason.
Where do I find my Netcup VPS's IP and root password?
In the Server Control Panel, after clicking your server's name: the IP is in the "General" tab (Network section → IPv4), and the root password in the "Access" tab (be sure to click "Set Password" to apply it).
Which operating system for KryllOS?
Ubuntu 22.04+ or Debian 12+. If your VPS runs a different OS, reinstall it from the Netcup panel before launching the KryllOS install.